
Constant “allow this app to make changes” pop-ups can interrupt almost everything you install or open on a Windows 11 PC. They come from a built-in protection, and how much it nags depends on how it is set. The sections below cover how to disable UAC, the milder options and how to undo the change afterward.
Table of Contents
How to Disable UAC in Windows 11 With the Slider
Open Change User Account Control settings, drag the slider to the bottom, and confirm.
- Click Start and type
UAC.
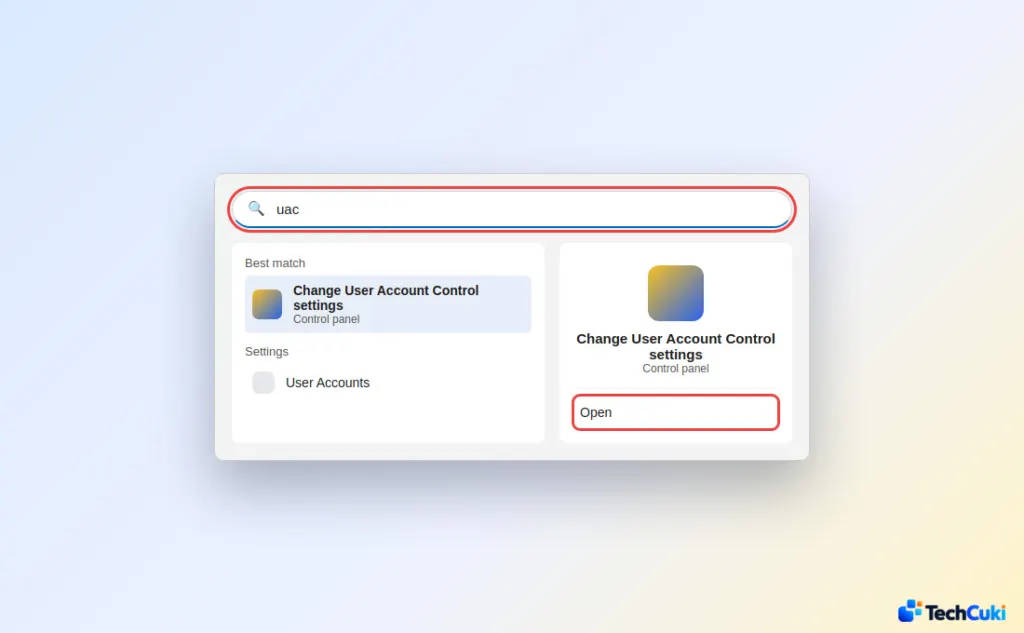
- Select Change User Account Control settings from the results. From Control Panel, the same window sits under System and Security.
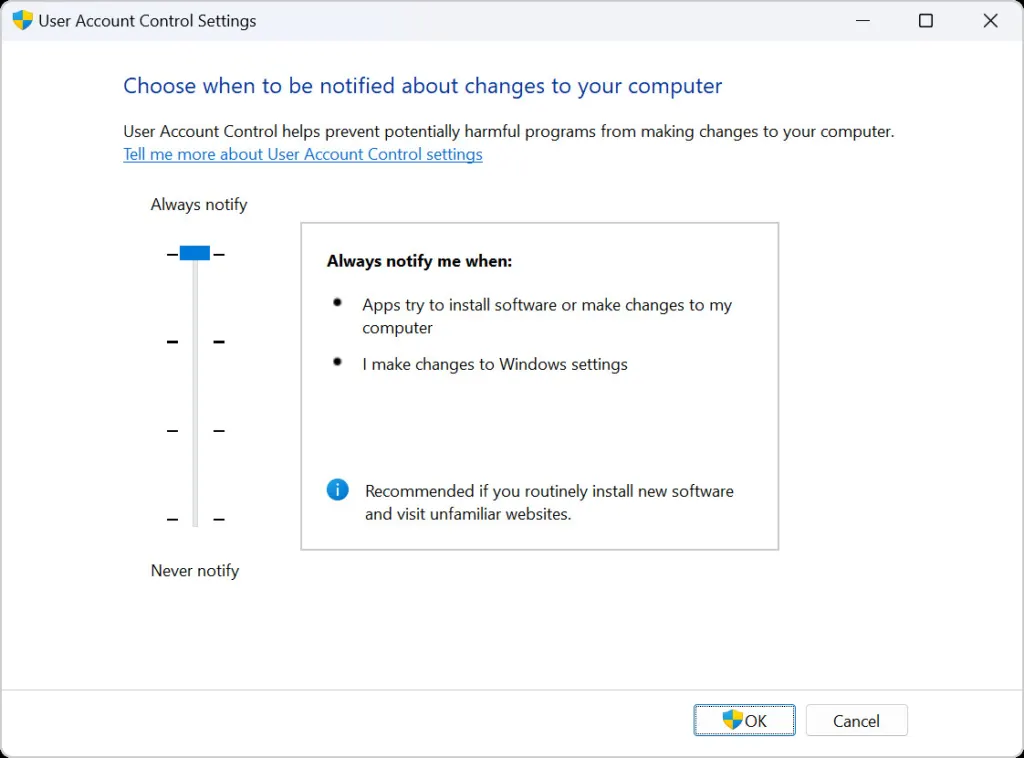
- Drag the slider down to Never notify and select OK.
- Approve the final prompt. This one is UAC asking permission to change UAC.
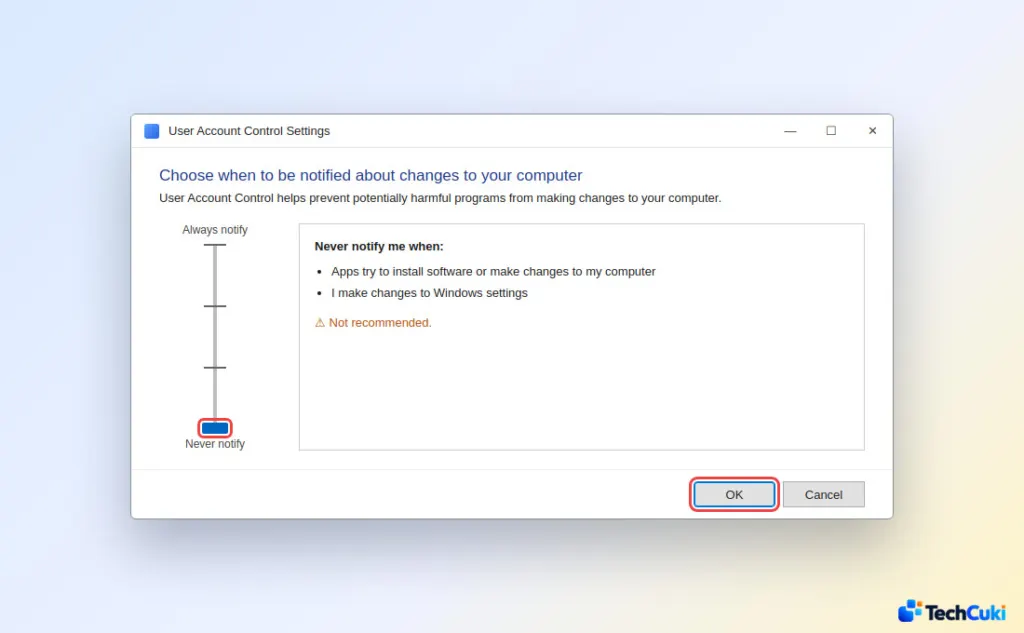
From now on, programs that need administrator rights start without asking. To undo it, open the same window and drag the slider back to the second notch, the default.
Which UAC Level Should You Pick?
If the goal is fewer interruptions rather than none, the two middle levels are usually enough. The levels differ in what triggers a prompt and whether the screen dims.
| Slider level | Prompts for app changes | Prompts when you change Windows settings | Dims the desktop and pauses other tasks |
|---|---|---|---|
| Top: Always notify | Yes | Yes | Yes |
| Second (default) | Yes | No | Yes |
| Third, labeled “do not dim my desktop” | Yes | No | No |
| Bottom: Never notify | No | No | No |
The third level still asks before an app changes the PC, so it keeps the check and skips only the dimmed screen. It suits PCs where the dimming itself is slow. The bottom level is the one Microsoft flags for security concerns.
Stop the Prompt for One App Only
UAC is all or nothing, so there is no switch for a single trusted program. A common community workaround is a scheduled task that runs the app with the highest privileges, started from a shortcut.
- Open Task Scheduler and select Create Task.
- On the General tab, name the task and check Run with highest privileges.
- On the Actions tab, add a Start a program action that points to the app’s .exe file, then save.
- Create a desktop shortcut whose target is
schtasks /run /tn "TaskName", using your task’s name.
The app launched from that shortcut starts elevated with no prompt, while every other program keeps UAC. Use it only for software you fully trust, because anything that app launches inherits the same rights.
Turn UAC Off Completely (Registry)
The slider’s lowest setting stops the pop-ups. A full shut-off is a separate registry value and needs a restart.
- Press
Win+R, typeregedit, and press Enter. - Browse to
HKEY_LOCAL_MACHINE\SOFTWARE\Microsoft\Windows\CurrentVersion\Policies\System. - Open the EnableLUA value, set it to
0, and restart the PC.
On Pro, Enterprise and Education, the same switch lives in Local Security Policy under Security Options: set the policy User Account Control: Run all administrators in Admin Approval Mode to Disabled. The policy editors are not part of Windows Home.
Expect side effects. With UAC disabled entirely, modern apps and some security features stop working properly. To reverse it, set EnableLUA back to 1 and restart. Back up the registry before editing it.
Is It Safe to Disable UAC?
Not really. With the prompt gone, any program you run, including a malicious one, can make system changes without asking you first.
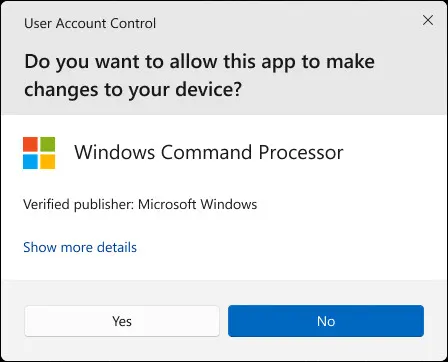
If the prompt appears but you can’t get past it, or an app is blocked outright instead, the cause may be a different feature. See how to turn off Smart App Control in Windows 11. When the task that needed no prompts is finished, move the slider back to the default.
Weigh the convenience against the protection before changing anything, since this safeguard exists for a reason. Any change here can be reversed later, so it is easy to adjust if the result is not what you wanted.


