
Pages that load slowly, or a connection you would like to be more private, often come down to a network setting most people never open. Your PC uses a default choice unless you tell it otherwise, and Windows 11 keeps that option somewhat out of sight. You will find several ways to change DNS on Windows 11, a look at popular providers and how to return to the default if you change your mind.
Table of Contents
DNS Server Addresses to Use
Pick one pair and enter it in whichever method you choose below. Windows falls back to the alternate address only when the preferred server stops answering or answers too slowly.
| Provider | Preferred DNS | Alternate DNS |
|---|---|---|
| 8.8.8.8 | 8.8.4.4 | |
| Cloudflare | 1.1.1.1 | 1.0.0.1 |
| OpenDNS | 208.67.222.222 | 208.67.220.220 |
On a work or school PC, DNS usually comes from the organization’s DHCP server, and replacing it can cut you off from internal resources. Ask the IT team before changing it there. Also note that a different DNS server will not fix browser errors such as “SSL no cipher overlap”, or sites blocked by an administrator.
1. Change DNS on Windows 11 Using Settings
Settings is the simplest method and needs no commands.
- Open Settings and select Network & internet.
- Select Ethernet or Wi-Fi, depending on how you connect. On Wi-Fi, open Hardware properties first.
- Next to DNS server assignment, click Edit.
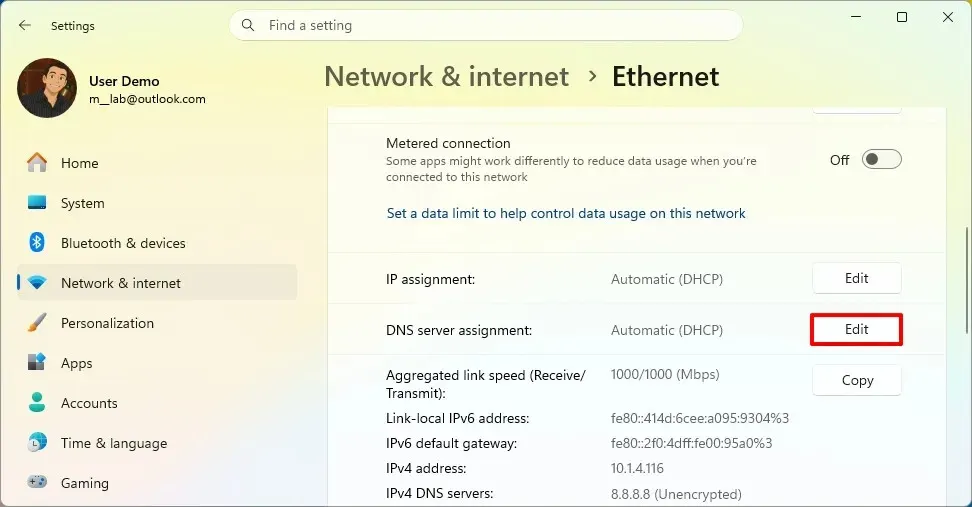
- In the Edit DNS settings dialog, change the dropdown from Automatic (DHCP) to Manual.
- Turn on IPv4.
- Enter the Preferred DNS and Alternate DNS addresses, for example 1.1.1.1 and 1.0.0.1 for Cloudflare.
- Optional: set DNS over HTTPS to On with the automatic template, which encrypts lookups with Google or Cloudflare.
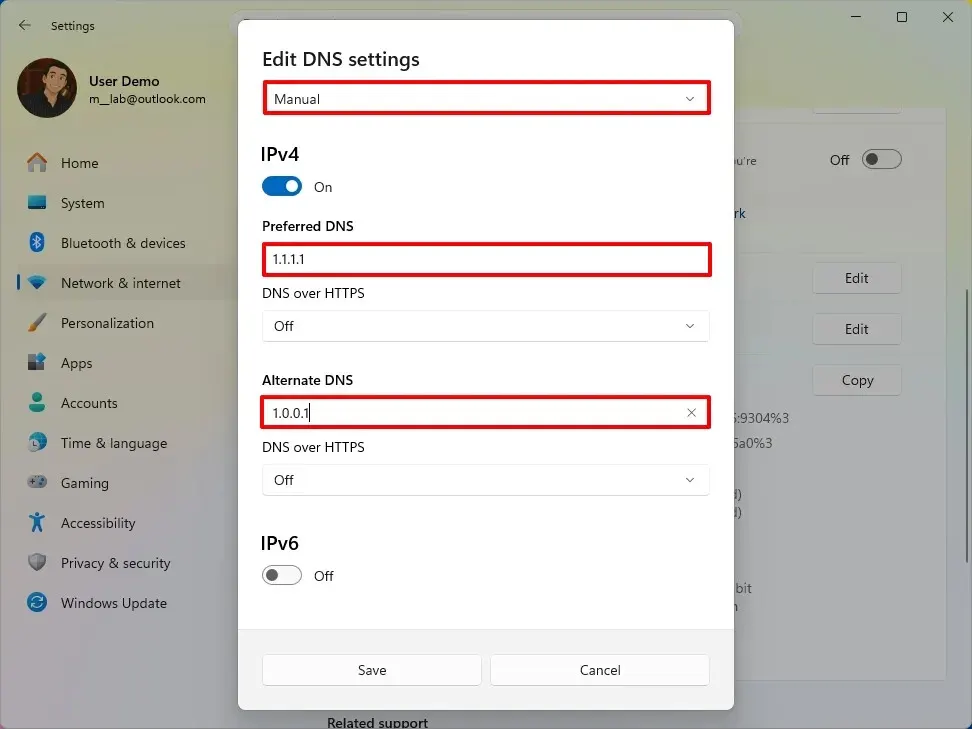
- Click Save.
The page should now list your new servers next to DNS server assignment. IPv4 is enough for most home networks. Add IPv6 servers only if your connection actually uses IPv6 DNS, since without a working IPv6 resolver the PC falls back to the IPv4 ones anyway.
2. Set DNS With Command Prompt
Two netsh commands set the servers for one adapter, which suits a quick change on a single PC. Run Command Prompt as administrator.
- Open Command Prompt as administrator.
- Run
ipconfig /allto find your adapter name (such as “Ethernet0” or “Wi-Fi”) and the DNS servers it uses now.
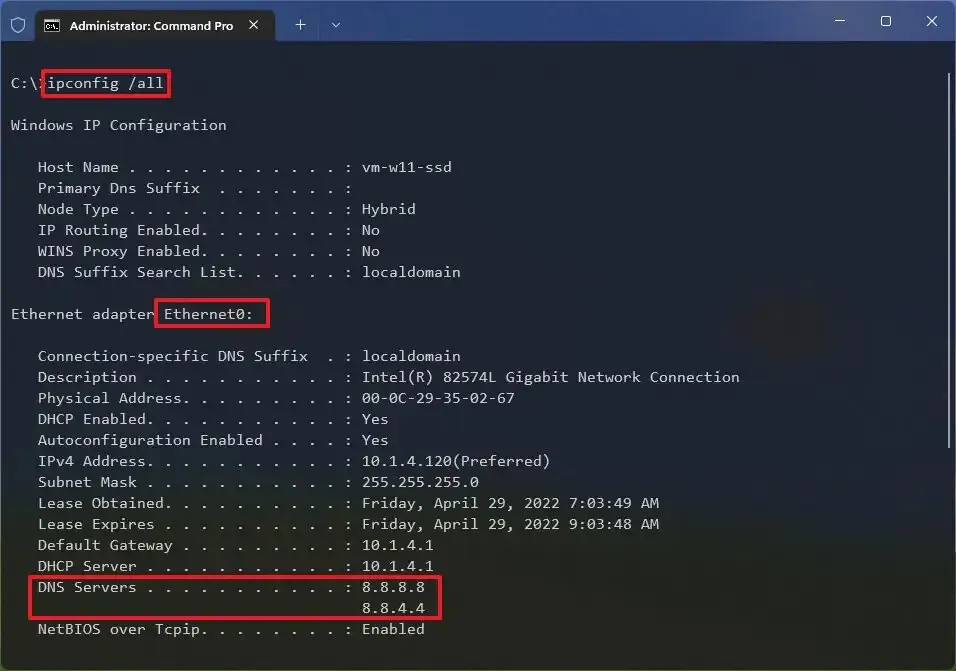
- Run
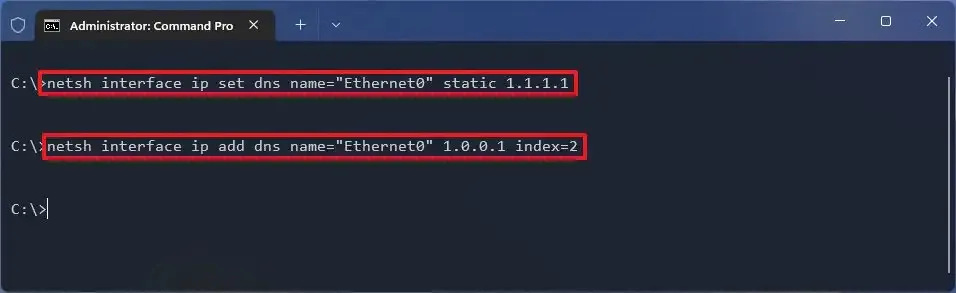
netsh interface ip set dns name="Ethernet0" static 1.1.1.1to set the preferred server, replacing “Ethernet0” with your adapter name. - Run
netsh interface ip add dns name="Ethernet0" 1.0.0.1 index=2to add the alternate server.
3. Set DNS With PowerShell
PowerShell does the same job with one cmdlet and is easier to repeat across several PCs. Run it as administrator.
- Open PowerShell as administrator.
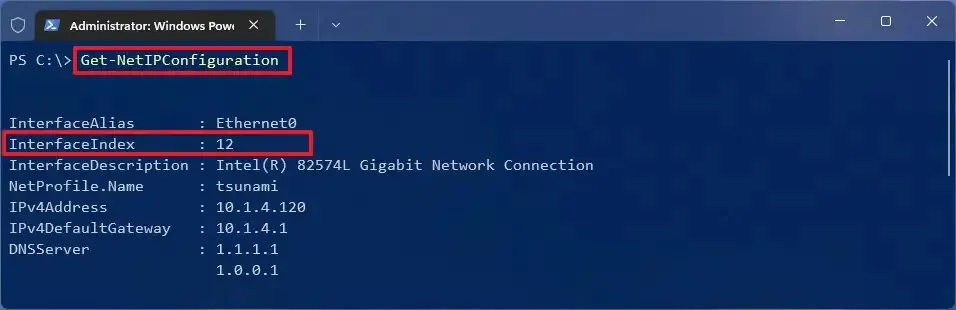
- Run
Get-NetIPConfigurationand note the InterfaceIndex number for your connection.
- Run
Set-DnsClientServerAddress -InterfaceIndex 12 -ServerAddresses 208.67.222.222, 208.67.220.220, replacing the index and addresses with your own.
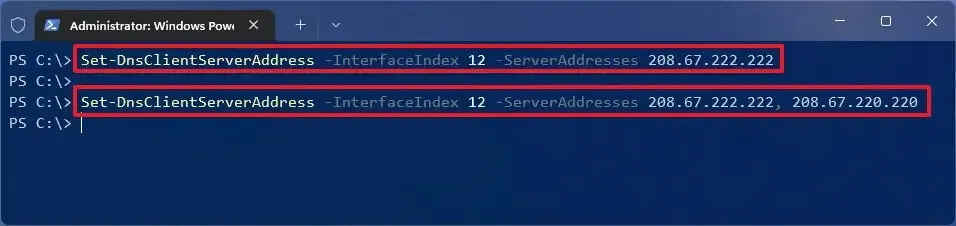
The cmdlet replaces the whole server list rather than adding to it. Run Get-DnsClientServerAddress afterward to confirm what is set for both IPv4 and IPv6.
4. Set DNS Through Control Panel
Control Panel edits the same adapter settings through the older interface.
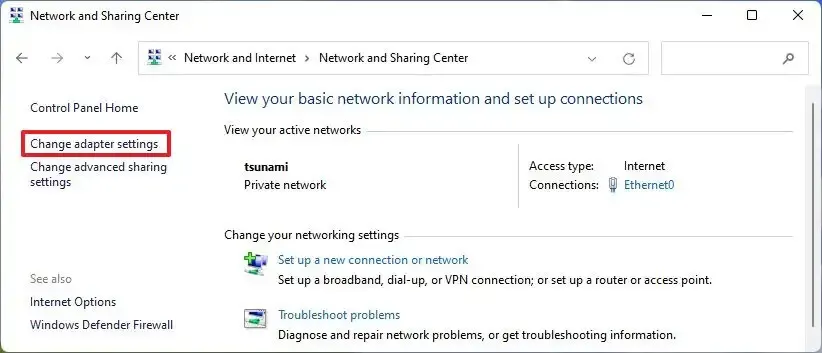
- Open Control Panel and go to Network and Internet > Network and Sharing Center.
- Click Change adapter settings.
- Right-click your network adapter and select Properties.
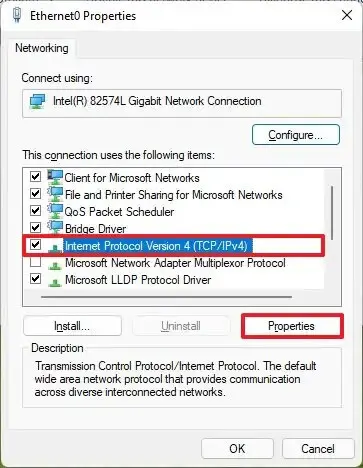
- Select Internet Protocol Version 4 (TCP/IPv4), then click Properties.
- Select Use the following DNS server addresses.
- Enter the Preferred DNS server and Alternate DNS server addresses.
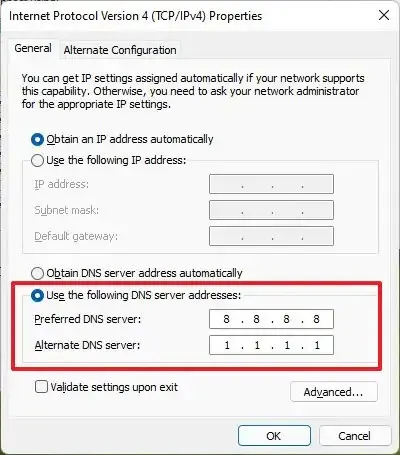
- Click OK to save.
Flush the DNS Cache and Switch Back to Automatic
Windows keeps old answers cached, so clear them after the change. Open Command Prompt and run ipconfig /flushdns. Our guide to clearing cache on Windows 11 covers other caches.
To undo the change, return to the same DNS settings and set the option to Automatic (DHCP), or select Obtain DNS server address automatically in the adapter’s IPv4 Properties.
1.1.1.1 vs. 8.8.8.8: Which DNS Is Better?
Both are free and fast, so the choice comes down to privacy and your location. Cloudflare puts privacy first and says its policy does not permanently log your IP address, while Google’s DNS is very reliable and a solid default. Actual speed varies by where you live, and a tool such as DNS Benchmark can compare them from your own connection.
A small network change like this can make browsing feel quicker or more private, and it is easy to test for yourself. Nothing is permanent, so you can always go back to the original setup. If speed is still poor afterward, the connection itself may be the cause.


