Moving photos and files to a Mac without a cable or an upload is a small convenience that’s easy to miss. To AirDrop from iPhone to Mac, a few things on both devices need to line up, and a transfer can still fail when one of them doesn’t. The setup, the send, where your files end up and what to do when the Mac never appears are all covered.
Table of Contents
Before you start
- Turn off Personal Hotspot on either device and pause any VPN. Either one can stop AirDrop from working.
Set Up AirDrop on Your iPhone
Start on the phone, since the same AirDrop panel controls whether other devices can reach it.
- Make sure Wi-Fi and Bluetooth are on, and keep both devices within 30 feet (10 meters).
- Open Control Center and touch and hold the top-left group of controls.
- Tap AirDrop.
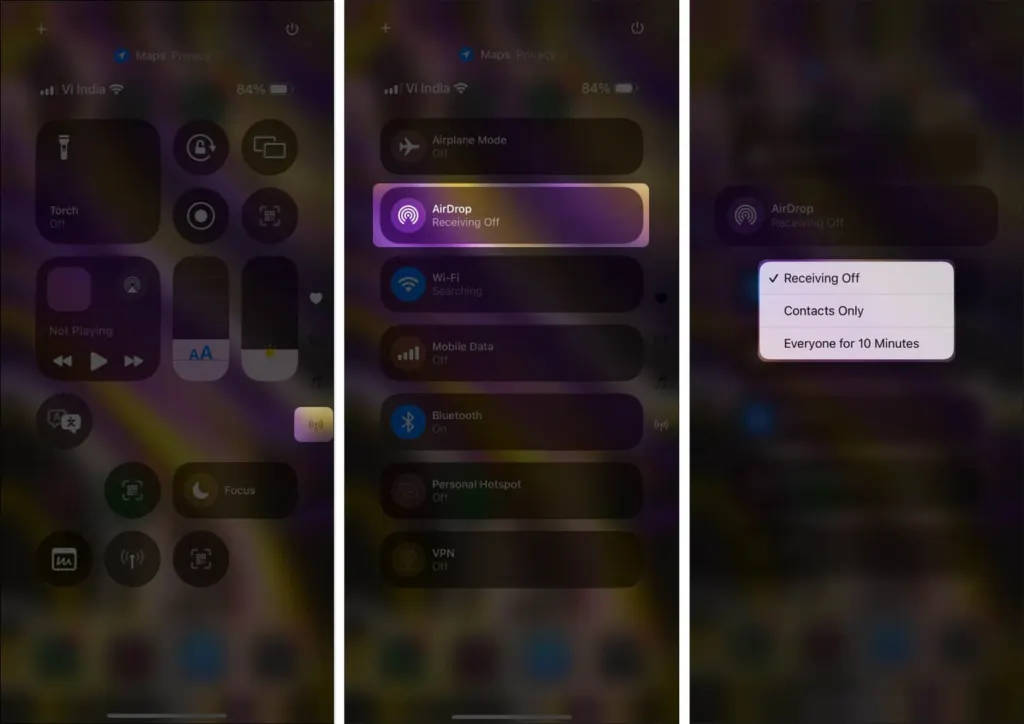
- Choose Contacts Only or Everyone for 10 Minutes.
Turn On AirDrop on Your Mac
On a Mac, AirDrop is blue when it’s on, and the visibility option is next to it.
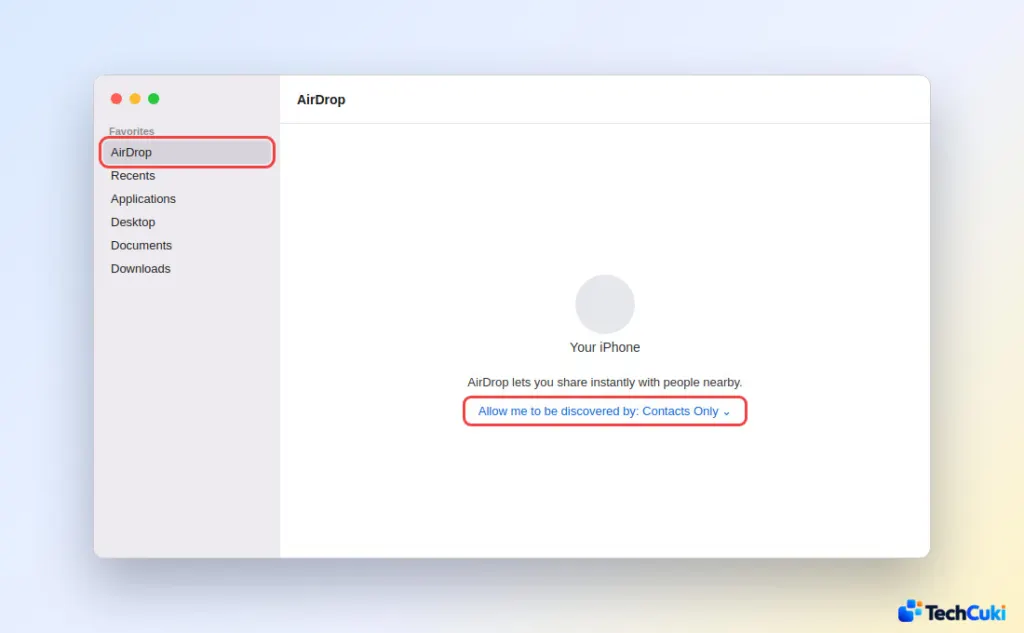
- Click Control Center in the menu bar and click AirDrop.
- Click the arrow beside it and choose Contacts Only or Everyone. If it’s set to No One, your iPhone will never see the Mac.
You can also open Finder, click AirDrop in the sidebar and use Allow me to be discovered by at the bottom. Leaving that Finder window open also puts the Accept prompt there instead of in Notification Center.
AirDrop From iPhone to Mac: Send the File
Sending uses the same Share sheet in any app.
- Open the photo or file.
- Tap Share, then AirDrop.
- Tap your Mac in the list.
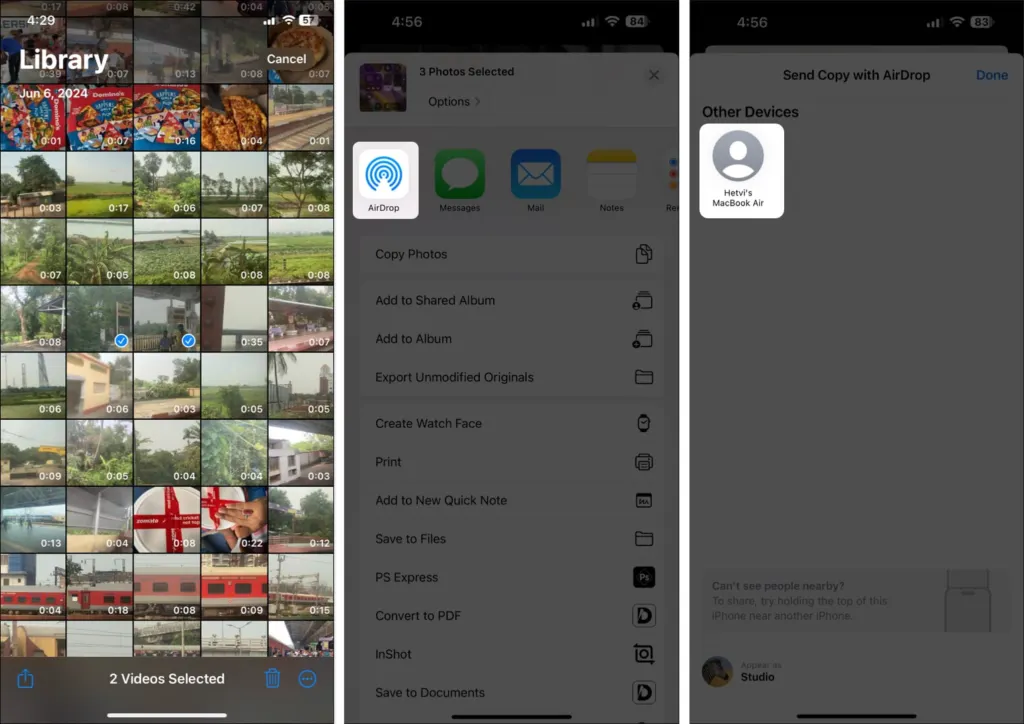
The Mac appears only if it’s nearby, awake, has Wi-Fi and Bluetooth on, and is able to accept from this iPhone. With the same Apple Account on both devices, the transfer is accepted and saved automatically. Otherwise, click Accept in the notification. If the transfer starts and you walk out of range, it carries on over the internet.
When the sender isn’t in your contacts and both devices run iOS 26.2 or macOS 26.2 or later, the receiver gets an AirDrop code to read out, and the sender types it in. After that, they can swap files for 30 days, and Forget This Person in the Contacts app (Other Known list) ends it sooner.
Where AirDrop Files Go on a Mac
Most items are saved in the app they came from, so a photo sent from the iPhone’s Photos app is saved in Photos on the Mac. Other files often go to the Downloads folder, and in some cases the Mac asks whether to save to Downloads or open the item in Photos.
If Your Mac Isn’t Showing Up in AirDrop
Match what you see to the fix:
- Mac missing from the list: set the Mac to Contacts Only or Everyone, check that Wi-Fi and Bluetooth are on, and wake the Mac. With Contacts Only, the iPhone’s Apple Account email or phone number must be on a contact card in the Mac owner’s Contacts.
- Mac listed but it spins and says “AirDrop failed”: turn the Mac’s AirDrop setting off and on, check System Settings > General > AirDrop & Handoff, and restart the Mac. One user hit exactly this after leaving the Mac off for a week, and a Mac restart was the fix suggested.
Restart both devices if none of that helps. Our guide on fixing AirDrop when it isn’t working goes further, and the reset network settings guide is the last resort because it wipes saved Wi-Fi passwords.
AirDrop is handy for everyday transfers, and a little patience with the connection solves most hiccups. For very large batches, a steadier method may serve you better than sending everything at once.