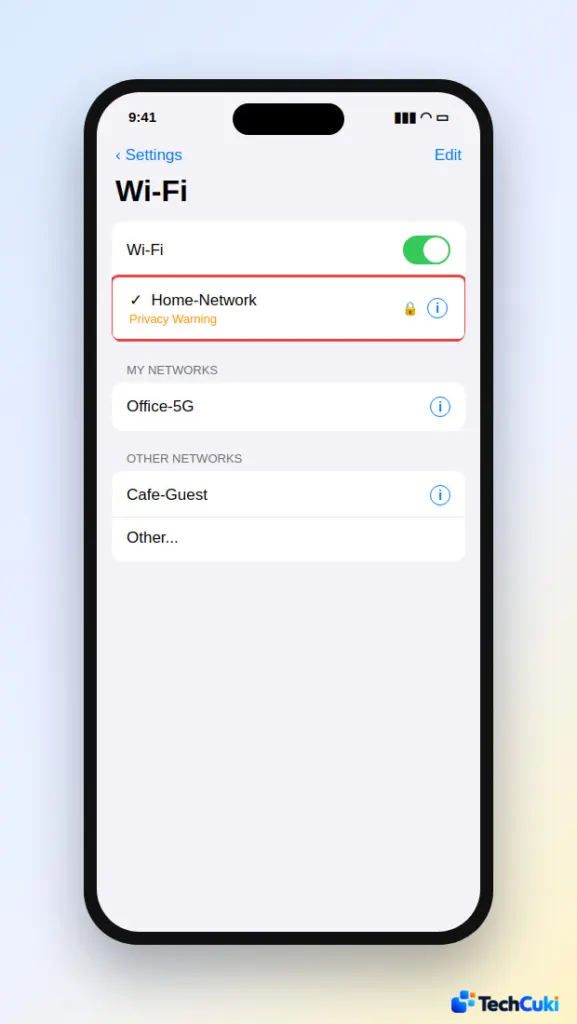
A small orange label under a Wi-Fi network name can be unsettling, especially on a network you use every day. An iPhone WiFi privacy warning usually comes down to how the phone or the router is set up, and tapping the info button next to the network explains the exact reason. The sections below cover what the warning means, how serious it is and how to clear it.
Table of Contents
- What the iPhone WiFi Privacy Warning Means and Which Fix It Needs
- Turn On Private Wi-Fi Address for That Network
- Fix the “Blocking Encrypted DNS Traffic” Warning
- Forget the Network and Rejoin
- Check for a Hidden Network or MAC Filtering on Your Router
- Restart Everything, Then Reset Network Settings
- Weak Security Is a Different Warning
- Is the iPhone WiFi Privacy Warning Safe to Ignore?
What the iPhone WiFi Privacy Warning Means and Which Fix It Needs
Open Settings > Wi-Fi and tap the (i) button to read the line under the warning. The wording points to the fix.
| Wording on the (i) screen | What it means | Go to |
|---|---|---|
| Private Wi-Fi Address is turned off for this network | The network can see your iPhone’s real MAC address and track it | Fix 1 |
| This network is blocking encrypted DNS traffic | The router or its DNS service blocks encrypted lookups, so others on the network can see which sites you visit, though not their contents | Fix 2 |
| Weak Security | The router uses outdated encryption | The Weak Security section |
1. Turn On Private Wi-Fi Address for That Network
This clears the most common cause, and it takes under a minute.
- Open Settings and tap Wi-Fi.
- Tap the (i) button next to the network with the warning. If you aren’t connected to it right now, tap Edit in the upper-right corner first to reach that button.
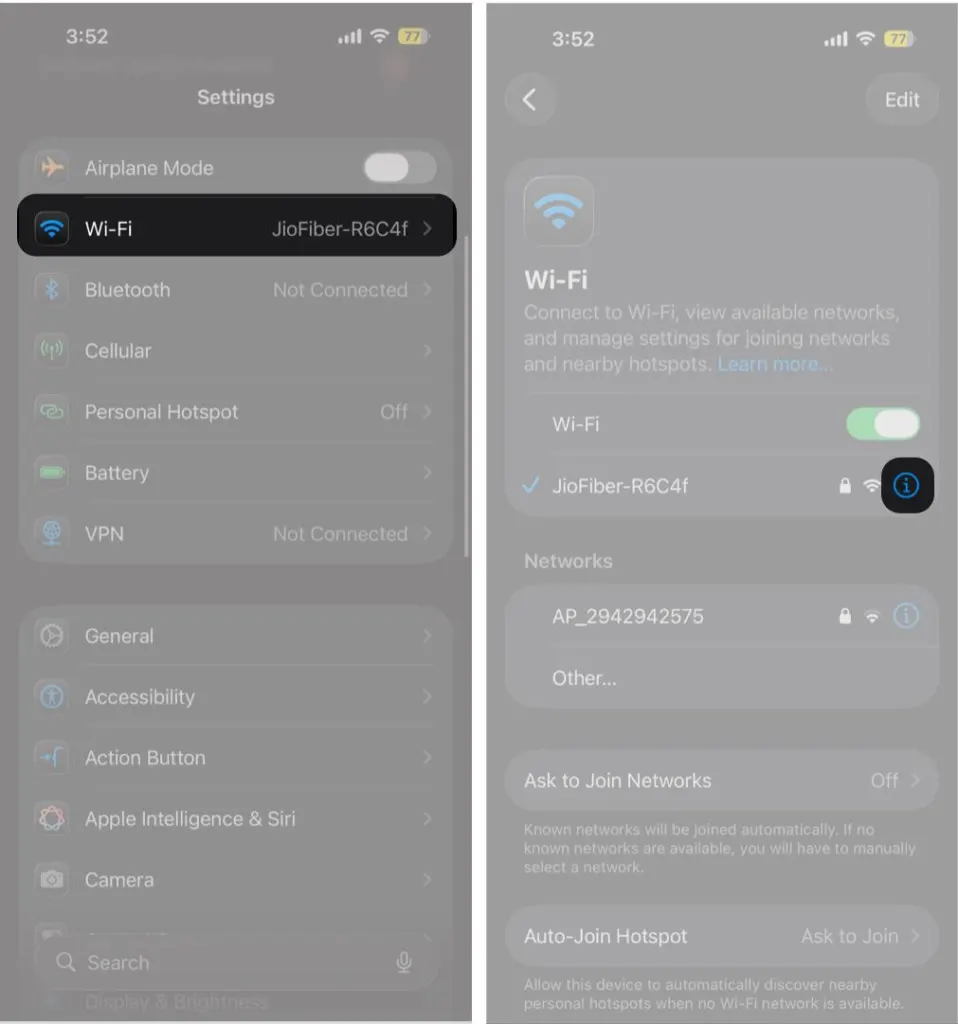
- On iOS 18 and later, tap Private Wi-Fi Address and choose Fixed or Rotating. On earlier versions, turn the Private Wi-Fi Address toggle on (iOS 14 or later).
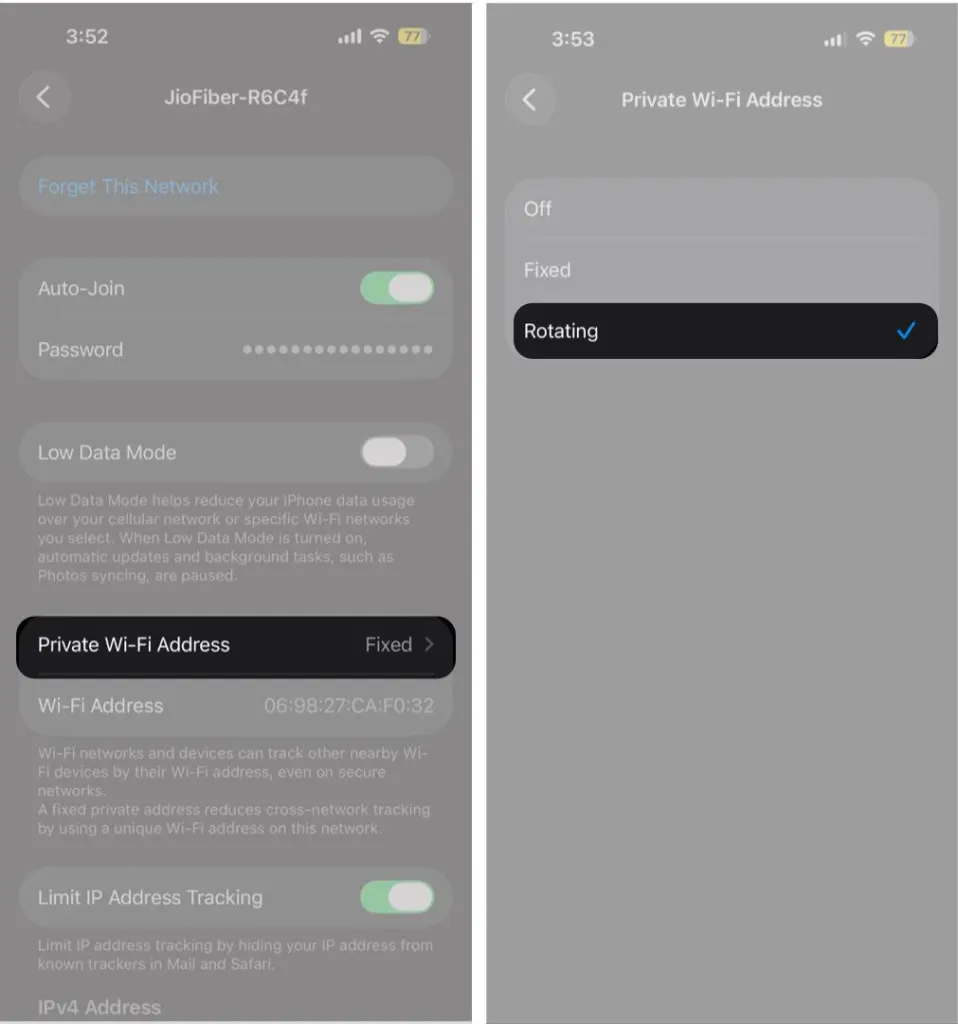
- Rejoin the network. The orange label should disappear.
The difference between the two choices: Fixed keeps one private address for that network, while Rotating changes it every two weeks. The iPhone picks Rotating by default on weak or open networks and Fixed on WPA2 or stronger ones, so Rotating suits public Wi-Fi. Off exposes the hardware address, which is exactly what the warning flags.
Private addresses don’t affect how you join or use most networks. If one network stops working afterward, install the latest software updates and try again before you turn the setting off for it. The same screen has Limit IP Address Tracking, which hides your IP address from known trackers in Mail and Safari. It doesn’t cause this warning.
2. Fix the “Blocking Encrypted DNS Traffic” Warning
This one comes from the network, not the phone. The network still works, but lookups for site names travel unencrypted, so other devices on it could see them. Try these in order:
- Update iOS and restart the iPhone.
- Restart the router, and update its firmware.
- Check the router for DNS filtering, parental controls or an ad-blocking DNS service, and confirm the Wi-Fi security is set as described in the Weak Security section.
- Forget the network and rejoin it (Fix 3).
If it still shows, the next stop is your internet provider or your DNS provider. On a café or hotel network you can’t change any of this, so keep sensitive tasks off it or switch to cellular. If Wi-Fi also keeps dropping, see our guide on why your iPhone keeps disconnecting from Wi-Fi.
3. Forget the Network and Rejoin
This makes the iPhone reconnect from scratch, which also picks up any router setting you changed since the first join. You’ll need the Wi-Fi password, so see your Wi-Fi password on iPhone before you start if you don’t have it.
- Tap the (i) button beside that network name.
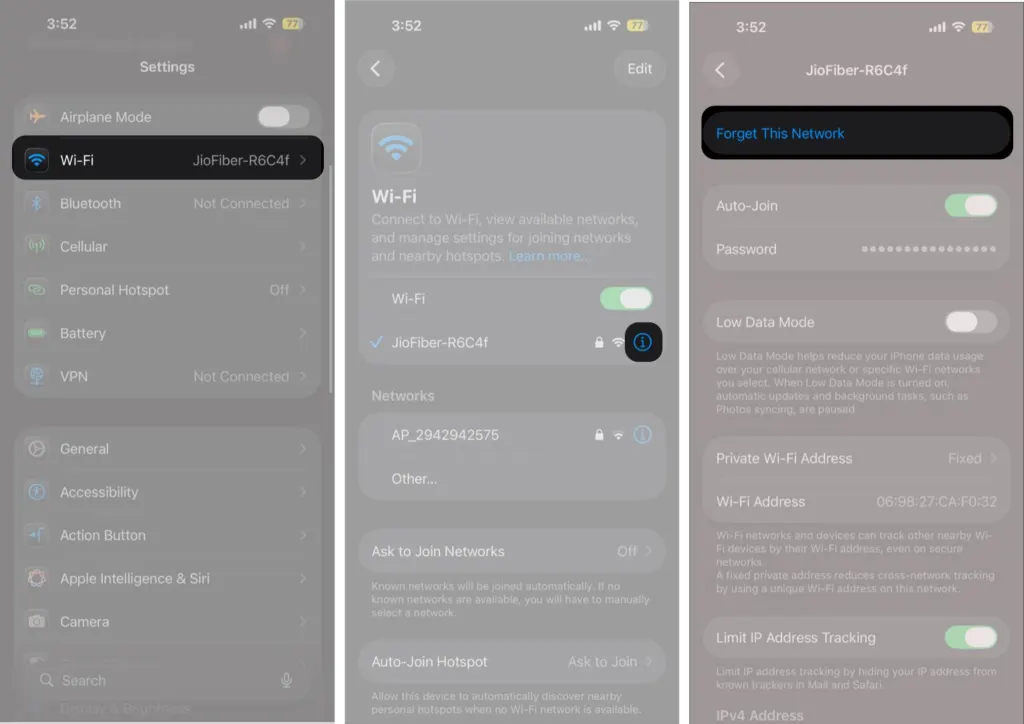
- Tap Forget This Network, then tap Forget to confirm.
- Join the network again with its password.
On iOS 18 and later, a network forgotten less than 24 hours after you last used it keeps its old private address, so forgetting alone may not change what the network sees. Resetting network settings (Fix 5) does assign a new one.
4. Check for a Hidden Network or MAC Filtering on Your Router
If the warning stays even though Private Wi-Fi Address is on, the cause is often your own router. Connecting to a hidden network (one that doesn’t broadcast its name) can trigger the warning, because hunting for hidden networks reveals information that identifies you and your home network. Hiding the name doesn’t secure anything, so broadcast the name and rely on WPA2 or WPA3 security instead.
MAC address filtering clashes with private addresses for a similar reason: the iPhone presents a different address on each network. Turn the filter off and use proper security. After you change router settings, forget the network on the iPhone and rejoin it so it uses the new settings.
5. Restart Everything, Then Reset Network Settings
Restart the iPhone and the router, and install any pending iOS update. If the label survives all of that, resetting network settings is the last software step. It removes every saved Wi-Fi network and password, so have them ready. Our guide to resetting network settings on iPhone covers the full process.
Weak Security Is a Different Warning
This label points at the router’s encryption, so the fix is on the router, not the iPhone.
- Log in to the router’s admin page.
- Set the Wi-Fi security to WPA3 Personal, or to WPA2/WPA3 Transitional if older devices need to join. WPA2 Personal with AES is acceptable when neither is available.
WEP, any setting with TKIP in its name, and open networks with no security are what trigger the label.
Is the iPhone WiFi Privacy Warning Safe to Ignore?
The label is a prompt to check how a network is set up, not a sign that the phone is broken. Until it clears, it is sensible to be careful with sensitive logins on that network. Public networks deserve extra care in general.