
A clean install is the most reliable way to start fresh on Windows 11 after building a PC, swapping in a new drive or just to clear out years of clutter. It takes a USB flash drive and a working PC, plus a few minutes of preparation. Below, you’ll find how to install Windows 11 from USB, from making the drive to what to do if your PC won’t boot from it.
Table of Contents
What you need
- A USB flash drive with at least 8 GB. Everything on it will be erased.
- A working Windows PC with internet to create the USB drive.
- A PC that meets Windows 11 requirements: a 64-bit processor, 4 GB of RAM, 64 GB of storage, TPM 2.0 and Secure Boot. You can check with the free PC Health Check app.
- A license: a product key, or a PC that already had Windows 10 or 11 activated (it reactivates automatically).
- A backup of your files if you’re installing on a PC you already use. A clean install erases the drive.
Step 1: Create a Windows 11 Bootable USB
Use the Media Creation Tool for the easiest, official method. Use Rufus if you already downloaded the Windows 11 ISO file or want extra setup options.
Option A: Media Creation Tool (recommended)
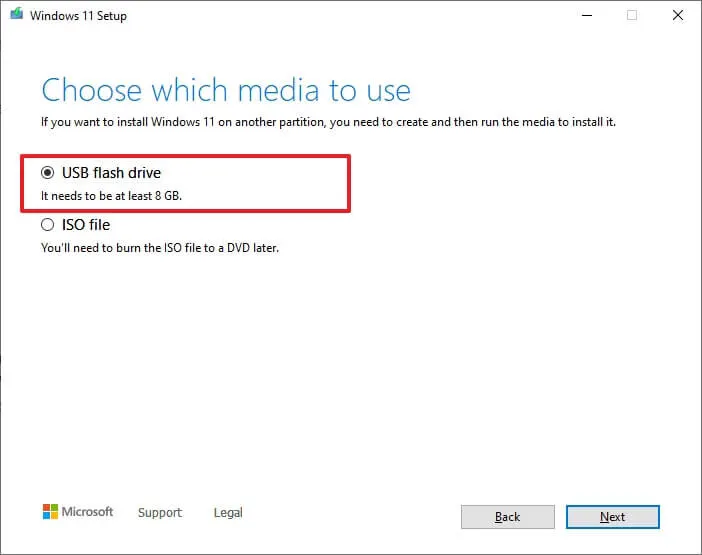
- Plug the USB drive into a working PC. Go to the Windows 11 download page, click Download Now under Create Windows 11 Installation Media, open the tool and click Accept. Keep the recommended language and edition, click Next, then choose USB flash drive and click Next.
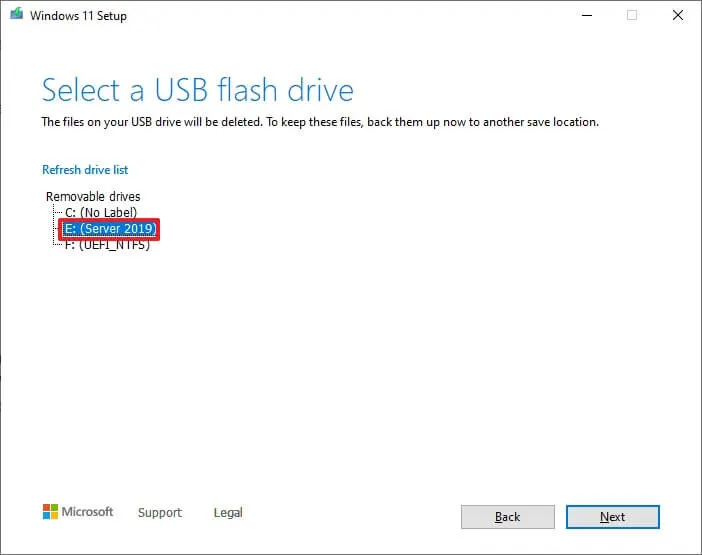
- Select your USB drive and click Next. The tool downloads Windows 11 and makes the drive bootable. This takes 15 to 45 minutes depending on your internet speed. Click Finish when it’s done.
Option B: Rufus
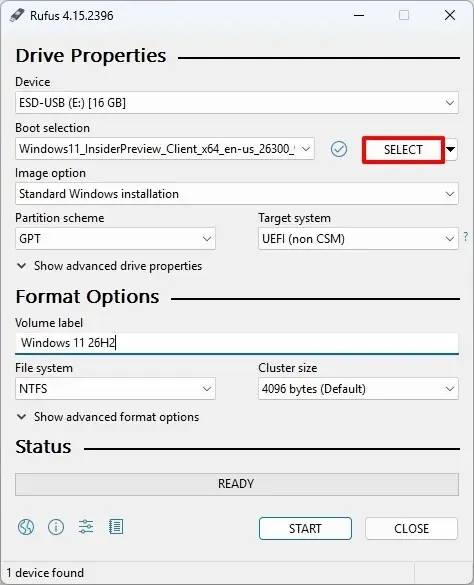
- Download the Windows 11 Disk Image (ISO) from the same Microsoft page and the free Rufus tool. Open Rufus, select your USB drive under Device, click SELECT and choose the ISO file. Leave Partition scheme on GPT and click START.
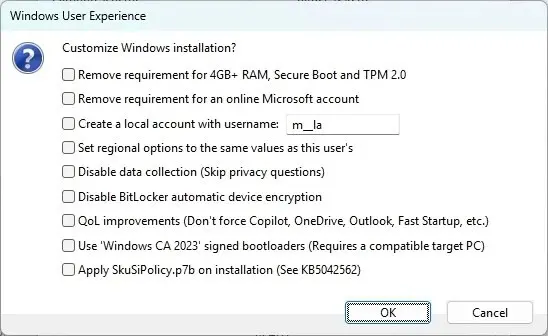
- Rufus shows a Windows User Experience window with optional tweaks, such as creating a local account or skipping privacy questions. Check what you want, or leave everything unchecked for a standard install, then click OK.
Note: Rufus can also remove the TPM, Secure Boot and RAM checks for older PCs. Microsoft doesn’t support Windows 11 on those PCs, and they may not receive all updates.
Step 2: Boot Your PC From the USB Drive
- Plug the USB drive into the PC where you want to install Windows 11. Turn it on and immediately tap the Boot Menu key until a list of drives appears. Select your USB drive (often shown as UEFI: [USB name]) and press Enter.
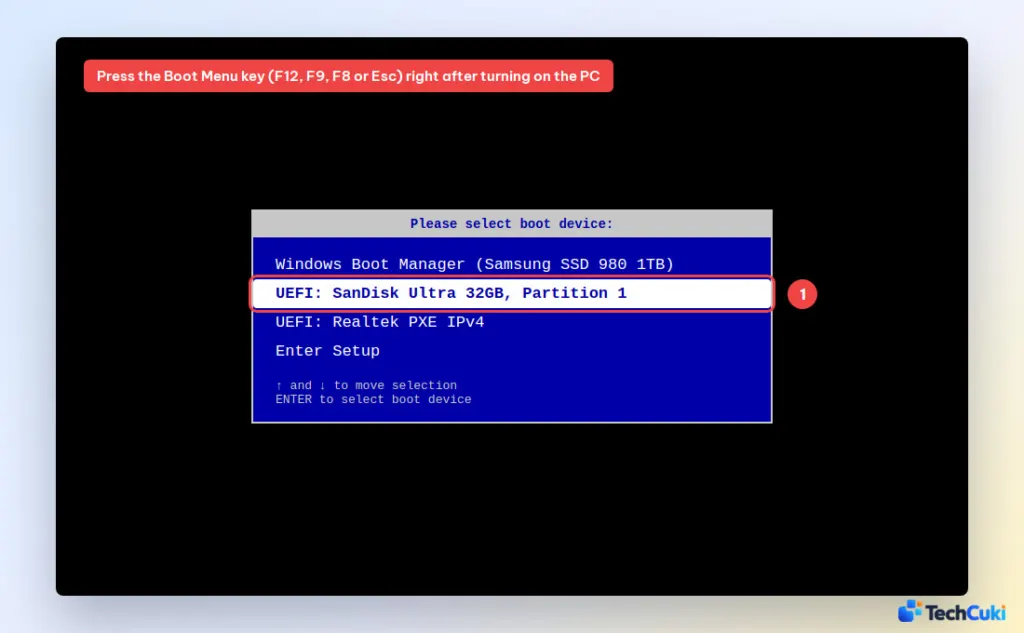
Boot Menu keys for common brands:
- Dell, Lenovo, Acer, Gigabyte: F12
- HP: Esc, then F9
- ASUS: Esc (laptops) or F8 (desktops)
- MSI: F11
- Microsoft Surface: hold Volume Down while pressing Power
If your PC skips the menu and loads the old system, open the BIOS/UEFI settings (usually F2 or Del at startup), go to the Boot tab, move the USB drive to the top of the boot order, then save and exit with F10.
Step 3: Install Windows 11 From USB
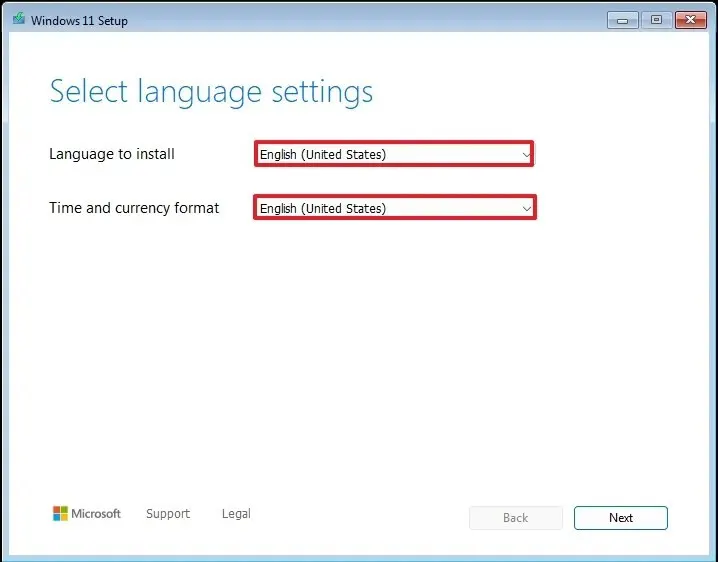
- Choose your language and time and currency format, then click Next.
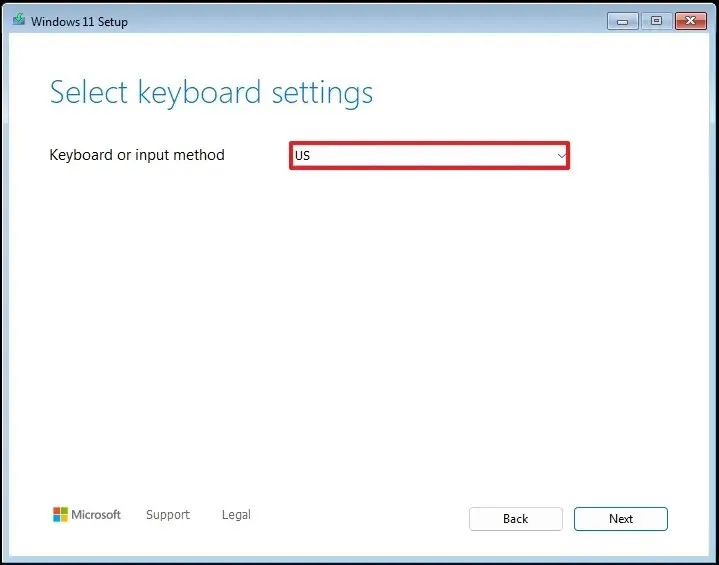
- Choose your keyboard layout and click Next.
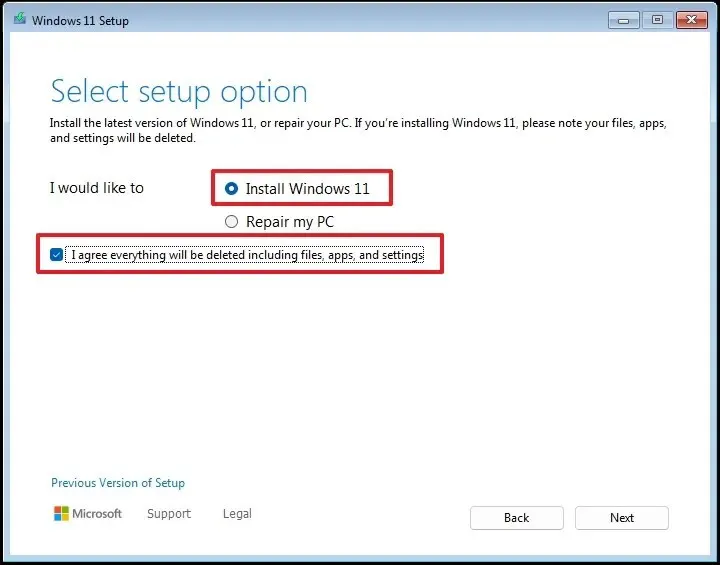
- Select Install Windows 11, check I agree everything will be deleted including files, apps, and settings, and click Next.
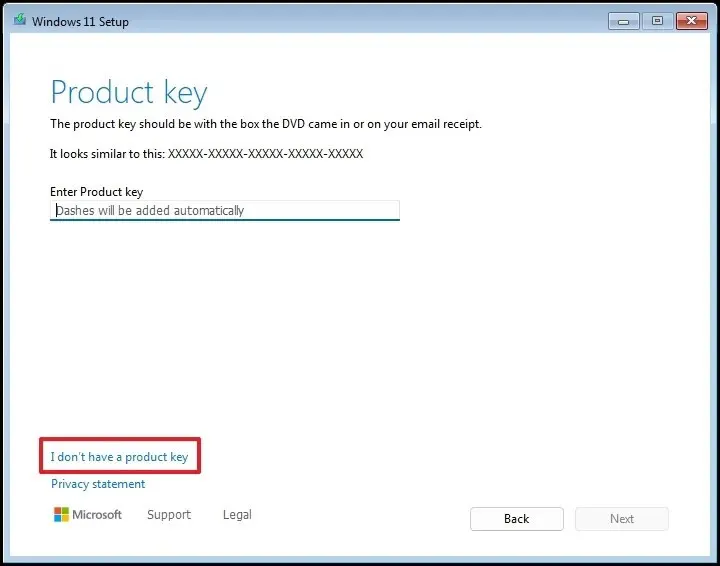
- Enter your product key, or click I don’t have a product key if this PC already had Windows activated.
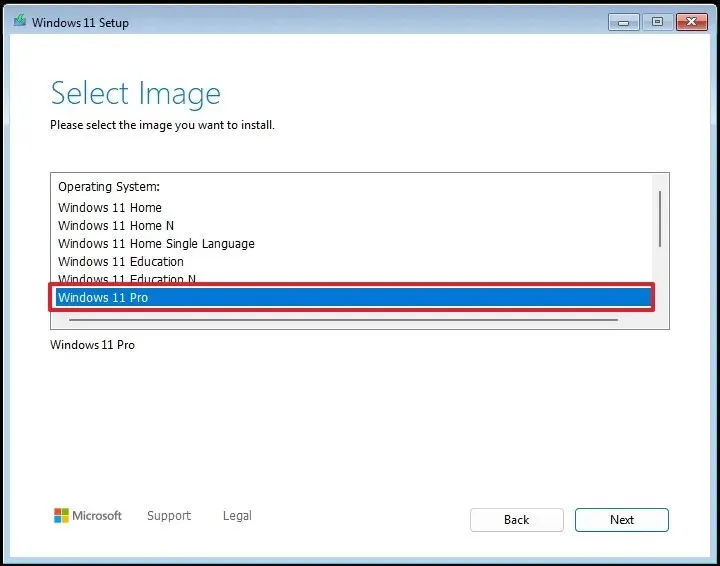
- Select the edition that matches your license (for example, Windows 11 Home or Windows 11 Pro), click Next, then Accept the license terms.
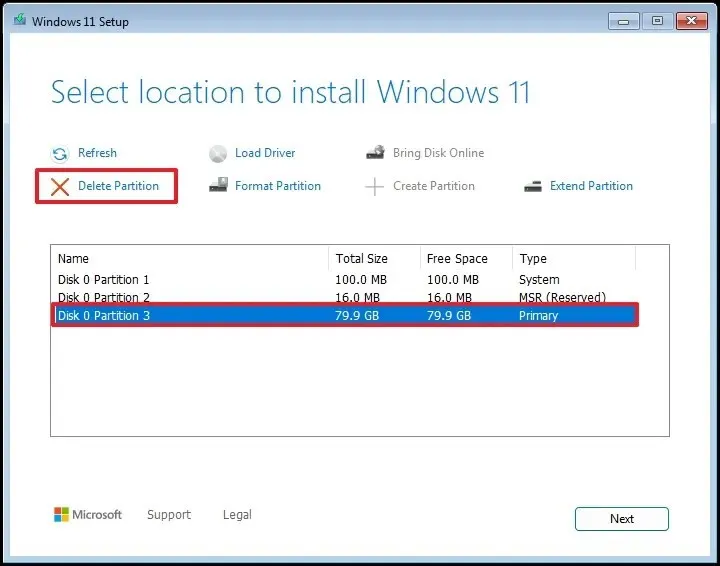
- On a used PC, select each partition on Disk 0 and click Delete Partition. Don’t touch other disks that may hold your files.
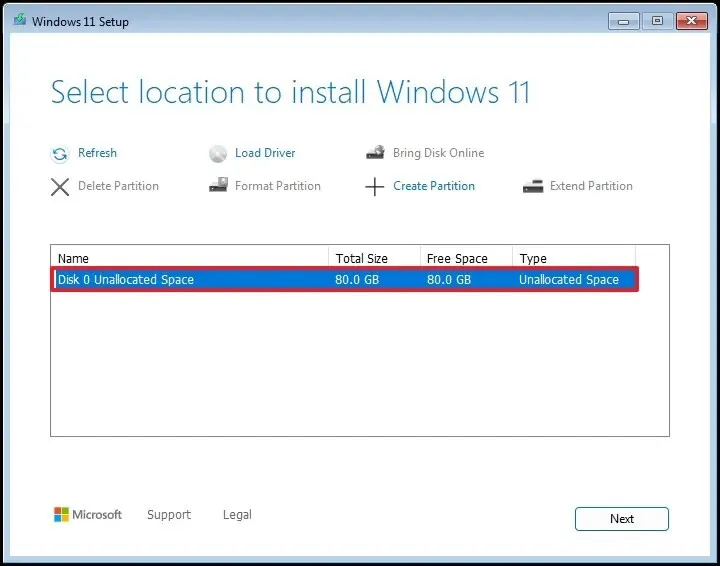
- Select Disk 0 Unallocated Space and click Next. On a new PC or new SSD, this is the only item you’ll see. Windows creates the partitions it needs automatically.
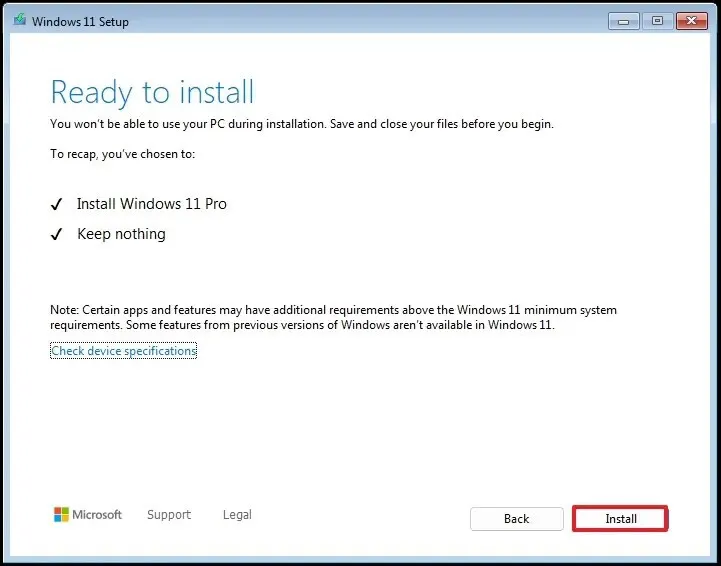
- Click Install. Windows copies the files and restarts several times. Remove the USB drive when the PC restarts for the first time so it doesn’t boot from it again.
Step 4: Set Up Windows 11
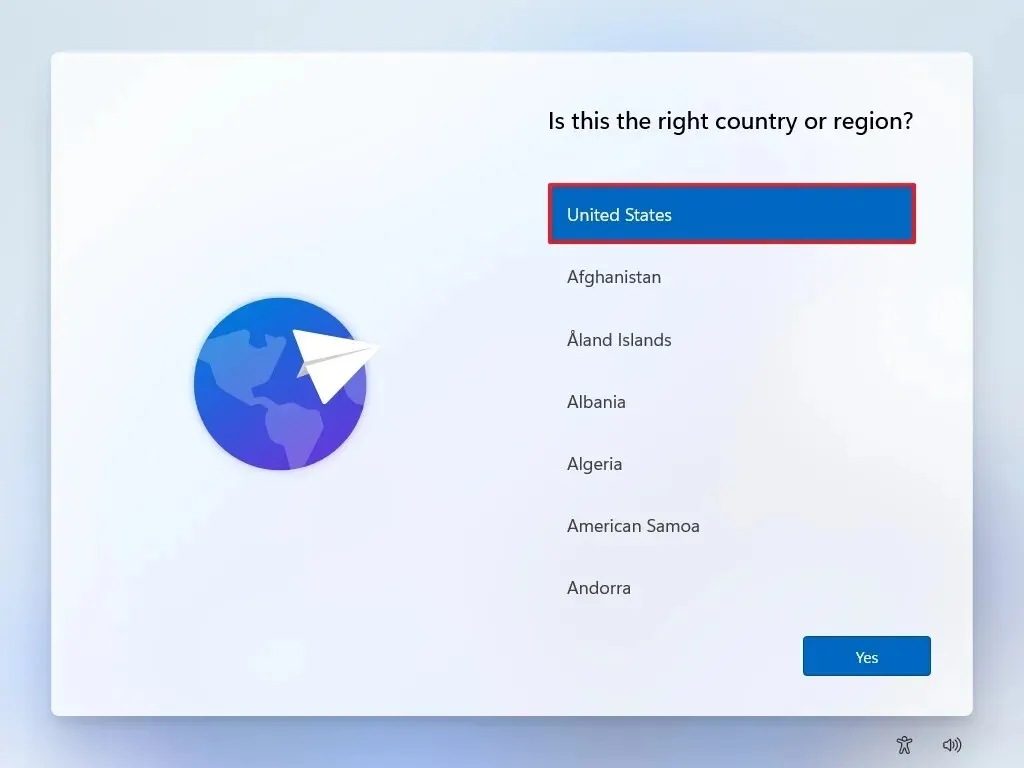
- Choose your country or region and click Yes, then confirm your keyboard layout and connect to Wi-Fi.
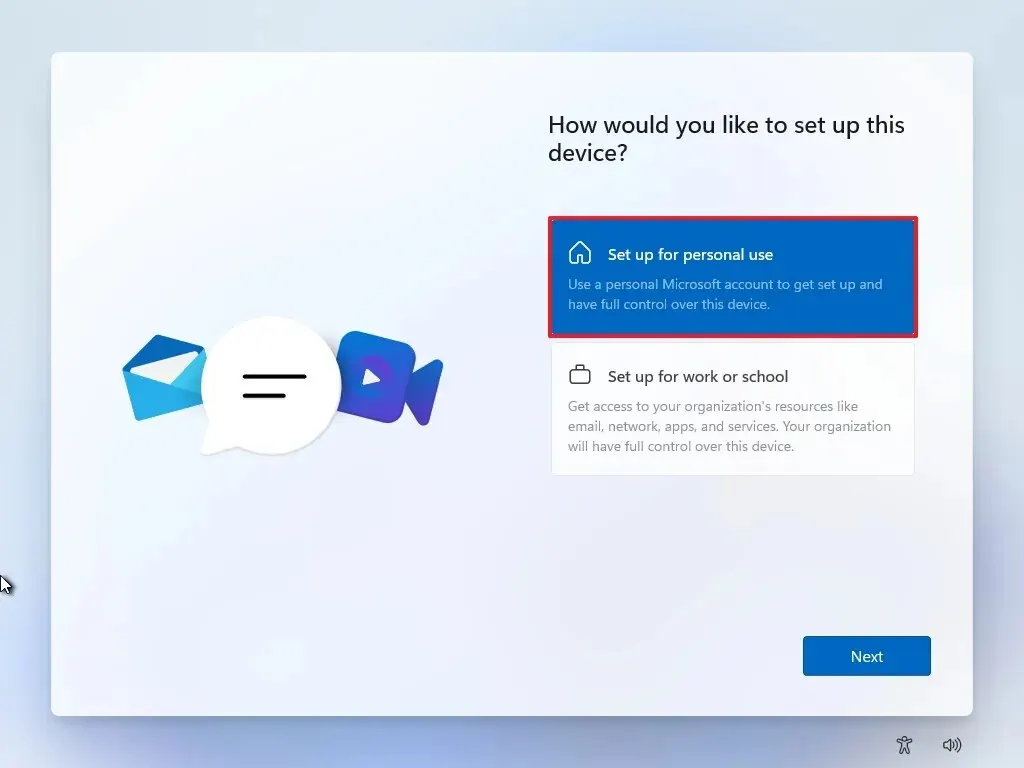
- On Windows 11 Pro, choose Set up for personal use (Home skips this screen). Sign in with your Microsoft account so your license and settings are linked to it.
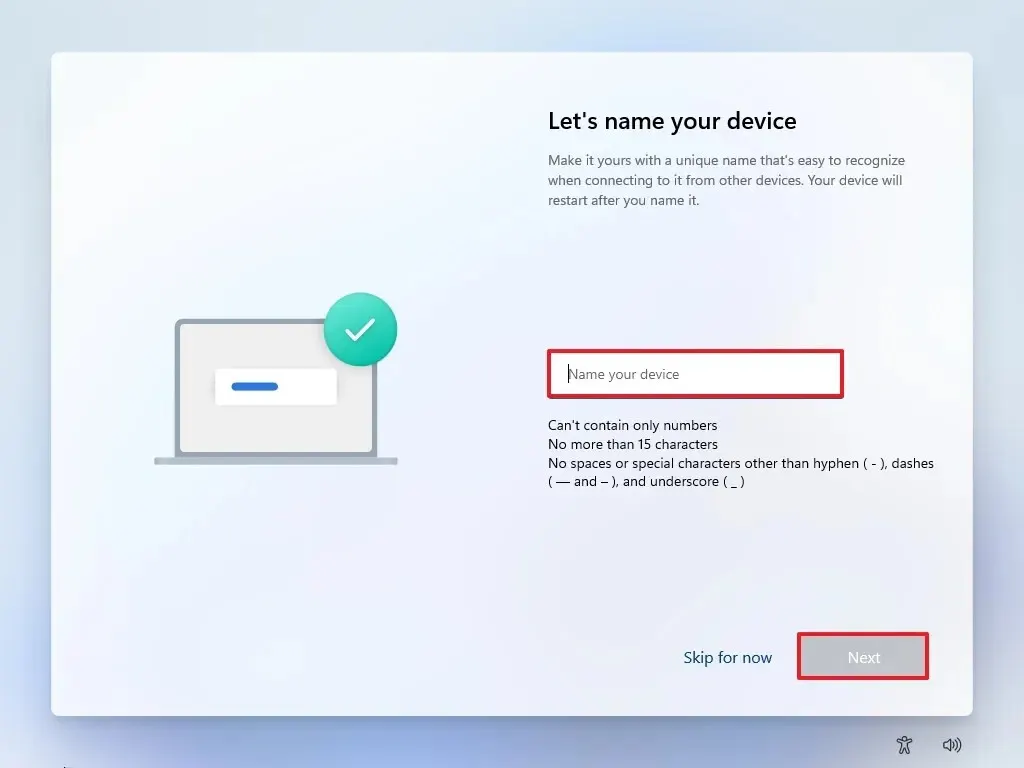
- Give your PC a name, or click Skip for now.
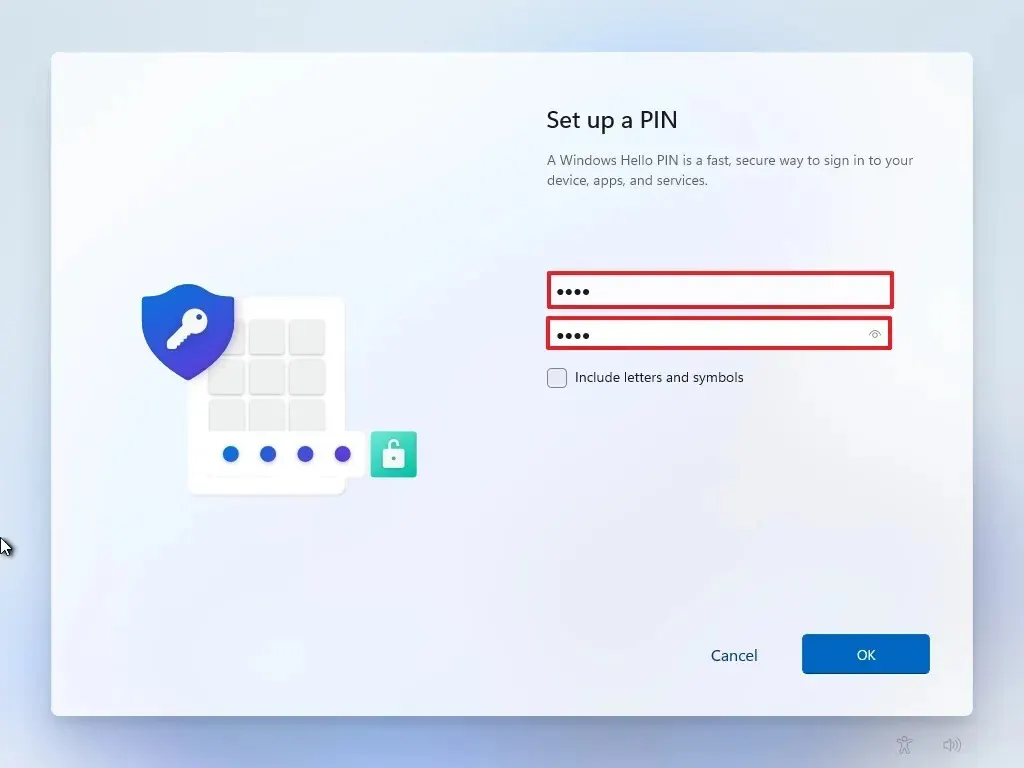
- Create a PIN to sign in quickly, then choose your privacy settings. After a few minutes, you’ll see the Windows 11 desktop.
Once you’re on the desktop, go to Settings > Windows Update, install all updates and optional driver updates, and check Settings > System > Activation to make sure Windows is activated.
Windows 11 USB Install Problems and Fixes
- The USB drive doesn’t show up in the Boot Menu: try a different USB port (a rear port on desktops), make sure USB boot is enabled in BIOS, and recreate the drive with the Media Creation Tool. Drives created with GPT only boot in UEFI mode.
- “This PC can’t run Windows 11”: turn on TPM (often called PTT on Intel or fTPM on AMD) and Secure Boot in BIOS, then restart Setup.
- No drives appear on the “Where do you want to install” screen: your PC needs a storage driver, common on newer Intel laptops. Download the Intel Rapid Storage Technology (IRST/VMD) driver from your PC maker’s support site, copy it to the USB drive, and click Load Driver.
- Want to keep your files and apps? Don’t boot from the USB. Instead, open the USB drive in Windows and run setup.exe, or follow our guide to reinstall Windows 11 without losing data.
Once you’re on the desktop, take a moment to pick up the latest drivers and get the system up to date. Keep the USB drive around, since it’s handy for repairs or another clean install later.


