
Slow pages, stuck downloads and a drive that keeps filling up often trace back to stored data that has gone stale. To clear cache in Windows 11, it helps to know that the system keeps several kinds of cache, and each one lives in a different place. Five types are covered below, with a look at which are safe to clear and when doing so actually helps.
Table of Contents
Clear Temporary Files in Windows 11
Close open apps first, because files an app is using can’t be deleted. If you’re unsure what is running, check Task Manager in Windows 11.
- Press
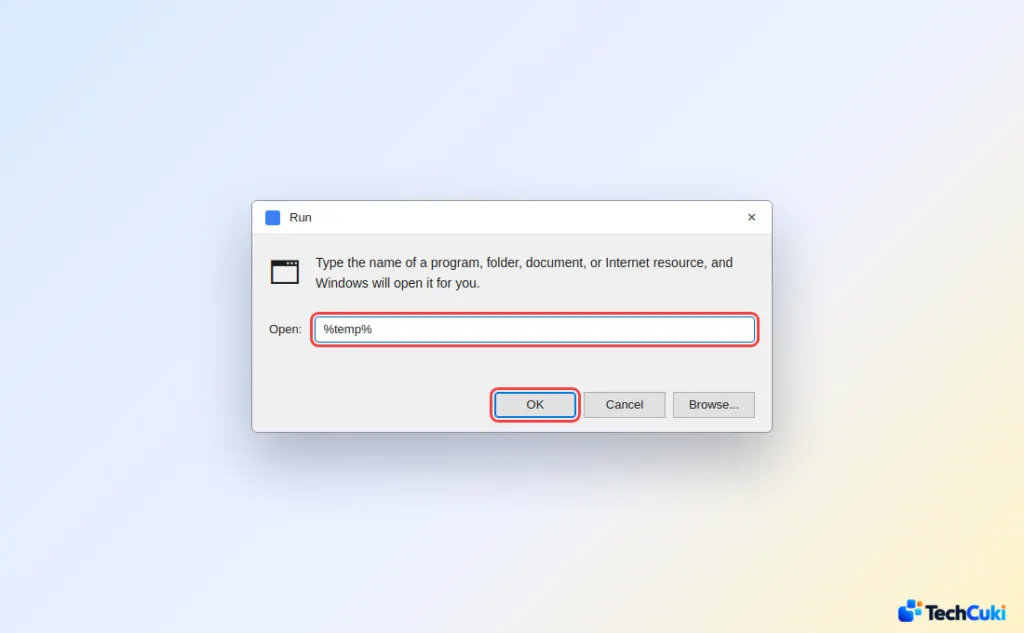
Windows + R, type%temp%, and press Enter.
- Press
Ctrl + Ato select everything, then press Delete.
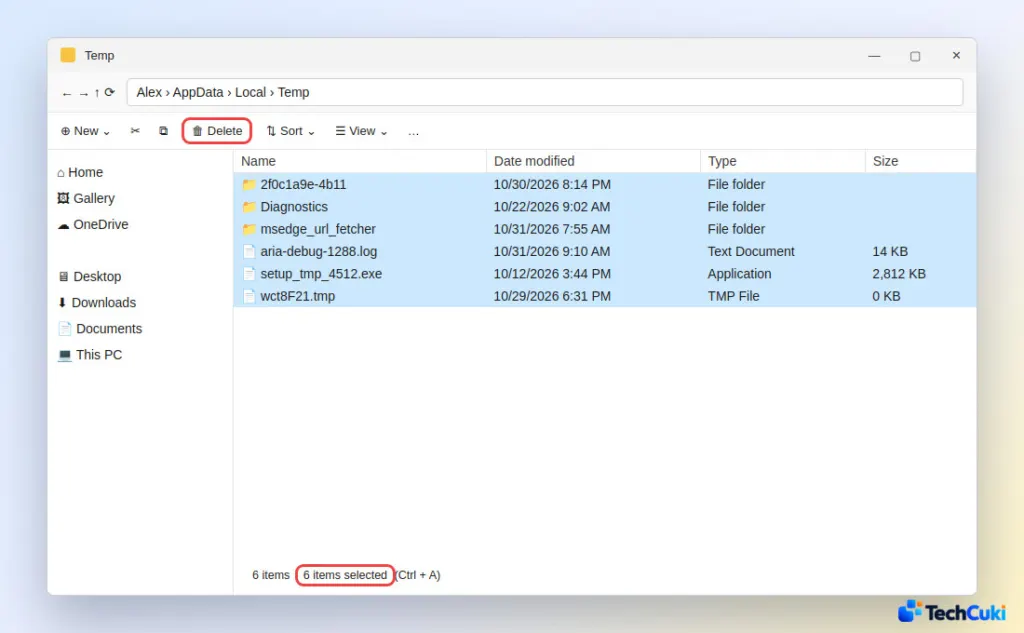
- Click Skip for any file that is in use. Windows is protecting something an open program needs.
- Empty the Recycle Bin, since deleted temp files still occupy space until you do.
For a guided version, open Settings > System > Storage > Temporary files. From Command Prompt, del /q/f/s %TEMP%\* does the same job and skips files in use. Disk Cleanup (search for it in the taskbar) also lists Delivery Optimization Files, which is the cached copy of Windows updates, and it can be cleared there. Windows Update rebuilds whatever it needs.
Clear the Microsoft Store Cache
Do this when Store apps won’t download or update. A reset throws away the Store’s local cache without touching your installed apps.
- Press
Windows + R, typewsreset.exe, and click OK.
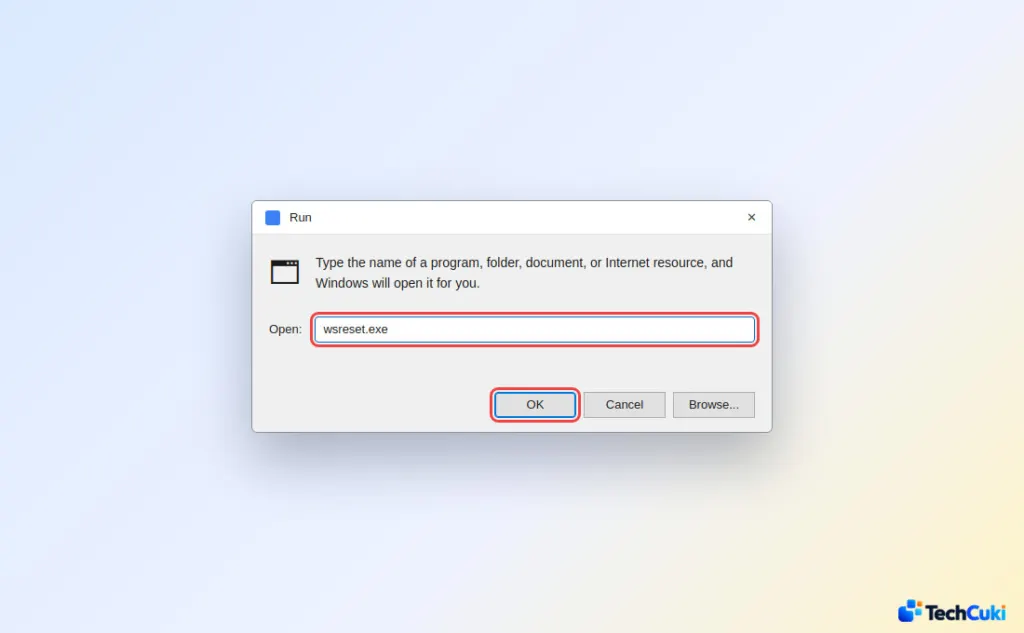
- Wait about ten seconds. A blank Command Prompt window appears and closes on its own, then the Microsoft Store opens automatically. That is how you know it finished.
Clear the DNS Cache With Command Prompt
Your PC remembers which address belongs to each site name, so after a site moves or you change DNS servers, it can keep going to the old address. Flushing the cache forces fresh lookups.
- Open Command Prompt, as administrator if the command is refused.
- Type
ipconfig /flushdnsand press Enter.
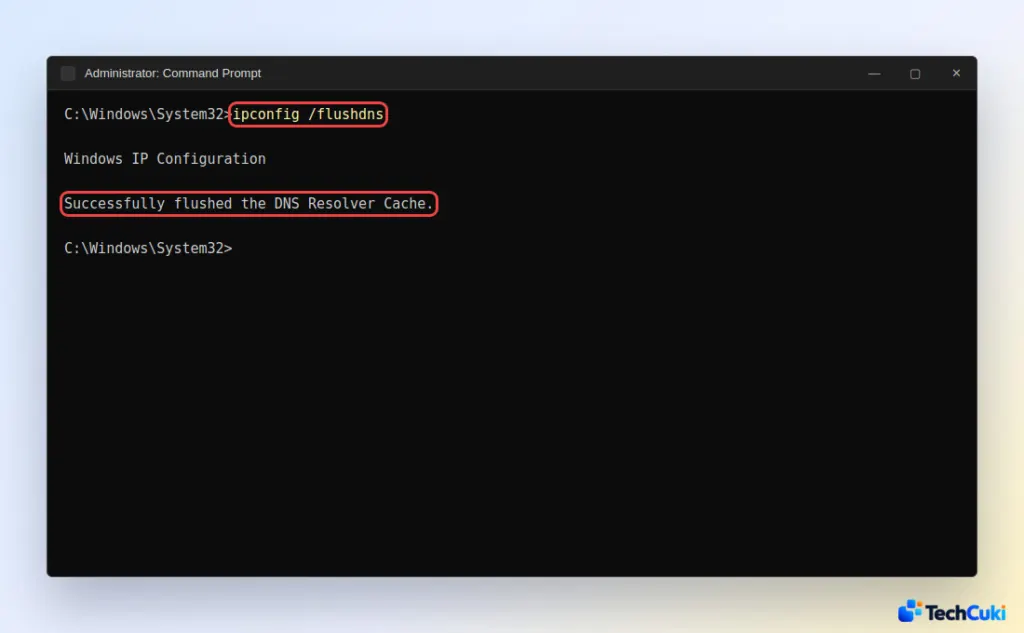
- Look for “Successfully flushed the DNS Resolver Cache.”
Clear Your Browser Cache
Browsers keep their own cache, separate from Windows, so it has to be cleared inside the browser. Cache and browsing history are separate check boxes, so you can clear one without the other.
- In Microsoft Edge or Google Chrome, press
Ctrl + Shift + Delete. - Set Time range to All time.
- Tick only Cached images and files. Untick cookies if you don’t want to be signed out of websites, and leave passwords unticked.
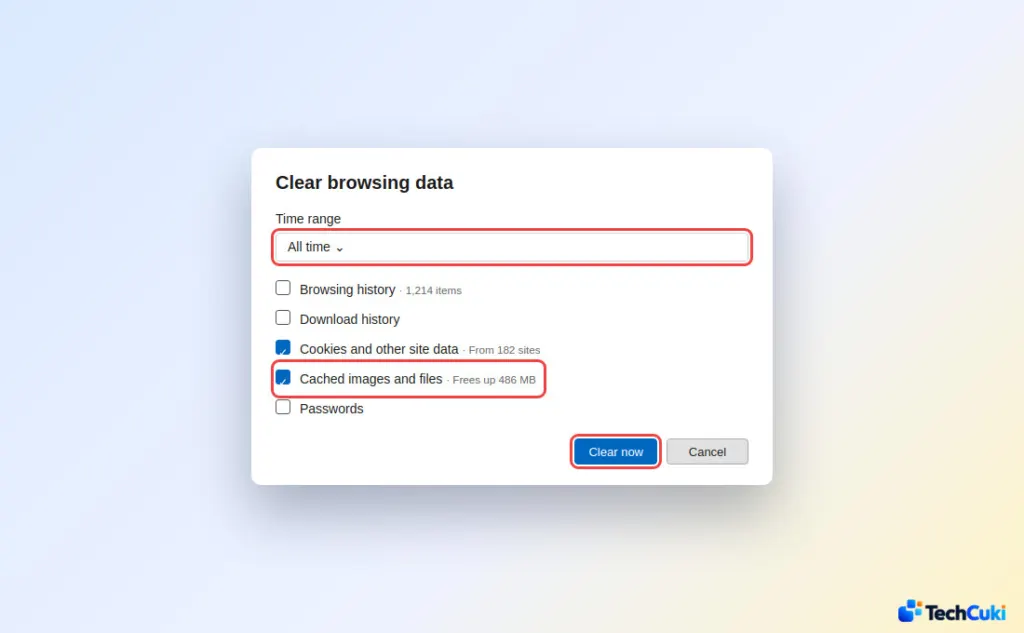
- Click Clear now (Edge) or Delete data (Chrome).
If only one site misbehaves, such as a checkout that keeps failing, try it first in an InPrivate window (Ctrl + Shift + N in Edge). If it works there, saved data in your normal profile is the cause. In Edge, go to Settings > Manage cookies > See all cookies and site data, search for the site, and choose Remove all shown. That clears just that site, and you’ll be signed out of it.
Clear File Explorer History
File Explorer’s history is a list of recent items, not a cache that slows anything down, so clear it only when you want those entries gone.
- In File Explorer, click … (See more) and choose Options.
- On the General tab, under Privacy, click Clear.
- Click OK.
Windows also keeps activity history and location history. Clear them under Settings > Privacy & security > Activity history and Location.
Is It Safe to Clear Cache in Windows 11?
Yes. Cache is temporary data kept so things load faster, and apps rebuild what they need, so the first launch afterward may be slightly slower. Review your Downloads folder before accepting Cleanup recommendations in Settings, since that list can include files you meant to keep.
Clearing cache is low-risk and worth doing when something misbehaves, but it is not a cure-all for every slowdown. Most caches rebuild on their own, so nothing is lost for good. If you are clearing cache because the drive is full, freeing up disk space on Windows 11 goes further than any cache will.


