
A screen that suddenly lies on its side or flips upside down can be alarming, but it is rarely a sign of anything broken. Sometimes a setting changes by accident, and sometimes you want a vertical layout on purpose. You will find how to rotate the screen in Windows 11 and put it back, plus what to do when a tablet or laptop will not auto-rotate.
Table of Contents
1. Rotate the Screen in Windows 11 From Settings
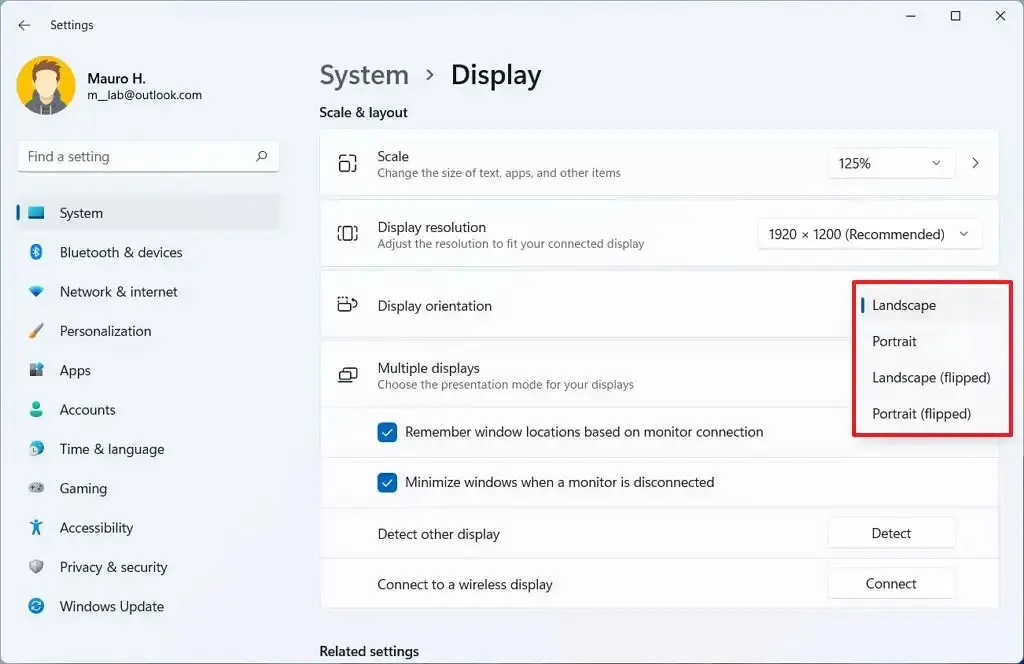
The orientation dropdown is the reliable method, and it is also the way back to normal: choose Landscape to undo a sideways or flipped screen.
- Open Settings and go to System > Display. A faster route is to right-click an empty spot on the desktop and select Display settings.
- With more than one monitor, select the right display at the top of the page first.
- Under Scale & layout, open the Display orientation dropdown.
- Choose Landscape, Portrait, Landscape (flipped), or Portrait (flipped).
- When Keep these display settings? appears, click Keep changes.
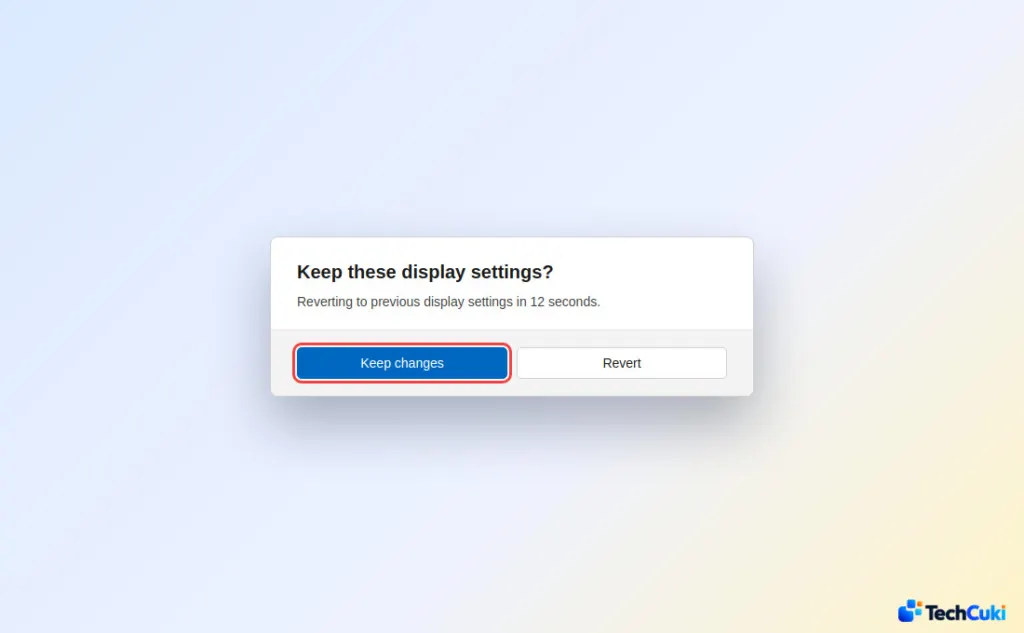
If you click nothing, Windows reverts after about 15 seconds, so a wrong choice cannot leave you stuck. If the dropdown is missing altogether, the orientation cannot be changed from Windows for that display.
2. Why Ctrl + Alt + Arrow Doesn’t Rotate the Screen
These keys are not a Windows feature. They belong to the graphics driver, and Intel removed the hotkeys from its newer drivers, because users who pressed them by accident thought their computer was broken. A Windows 11 driver update can therefore delete a shortcut that worked on Windows 10.
Where the shortcut still exists, Ctrl + Alt + Up returns the screen to normal, Ctrl + Alt + Down flips it, and Left and Right turn it sideways. On AMD graphics, open AMD Software, go to the hotkeys settings, and enable Use display hotkeys. With an NVIDIA or older Intel setup, or if the keys do nothing, use the Settings method above.
3. Rotate the Display From the NVIDIA Control Panel
With an NVIDIA graphics card, the driver offers its own rotation setting. The control panel ships with the driver, so update your drivers if you cannot find it.
- Open the NVIDIA Control Panel.
- Go to Display, select Rotate display, and choose the orientation you want.
4. Fix a Screen That Won’t Auto-Rotate or Keeps Flipping
On a tablet or 2-in-1, Rotation lock is the first thing to check, because it freezes the screen in its current orientation.
- Press
Windows + Ato open Quick Settings.
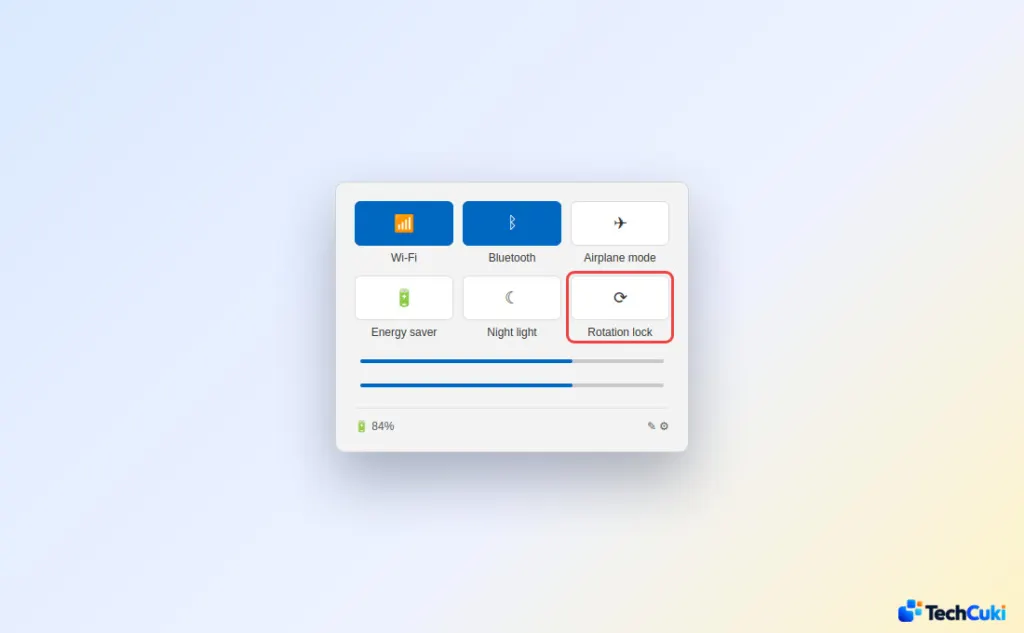
- Select the Rotation lock tile to turn it off. The same toggle sits under Settings > System > Display.
The toggle appears only on devices with a rotation sensor, and on many 2-in-1 laptops only once Windows detects tablet mode. If it is missing, fold the keyboard fully behind the screen and look again. A standard laptop without a sensor never auto-rotates, which is normal.
If rotation still fails or misbehaves:
- Screen flips every time the laptop wakes: set Landscape manually first. If a Sensors section exists in Device Manager (
Windows + X> Device Manager), right-click HID Sensor Collection and choose Disable device. Many PCs have no such section, which is expected. - Auto-rotate dead on a 2-in-1: in Device Manager, right-click each HID Sensor Collection V2 entry and choose Update driver.
- Still wrong: install every Windows update including optional ones, and your PC maker’s latest firmware and display drivers. As a last step, uninstall the graphics card under Display adapters in Device Manager and restart, so Windows reinstalls it.
Getting your display the right way up is usually a quick change, and a layout that suits your setup makes everyday work easier. The change is easy to undo if it does not look right. If the screen still misbehaves, the maker’s support can help.


