
Windows 11 can refuse to install on a PC that looks perfectly capable, and the reason is often a security feature that isn’t switched on. To enable TPM 2.0, you first confirm what your PC reports and then adjust a setting in its firmware, which differs slightly between Intel and AMD. The steps below also cover what to do when it still won’t show up.
Table of Contents
1. Check What Windows Reports Before Touching the BIOS
The result tells you whether you need to change anything, so look before you restart.
- Press
Windows + R, typetpm.msc, and select OK.
| What you see | What it means |
|---|---|
| “The TPM is ready for use” with Specification Version 2.0 under TPM Manufacturer Information | Nothing to enable. TPM is not what is blocking Windows 11. |
| Ready for use, but version 1.2 | It does not meet the requirement. Some boards offer a 2.0 mode in firmware (see the TPM 1.2 note below); otherwise the hardware is too old. |
| “Compatible TPM cannot be found” | TPM is probably disabled in firmware. Continue to the next section. |
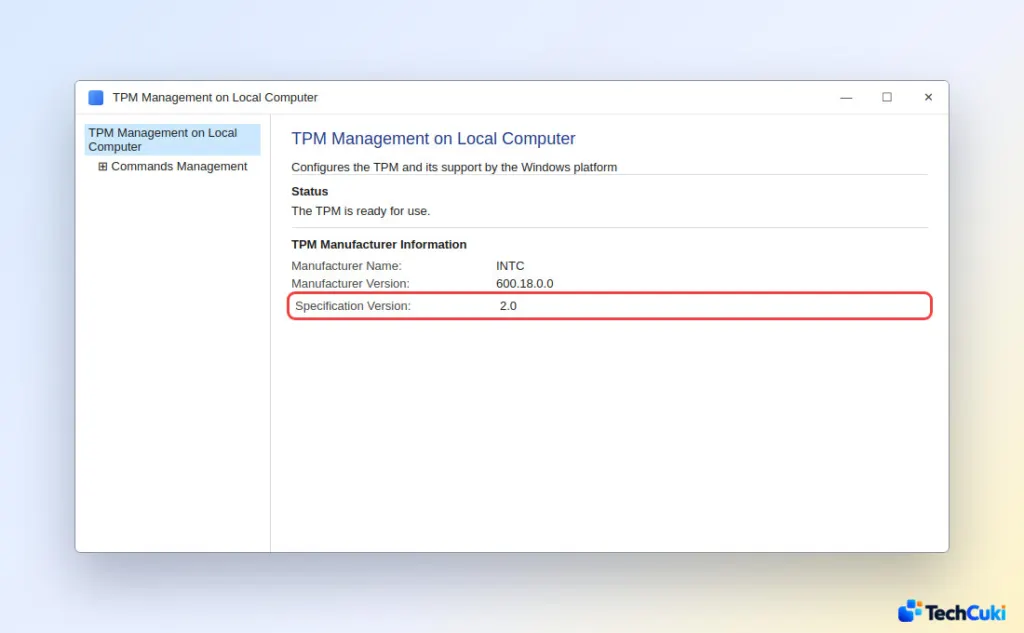
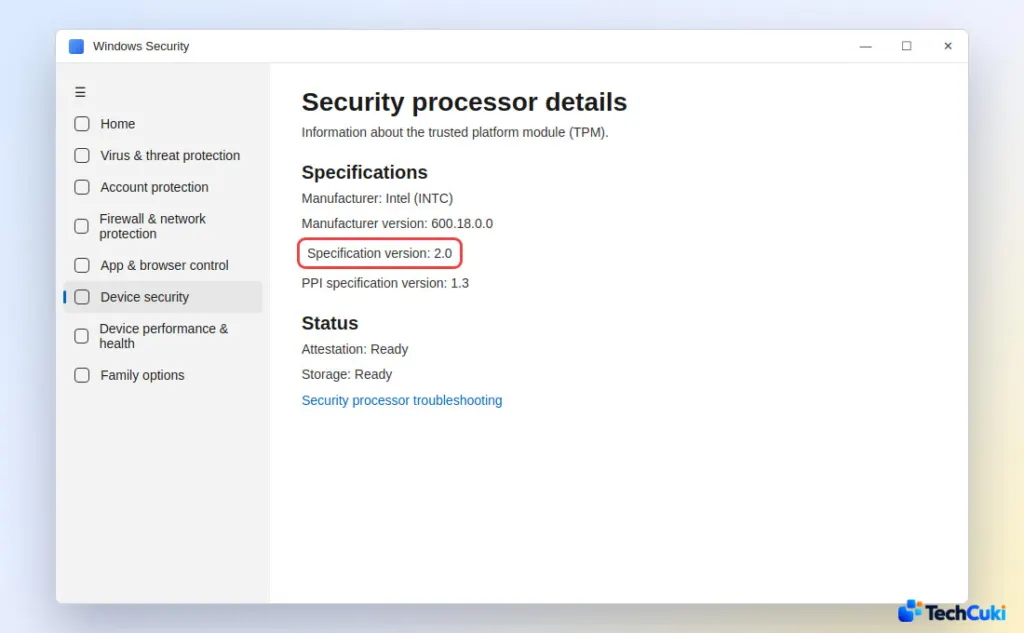
- If the console will not open, check Windows Security > Device security instead. A missing Security processor section points to a disabled TPM. If it is there, open Security processor details and confirm Specification version reads 2.0.
2. How to Enable TPM 2.0 for Windows 11 in UEFI Firmware
Going through Windows Recovery lands you in the firmware screen without guessing a boot key. If your PC does not offer that route, our guide to opening the BIOS on Windows 11 covers the other ways in.
- Open Settings > System > Recovery.
- Next to Advanced startup, select Restart now.
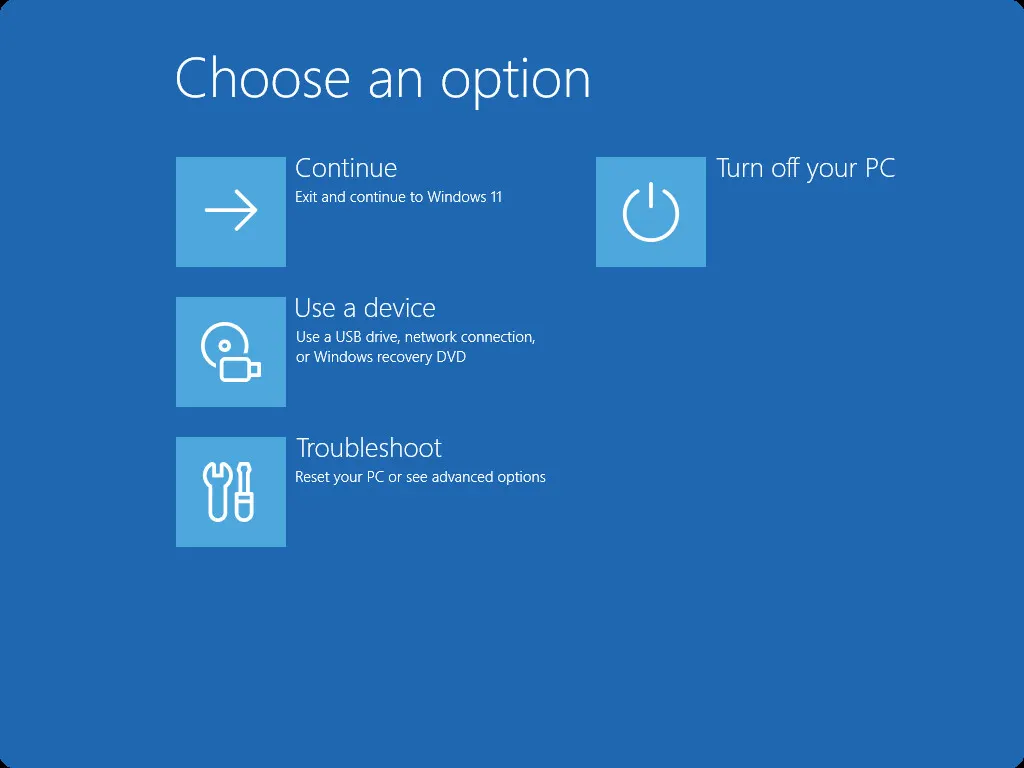
- Select Troubleshoot > Advanced options > UEFI Firmware Settings, then Restart.
- Find the TPM option. It usually sits under Advanced, Security or Trusted Computing. If you cannot spot it, many firmware screens have a search box (
F9orCtrl + F); search for “TPM”, “PTT” or “fTPM”.
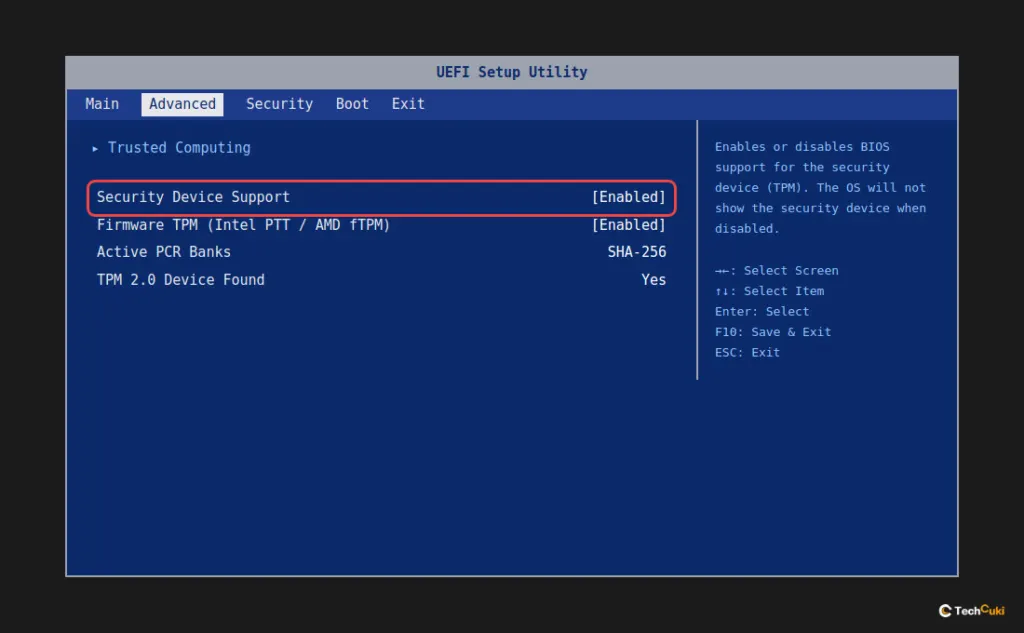
- Set it to Enabled (on some boards you choose the firmware TPM from a TPM Device Selection list), then save and exit, often with
F10.
Back in Windows, run tpm.msc again. The goal is “The TPM is ready for use” and version 2.0.
3. Where to Enable TPM 2.0 on Intel and AMD Boards
Firmware TPM lives inside the CPU, so no physical chip is needed. It is present on Intel 4th-generation Core and newer, and on AMD Ryzen 1000 and newer. Typical locations:
| Board | Intel | AMD |
|---|---|---|
| ASUS | Advanced, then PCH-FW Configuration, set PTT | Advanced, then AMD fTPM Configuration, set the switch |
| MSI | Settings > Security > Trusted Computing, choose PTT | Same menu, choose AMD CPU fTPM |
| Gigabyte | Settings > Miscellaneous, enable the Intel option | Settings > Miscellaneous, enable AMD CPU fTPM |
| ASRock | Security, enable the Intel option | Advanced > CPU Configuration, set the fTPM switch |
Other labels you may meet are Security Device Support, TPM State and AMD PSP fTPM. Change only the TPM option.
4. If TPM 2.0 Still Does Not Show Up
Match what you see to the cause.
- No TPM, PTT or fTPM option anywhere: a BIOS update can add the setting. See our guide to checking your BIOS version in Windows 11, then download the newest BIOS for your exact board from the maker.
- Enabled in firmware, but Windows or PC Health Check still says no: this is a known firmware bug on some boards, notably older AMD AGESA versions. One MSI X570 owner reported that a BIOS update was what fixed it. Do not switch fTPM off to cure stutter on a Ryzen system; update the BIOS instead.
- Version 1.2 only: some boards expose a mode selector for it, so check the TPM menu for a 2.0 choice. Changing versions wipes the stored TPM keys, so suspend BitLocker or have your recovery key at hand, otherwise Windows may refuse to unlock your drive. If no 2.0 option exists, the hardware cannot meet the requirement.
5. Can You Add a TPM 2.0 Module to an Older PC?
Sometimes. Many desktop boards have a TPM header that takes an add-on TPM 2.0 module made for that board, so check the manual for the exact connector and model. With no header, the PC cannot meet the Windows 11 requirement.
Once the check passes, retry the upgrade. Windows 11 has another firmware requirement, so if the upgrade still stops, see how to enable Secure Boot on Windows 11, and back up your recovery key before changing any security mode, since it can clear stored keys.


