
A game or the Windows 11 installer may tell you a security feature is off, and the message rarely explains what to do next. The change happens in the firmware rather than in Windows, and some PCs need extra preparation first. The sections below show how to check where things stand, enable Secure Boot on Windows 11, and handle an option that refuses to cooperate.
Table of Contents
Before you start
- Back up important files before you touch firmware or disk settings.
- If BIOS Mode says Legacy (step 1 below) and your system disk is MBR, switching the firmware to UEFI makes the current Windows install unbootable. Convert the disk to GPT first, using an admin Command Prompt:
mbr2gpt /validate /allowFullOS, thenmbr2gpt /convert /allowFullOS.
1. How to Check if Secure Boot Is Enabled on Windows 11
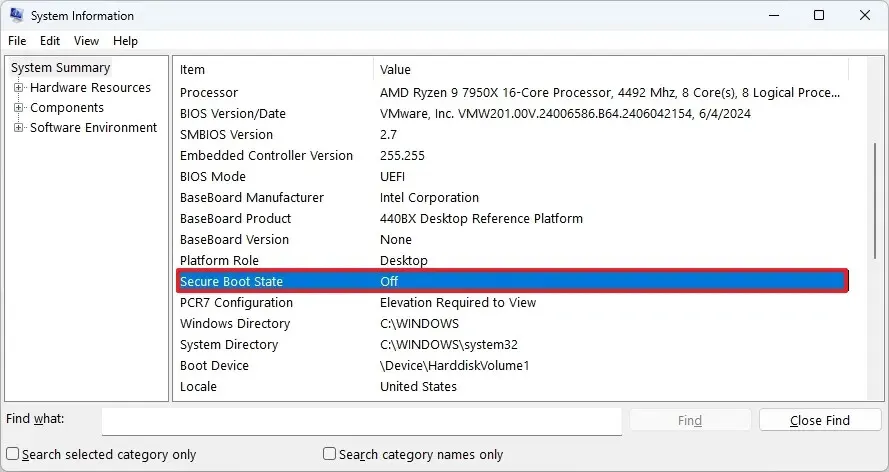
System Information shows the state as On, Off or Unsupported, and the BIOS Mode line right above it tells you whether turning it on is safe.
- Press Windows + R to open the Run dialog.
- Type
msinfo32and press Enter.
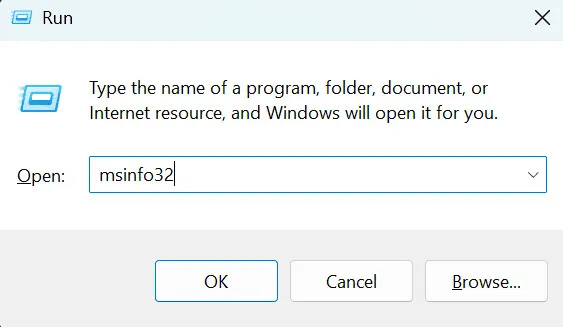
- In System Summary, check BIOS Mode. It should read UEFI. If it reads Legacy, read the note above before going on.
- Look at Secure Boot State. On means you are done. Off means continue to the next section. Unsupported means the firmware cannot run Secure Boot, so check your motherboard or laptop specification sheet.
If BIOS Mode says Legacy, find out whether the disk is MBR or GPT: press Windows + X, open Disk Management, right-click the disk that holds C:, choose Properties and open the Volumes tab. Partition style shows GPT or MBR. For an MBR disk, you can add /disk:0 to both mbr2gpt commands, replacing 0 with the disk number shown on that tab.
2. How to Enable Secure Boot on Windows 11
You switch it on from the UEFI firmware settings, which Windows Recovery can open for you.
- Open Settings > System > Recovery.
- Next to Advanced startup, click Restart now.
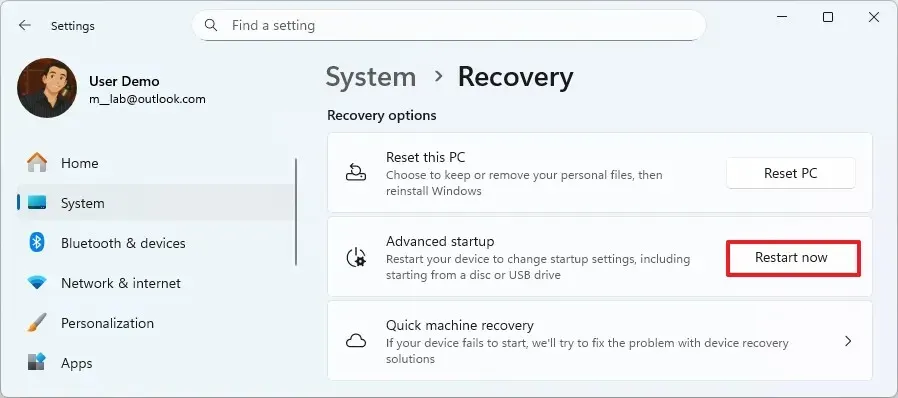
- On the blue screen, choose Troubleshoot > Advanced options > UEFI Firmware Settings, then click Restart.
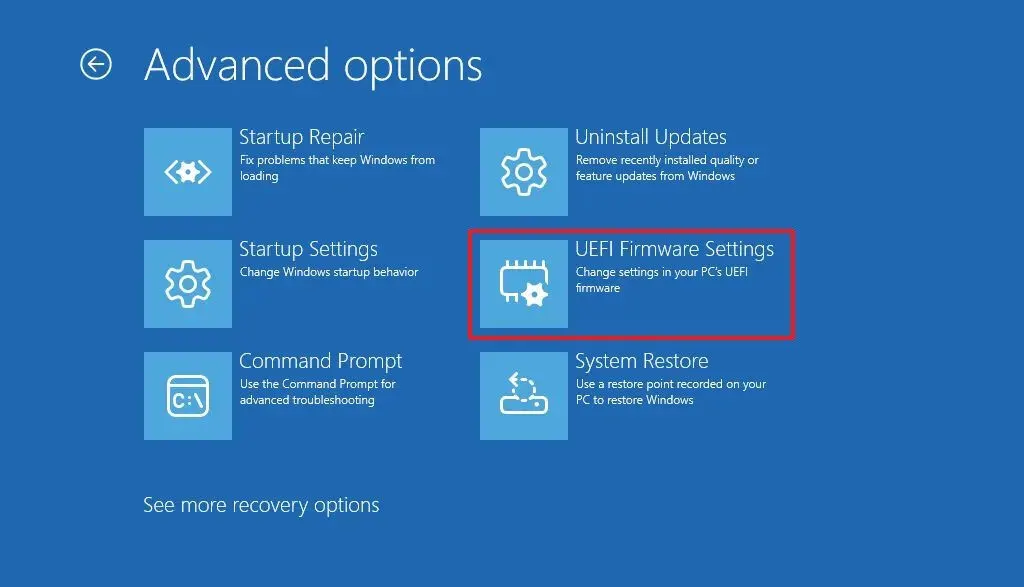
- In the firmware, find Secure Boot, usually under the Boot, Security or Authentication tab, and set it to Enabled. Many firmware screens have a search key (F9 on some) if the setting is hard to find.
- Save and exit, often with F10, and let Windows start.
- Open
msinfo32again. Secure Boot State should now read On, and games that complained should stop asking.
If something goes wrong later, the same menu turns Secure Boot off again. Microsoft notes this is acceptable as a temporary step to fix a problem, as long as you turn it back on afterward.
3. Where to Find Secure Boot in Your BIOS by Brand
Menu names change by manufacturer. If you can’t reach the firmware screen at all, our guide to getting into BIOS on Windows 11 covers other ways in.
- Dell: Boot Configuration > Enable Secure Boot. Tapping F2 at the Dell logo opens the BIOS.
- HP: Advanced (or Security) > Secure Boot Configuration.
- Lenovo: Security > Secure Boot.
- ASUS: Boot > Secure Boot, with OS Type set to Windows UEFI mode.
- MSI: Settings > Advanced > Windows OS Configuration, set BIOS UEFI/CSM Mode to UEFI, then open Secure Boot.
- Gigabyte: Boot > CSM Support set to Disabled, then Secure Boot set to Enabled.
4. Secure Boot Greyed Out or Won’t Turn On
A greyed-out option almost always means the firmware is still in Legacy mode or CSM (Compatibility Support Module) is on. Set Boot Mode to UEFI, turn CSM off, save, and open the firmware again.
If it stays greyed out, some boards need the default keys loaded first, using an option such as “Install default Secure Boot keys” or “Restore Factory Keys”. Others only allow changes after you set a BIOS administrator password. Games that need Secure Boot, such as EA titles with anti-cheat, also want TPM 2.0 enabled. Press Windows + R, run tpm.msc and check that the status says the TPM is ready.
An Unsupported state has no software fix. Our guide on installing Windows 11 from USB lists the other Windows 11 requirements to check against your hardware.
Finishing this step removes a common roadblock for newer games and Windows requirements. Because firmware changes are sensitive, go slowly and write down anything you change. If your PC is from a major maker, its support page can answer model-specific questions. Staying current with Windows also helps, and our guide on updating Windows 11 covers it.


