
A restart that lands in the middle of your work is one of the most irritating things Windows can do. Updates matter for security, so how long to hold them off, and how, depends on how much control you need and which edition you run. The options below explain how to stop Windows 11 updates, from a short break to turning them off, along with the risks and how to undo each one.
Table of Contents
- Which Way to Stop Updates Fits Your Problem
- Stop Windows 11 Updates With a Pause of Up to 5 Weeks
- Set a Metered Connection
- Stop Windows 11 Updates Installing Automatically With Group Policy
- Extend the Pause Beyond 5 Weeks With the Registry (Home Included)
- Disable the Windows Update Service
- Can You Stop a Windows 11 Update in Progress?
- How to Turn Windows 11 Updates Back On
Which Way to Stop Updates Fits Your Problem
Updates carry security fixes, so a pause is safer than turning them off for good. Whatever you pick, plan to turn updates back on soon.
1. Stop Windows 11 Updates With a Pause of Up to 5 Weeks
Pausing is the easiest method, and it works on every edition.
- Open Start and select Settings.
- Select Windows Update.
- Next to Pause updates, choose a pause length from Pause for 1 week up to Pause for 5 weeks. Some builds show a Pick a date calendar here instead.
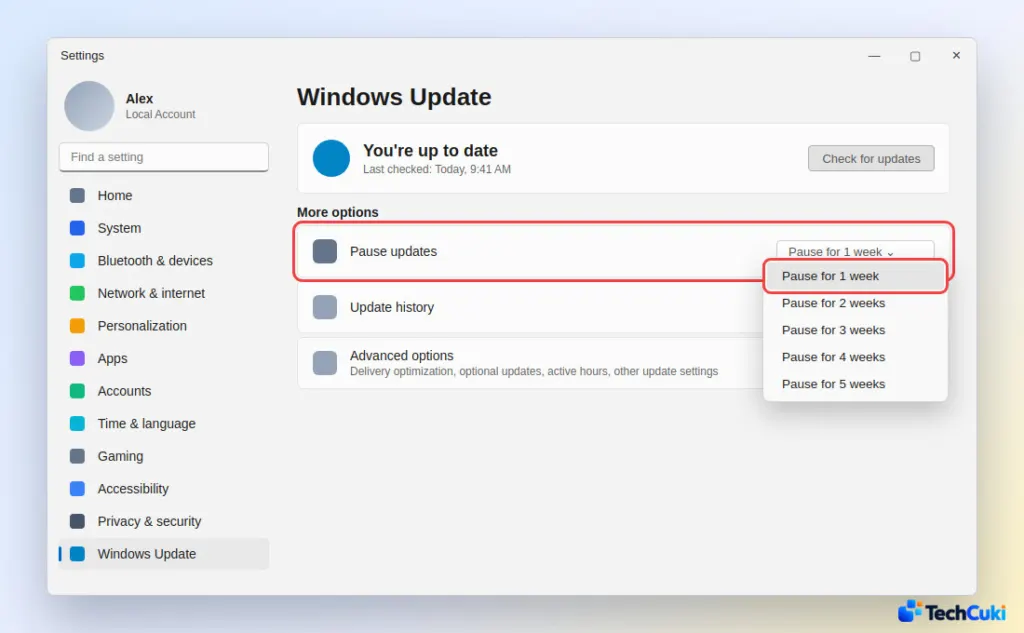
The page now shows that updates are paused until the date you chose. When the pause ends, Windows installs pending updates before you can pause again. To end it early, click Resume updates.
If the “We’ve got an update for you” banner keeps coming back anyway, you can’t dismiss it for good, but you can make it harmless. Open Advanced options on the same page and turn on Notify me when a restart is required to finish updating, and set Active hours to the stretch when you are at the PC (the default is 8 AM to 5 PM).
2. Set a Metered Connection
Windows holds back automatic downloads of most updates on a metered network, so this suits a data-capped connection and still lets you check for updates yourself.
- Open Settings and select Network & internet.
- Select Wi-Fi and open your network’s properties. If you’re on a wired connection, select Ethernet and pick your connection instead.
- Turn on Metered connection.
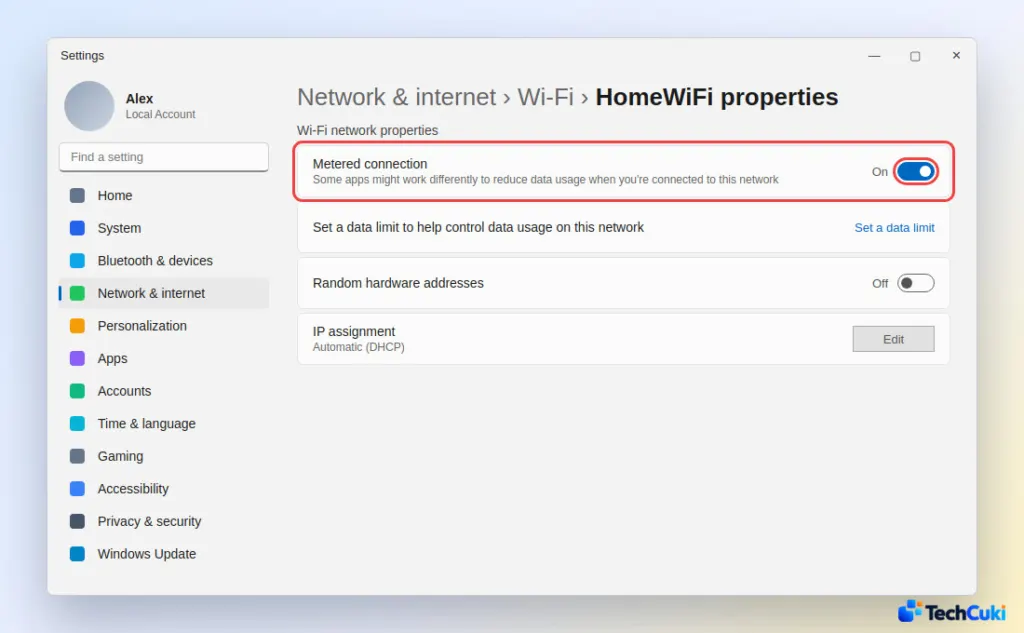
- Go to Windows Update > Advanced options and make sure Download updates over metered connections is turned off.
Some critical updates can still download on a metered connection, and the setting applies to one network, so it doesn’t follow you to a different Wi-Fi.
3. Stop Windows 11 Updates Installing Automatically With Group Policy
Group Policy stops automatic installs, but only on Windows 11 Pro, Enterprise and Education. Home doesn’t include the editor.
- Press
Windows + R, typegpedit.msc, and press Enter. - Go to Computer Configuration > Administrative Templates > Windows Components > Windows Update > Manage end user experience.
- Double-click Configure Automatic Updates, select Disabled, and click OK.
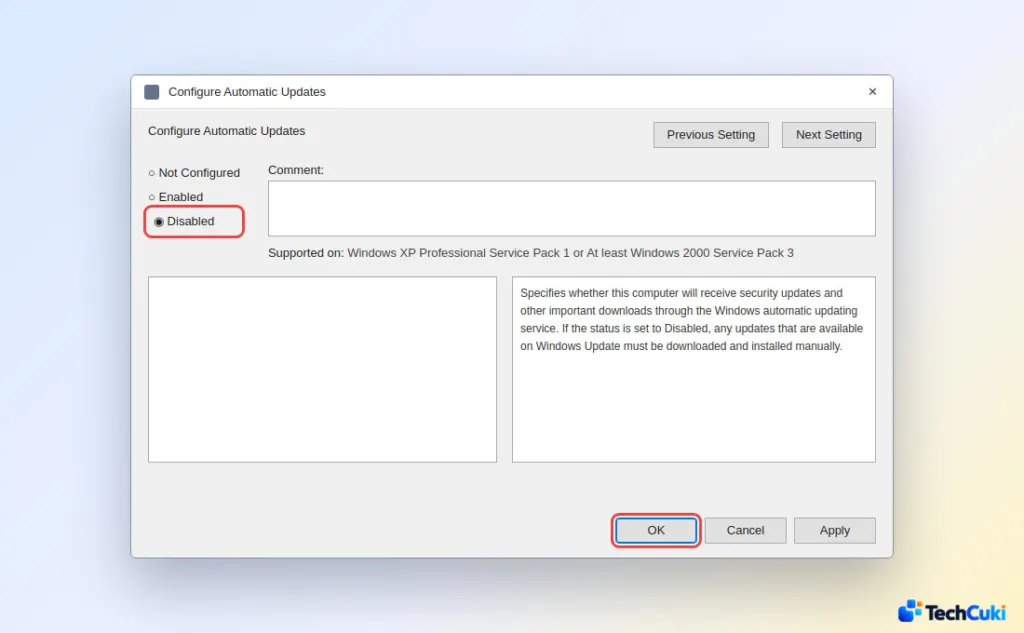
Updates stop installing on their own, but you can still run them by hand from Settings > Windows Update. Driver updates are handled separately, so if you need one, see how to update drivers in Windows 11.
4. Extend the Pause Beyond 5 Weeks With the Registry (Home Included)
The five-week limit is just a date stored in the registry, and on a build with the Pick a date calendar you can change that date. Because it edits the registry, export the Settings key first (right-click it in Registry Editor and choose Export) so you can restore it.
- In Settings > Windows Update, click Pick a date and choose any date. This step only creates the values you are about to edit.
- Press
Windows + R, typeregedit, and press Enter. - Go to
HKEY_LOCAL_MACHINE\SOFTWARE\Microsoft\WindowsUpdate\UX\Settings. - Double-click each of the string values
PauseFeatureUpdatesEndTime,PauseQualityUpdatesEndTimeandPauseUpdatesExpiryTime, and change the year in the value to a later one.
The Windows Update page then shows updates paused until that later date. You must be signed in as an administrator. To undo it, click Resume updates or import the key you exported.
5. Disable the Windows Update Service
Treat this as a last resort. While the service is off, the PC gets no security updates at all.
- Press
Windows + R, typeservices.msc, and press Enter. - Double-click Windows Update.
- Set Startup type to Disabled, click Stop, and then click OK.
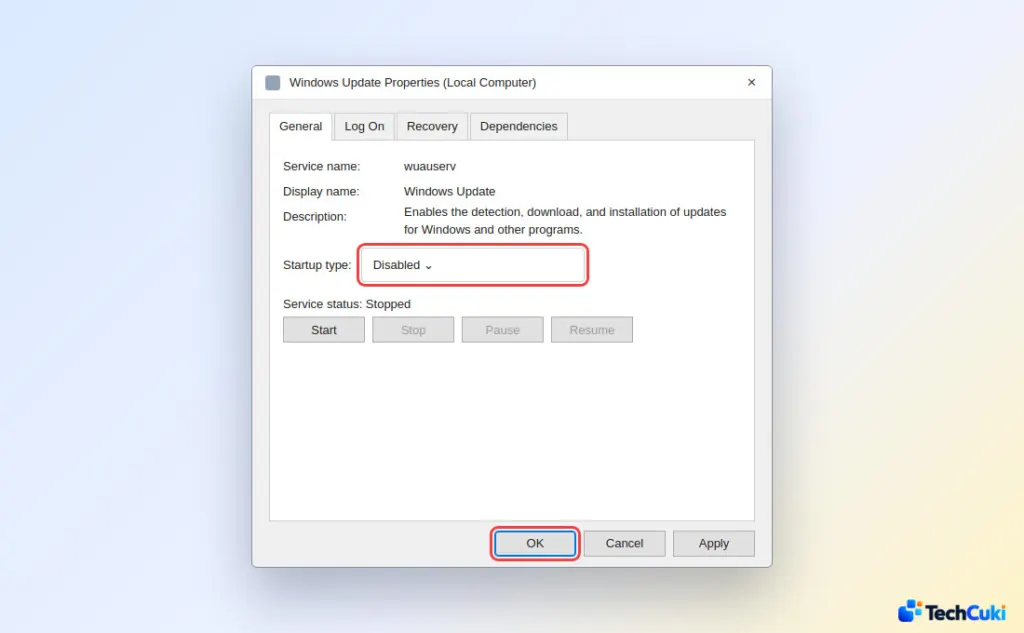
Windows often turns the service back on, because the Windows Update Medic Service repairs it. A commonly shared extra step is to open the service’s Recovery tab and set First failure to Take No Action, though the Medic Service can still undo the change. If updates reappear, recheck Startup type.
Can You Stop a Windows 11 Update in Progress?
Not safely once the install has started. If the update is still downloading, pausing updates in Settings stops the download. Don’t force the PC off on the Working on updates screen. Let it finish, and keep a laptop plugged in.
How to Turn Windows 11 Updates Back On
- Pause or registry pause: click Resume updates in Settings > Windows Update.
- Metered connection: turn off Metered connection for your network.
- Group Policy: set Configure Automatic Updates back to Not Configured.
- Service: set Startup type to Manual.
For most people a lighter approach is enough, and it keeps important security fixes arriving. Turning updates off entirely is a bigger step that deserves some thought first. If an update seems frozen after you switch things back on, our guide on fixing a stuck Windows 11 update covers the next step.


