
Recording a quick walkthrough, a game clip or a video call is easier than most people expect, and you may not need to install anything. Which built-in option fits best depends on what you want to capture and if you need sound. You will find how to use the Windows 11 screen recorder, how to get audio into the clip, where recordings are saved and what to check when it fails.
Table of Contents
Snipping Tool or Game Bar: Pick the Right Recorder
Snipping Tool can record the desktop, File Explorer or any region you select. Game Bar records a single app or game window and can’t capture the desktop or File Explorer. Both save MP4 files. For a still image, see how to take screenshots on Windows 11. For long sessions or heavier editing, OBS Studio is a free third-party option.
Record With the Snipping Tool Shortcut
The fastest start is the keyboard shortcut, which opens the recording bar over whatever is on screen.
- Press
Windows + Shift + R.
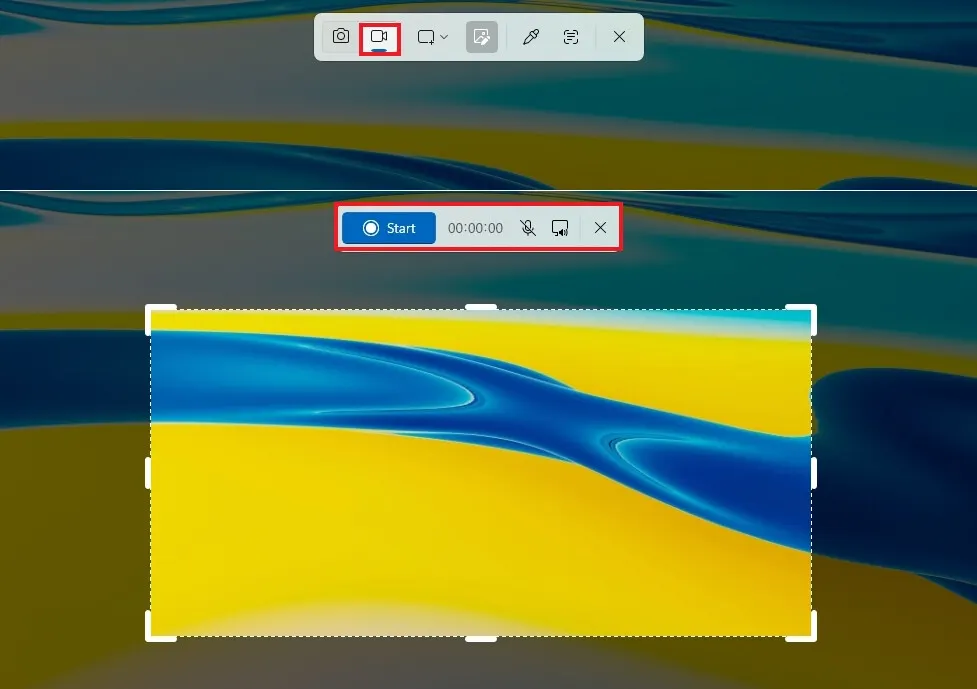
- Drag over the area to capture, or choose the full screen.
- On the recording bar, switch the microphone and system audio icons on or off as needed.
- Select Start. A 3-second countdown gives you time to get ready.
- Select the red square to Stop.
Start From the Snipping Tool App Instead
The app route shows the preview and editing options in one window, which is handy for a clip you plan to trim.
- Open Snipping Tool from the Start menu.
- Select the Record icon (the video camera), then New.
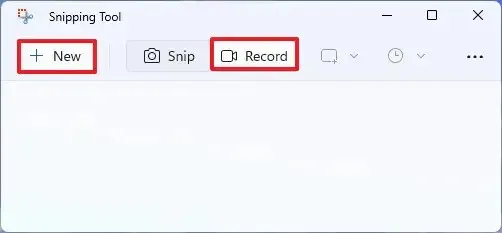
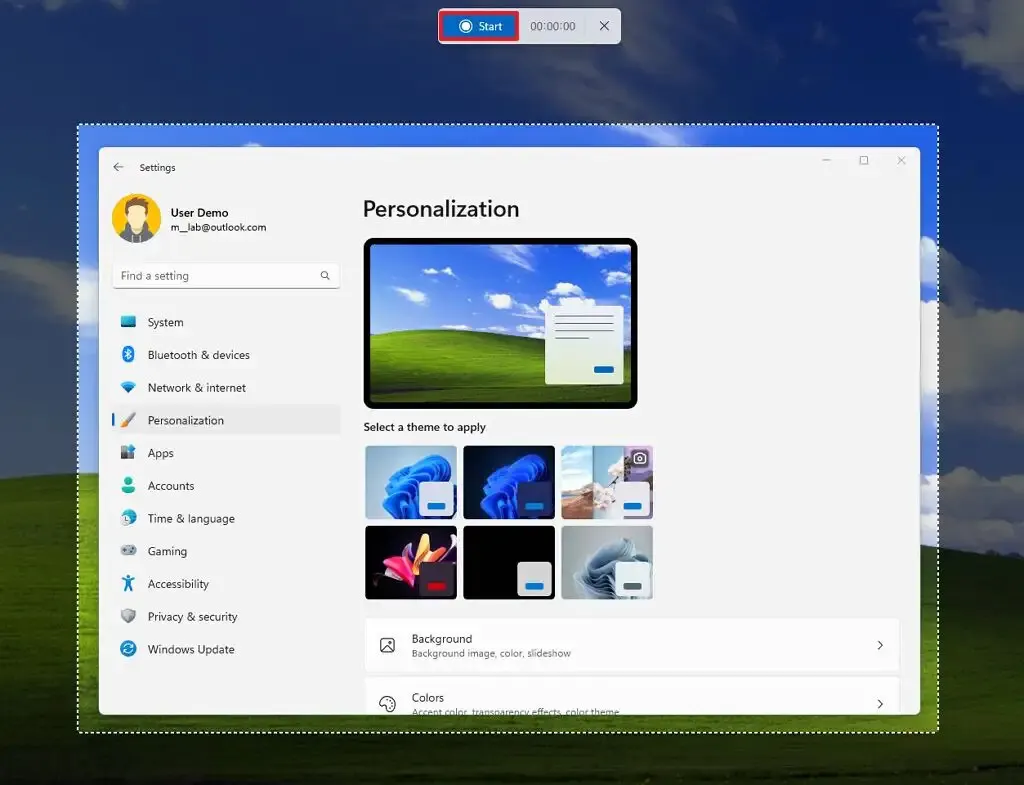
- Drag to select an area, or choose the full screen.
- Select Start and wait out the countdown.
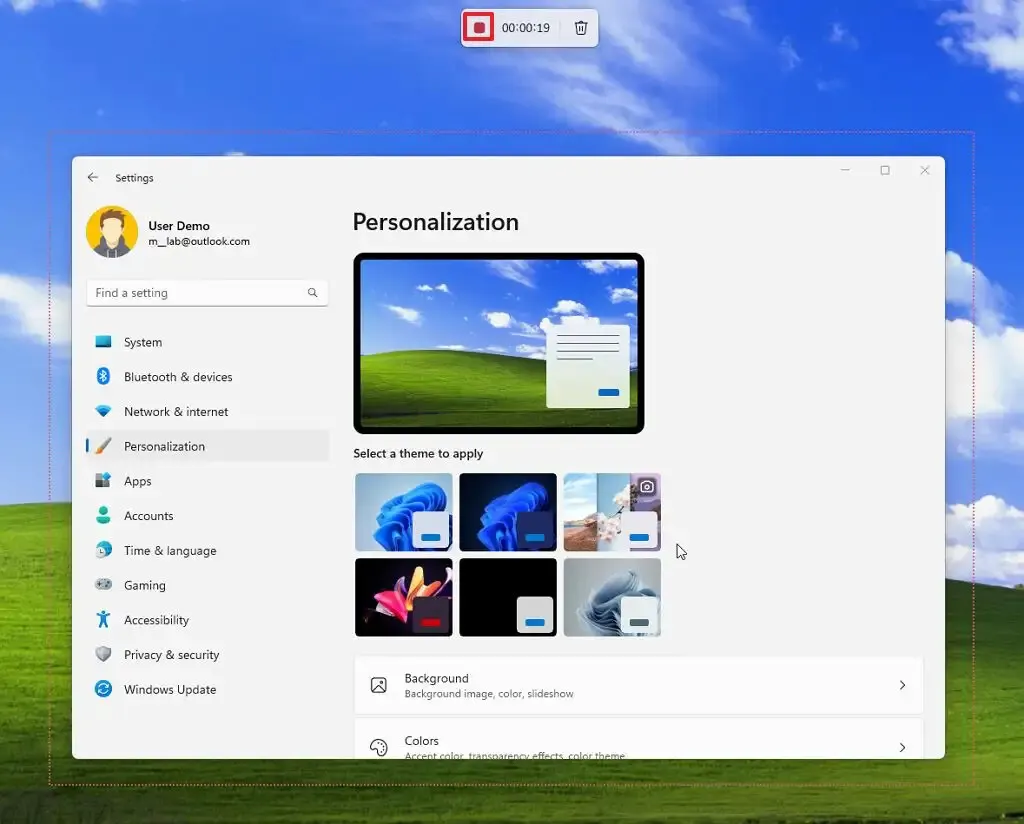
- Select the red square to Stop when you’re done.
- Save the clip from the preview with
Ctrl + Sor the Save icon.
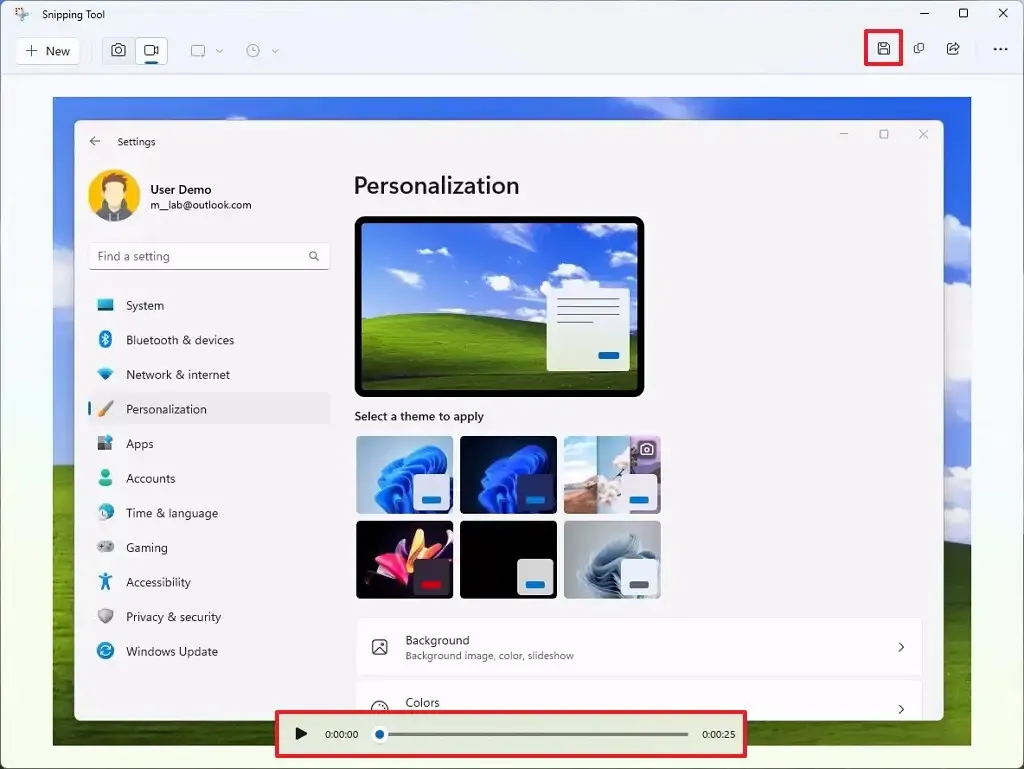
You can pause a recording while it runs. To trim or add captions afterward, choose Edit in Clipchamp from the preview.
Windows 11 Screen Recorder With Audio
If the recording comes out silent or has only your voice, the fix is in two places: the toggles on the recording bar and a default in Snipping Tool’s settings.
- Before pressing Start, turn on both the microphone and system audio icons. The microphone captures your voice, and system audio captures what the PC plays.
- To make that the default, open the three-dot menu in the top right of Snipping Tool, choose Settings, and enable the option to include microphone input when a screen recording starts, along with the system audio option beneath it.
With wireless headphones, make sure the mic and system audio are both unmuted. A user in a Microsoft Q&A thread got only their own voice and none of the trainer’s during a meeting. If no audio options appear at all, the app is too old, so update Snipping Tool in the Microsoft Store. Microsoft’s own learning-center page still says audio isn’t supported, which is outdated for current builds.
Record One App With Xbox Game Bar
Game Bar attaches to the window that’s in focus, so open the app or game first.
- Open the app or game you want to record.
- Press
Windows + Gto open Xbox Game Bar. - In the Capture widget, select Record, or press
Windows + Alt + Rto start and stop. - Toggle the microphone with
Windows + Alt + Mor in the widget. Mute it beforehand if you don’t want your voice in the clip.
If Game Bar won’t open, check Settings > Gaming and make sure Game Bar and captures are on. Quality and limits live under Settings > Gaming > Captures: maximum recording length (30 minutes up to 4 hours), 30 or 60 frames per second, video quality, audio levels and whether the mouse cursor is shown. The default 30 fps is enough for most recordings, and 60 mostly adds file size.
Where Windows 11 Saves Screen Recordings
- Snipping Tool: Videos > Screen Recordings
- Xbox Game Bar: Videos > Captures
Recordings grow quickly, so if the Videos folder starts eating storage, free up disk space on Windows 11 before the next long capture.
When Windows 11 Won’t Record
| Problem | Check |
|---|---|
| No audio toggles in Snipping Tool | Update Snipping Tool from the Microsoft Store. |
| Recording is silent or missing your mic | Open Settings > Privacy & security > Microphone and confirm access is on for the app. |
| Game Bar does nothing on the desktop | It can’t capture the desktop or File Explorer. Use Snipping Tool. |
| Recording stops or fails to save | Check free space on the drive holding your Videos folder. |
A short screen recording often explains something better than a page of text, and you can make one in a couple of minutes. Try a quick test clip first so you know the sound and quality are what you want. Your recordings are ordinary video files you can keep, trim or share.


