
Reaching for a tool on the right-click menu only to find it hidden behind Show more options gets old quickly. Windows 11 can open the full menu straight away, and there is also a way to open it on demand. The steps cover both, plus how to check the result and undo it so you can show more options by default without guesswork.
Table of Contents
Before you start
- This edits the registry. Type the key name exactly as shown, and consider creating a restore point first.
1. Open the Full Menu Once With Shift + Right-Click
Use this if you only need the classic menu occasionally. Nothing is changed, so there is nothing to undo.
- Right-click a file or folder in File Explorer. The Windows 11 menu opens with Show more options at the bottom.
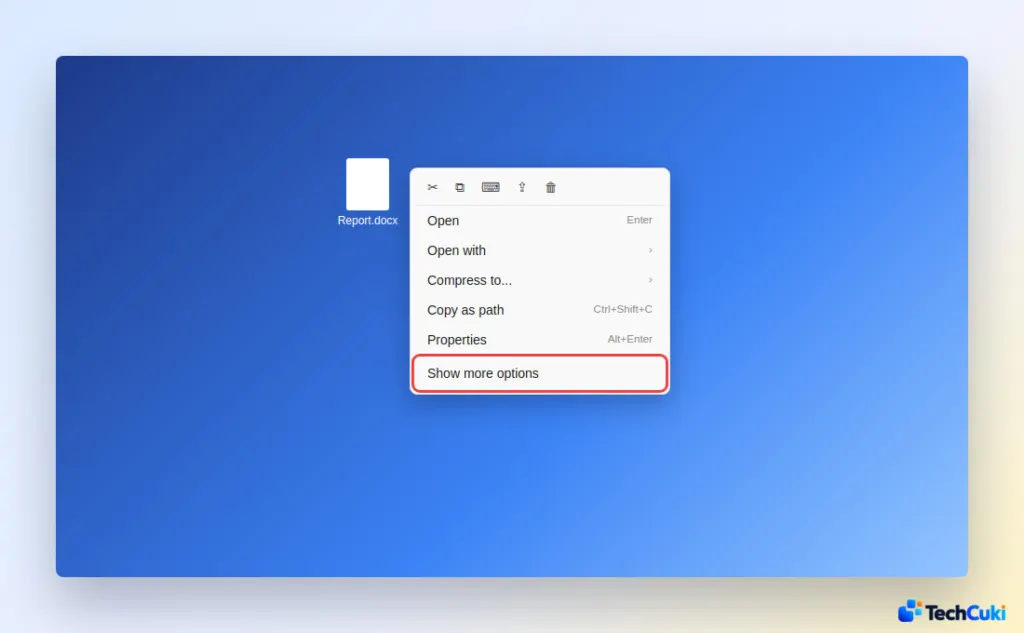
- Hold
Shiftand right-click the same item to get the full menu. Selecting an item and pressingShift+F10does the same.
2. Show More Options by Default With Command Prompt
One reg add command makes the classic menu the default for your account, and it needs no administrator rights.
- Open Command Prompt from the Start menu. Windows Terminal works the same way.
- Paste this command and press
Enter:reg add "HKCU\Software\Classes\CLSID\{86ca1aa0-34aa-4e8b-a509-50c905bae2a2}\InprocServer32" /f /ve - Look for
The operation completed successfully.
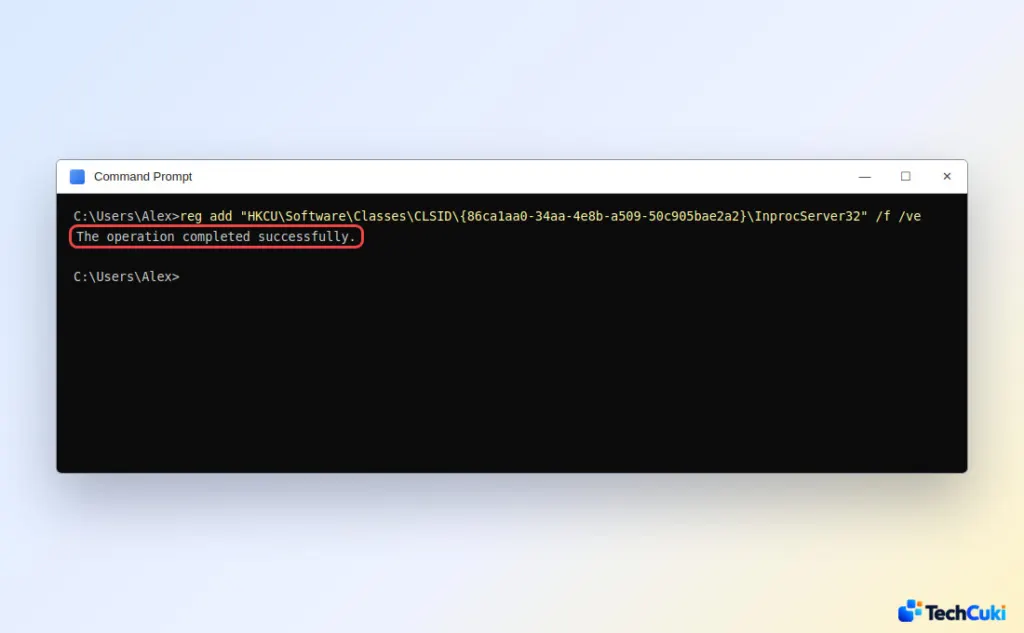
- Restart Windows Explorer so the change loads. Open Task Manager, go to the Processes tab, select Windows Explorer and click Restart. Signing out and back in, or restarting the PC, also works.
Why it works: Windows normally reads the new menu from a DLL named in that key, Windows.UI.FileExplorer.dll in the System32 folder. The command writes an empty default value there (/ve is the default value, /f skips the overwrite prompt), and with nothing to load, Explorer falls back to the classic menu.
3. Show More Options by Default With Registry Editor
This makes the same change by hand, which is handy if you want to see exactly what you are creating.
- Press
Win+R, typeregeditand pressEnter. - Go to
HKEY_CURRENT_USER\Software\Classes\CLSID. Right-click CLSID, choose New > Key and name it{86ca1aa0-34aa-4e8b-a509-50c905bae2a2}. - Right-click that new key, choose New > Key and name it
InprocServer32.
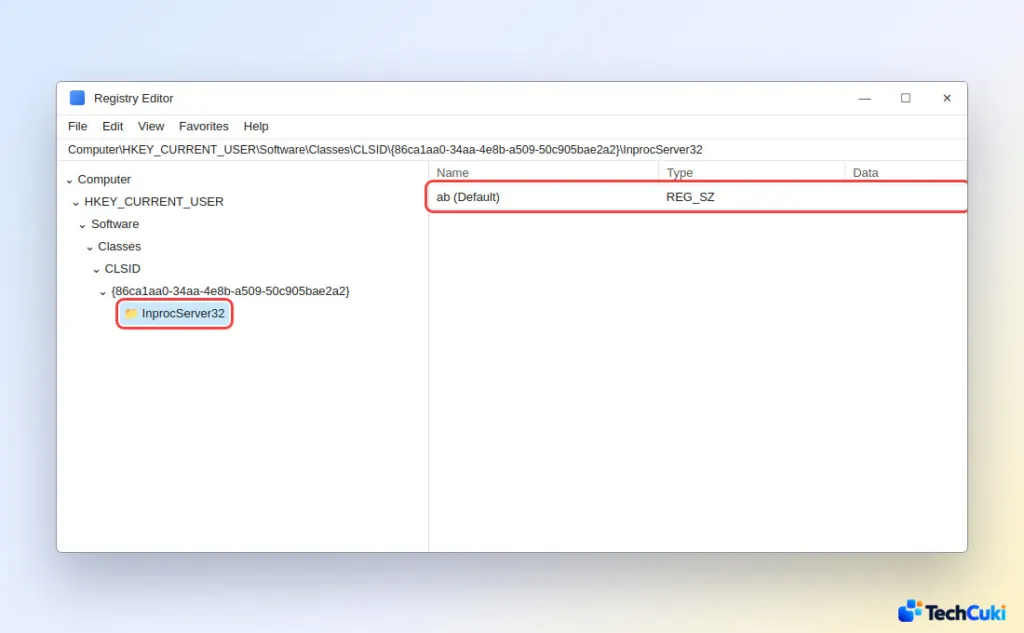
- Select InprocServer32, double-click the (Default) value, leave the value data empty and click OK. The field must be truly blank; the list will then show no data, not the text “(value not set)”.
- Restart Windows Explorer as described in method 2, or sign out and back in.
What the Full Right-Click Menu Looks Like
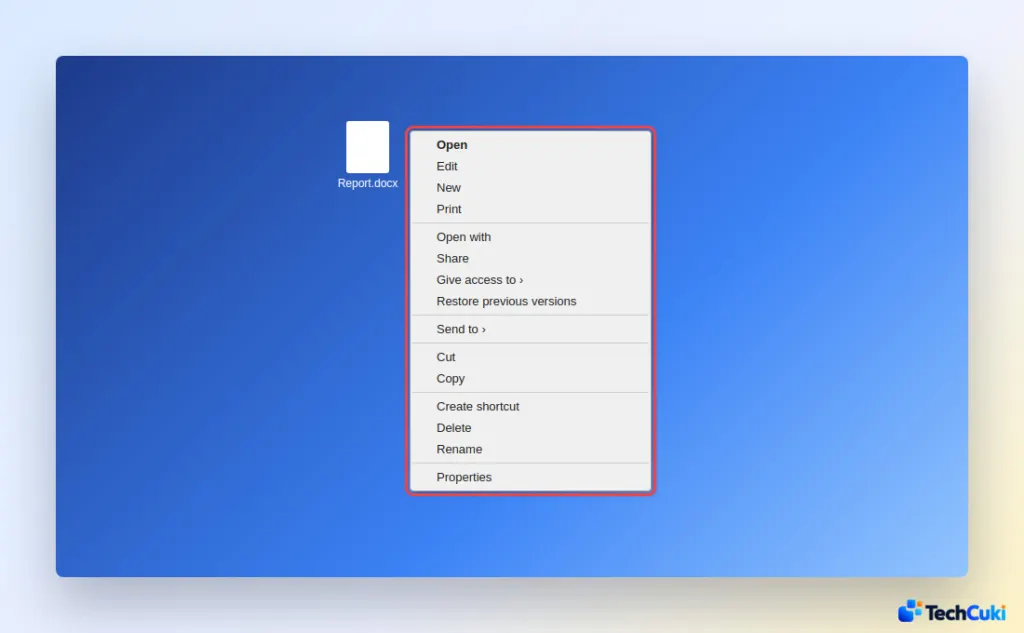
After the restart, right-clicking shows the Windows 10-style menu straight away: Open, Edit, Open with, Send to, Cut, Copy, Create shortcut, Delete, Rename and Properties, plus entries from tools such as 7-Zip. If the menu still looks the new way, Explorer wasn’t restarted; do that step again. Some people report that the classic menu feels slower to appear on certain laptops, and the undo below fixes that.
How to Restore the Default Windows 11 Menu
Deleting the key you created puts the new menu back, and it only affects your account.
- Open Command Prompt and run
reg delete "HKCU\Software\Classes\CLSID\{86ca1aa0-34aa-4e8b-a509-50c905bae2a2}" /f. - Restart Windows Explorer or sign out and back in.
In Registry Editor, go to HKEY_CURRENT_USER\Software\Classes\CLSID, right-click the {86ca1aa0-34aa-4e8b-a509-50c905bae2a2} key, choose Delete, then restart Explorer.
Fewer clicks add up over a busy day, especially if you rely on right-click tools often. The change affects only your account and can be reversed, so it is easy to try and adjust.


