
Random restarts, blue screens with no pattern and apps that crash for no clear reason can all point to faulty memory. Windows 11 includes a way to check for it, though a single result is not always conclusive. The sections below show how to test RAM in Windows 11, what the results mean, and what to do if a stick turns out to be failing.
Table of Contents
Before you start
- Save your work and close all open apps. The Windows Memory Diagnostic test restarts your PC.
Signs Your RAM Might Be Failing
Bad RAM rarely gives one clear error. It shows up as instability:
- Random crashes or blue screens, sometimes with memory-related error messages
- Freezes, or apps that crash for no clear reason
- Files that get corrupted
- The PC restarting on its own, beeping, or not booting
Run Windows Memory Diagnostic to Test RAM in Windows 11
The tool needs no download, but it only runs while Windows is not loaded, so it always involves a restart.
- Press
Windows + Rto open the Run dialog. - Type
mdsched.exeand click OK. You can also search the Start menu for “Windows Memory Diagnostic.”

- Select Restart now and check for problems (recommended). If you can’t restart now, the other option, Check for problems the next time I start my computer, schedules the test for your next boot.

The PC restarts into a blue test screen and runs the Standard test with 2 passes, which takes several minutes to an hour or more depending on how much RAM you have. The Standard mix is usually enough to find a failing module.
- To change the test, press
F1on the test screen. Choose Basic, Standard or Extended and set the number of passes. PressTabto move between options, including the cache setting: turning the cache off makes the tool read RAM directly, which is a harsher test. PressF10to apply the settings and start.

Windows restarts on its own when the test ends. Use Extended when Standard passes but you still suspect the memory, since it runs every Standard test plus extra cache-disabled ones.
How to See Windows Memory Diagnostic Results
A notification usually appears after you sign in, whether the test found a problem or not. If it vanished, the result is in Event Viewer.
- Right-click the Start button and select Event Viewer.
- Go to Windows Logs > System.
- Select Filter Current Log (or Find) and look for the source
MemoryDiagnostics-Results. The result is logged under event ID 1201 or 1101.

“The Windows Memory Diagnostic tested the computer’s memory and detected no errors” means this test passed, and entries marked Information are normal. Seeing only the “scheduled the testing” message and no result means the test never ran to completion, so run it again and let the PC finish both restarts untouched.
Run a Deeper Test With MemTest86
MemTest86 runs outside Windows and checks more thoroughly. Use it when Windows Memory Diagnostic passes but the crashes continue, or when that tool reports errors you want confirmed.
- Download the free version from memtest86.com and create the bootable USB drive by following the instructions on that site.
- Boot your PC from the USB drive, changing the boot order in the BIOS if needed, and let the test run for at least 4 passes. A full run can take several hours on a large amount of RAM.
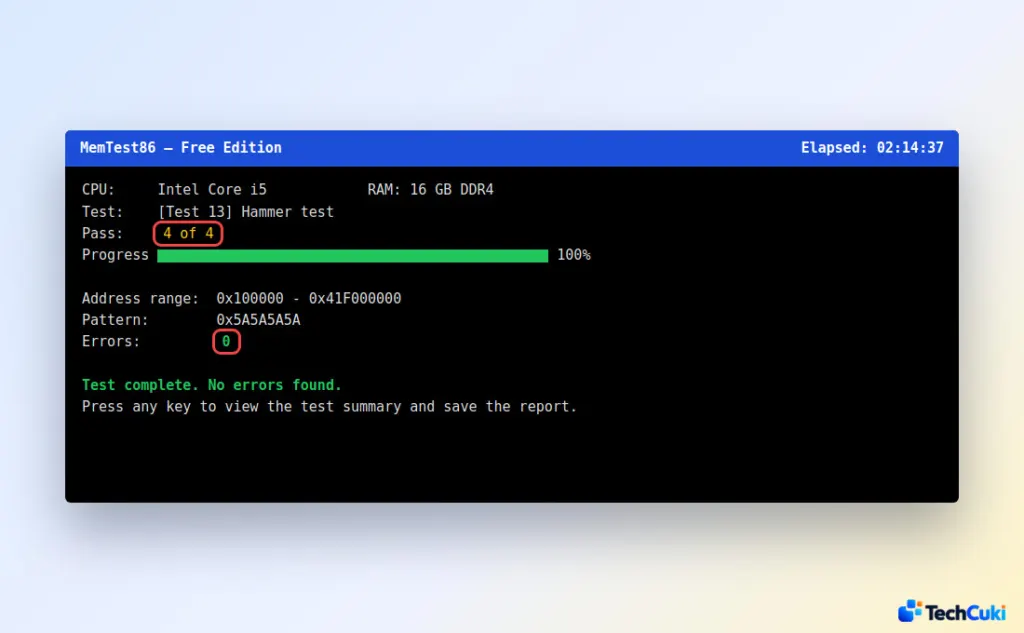
If it reports errors, save the HTML results file. It is what RAM makers’ support teams ask for.
What to Do If Your RAM Test Finds Errors
Errors usually mean one stick is faulty, but a loose stick or an unstable overclock can look identical, so rule those out before buying anything.
- Turn off the PC and reseat the RAM sticks, making sure each one is firmly in its slot.
- Open the BIOS and disable XMP or EXPO overclocking, then run the test again. Resetting the BIOS to defaults removes any other overclock too, and updating the BIOS and chipset driver first rules out compatibility bugs.
- Test one stick at a time. If a stick fails alone in a slot that worked with another stick, the stick is the problem.
- Replace the faulty module. Laptops with soldered RAM need a repair service.
If the errors disappear when every stick is tested alone, the kit is probably fine and the cause lies elsewhere, such as heat. Checking your CPU temperature is a sensible next step, since overheating produces the same crashes. If the PC feels slow rather than unstable, see Windows 11 high memory usage instead.
One clean result rules out little, so a PC that keeps crashing deserves more than a single check before any money goes on new parts. Many memory problems turn out to be simple and free to rule out first.


