
An emulator or virtual machine that won’t start can leave you guessing what your PC is missing. If you need to enable virtualization in Windows 11, the setting may be off at the hardware level, and Windows has its own part to play as well. The steps below show how to check your PC first, switch it on and confirm it’s working.
Table of Contents
1. Check Whether Virtualization Is Already On
Task Manager shows the current state in one line.
- Press
Ctrl + Shift + Escto open Task Manager. - Select the Performance tab, then click CPU.
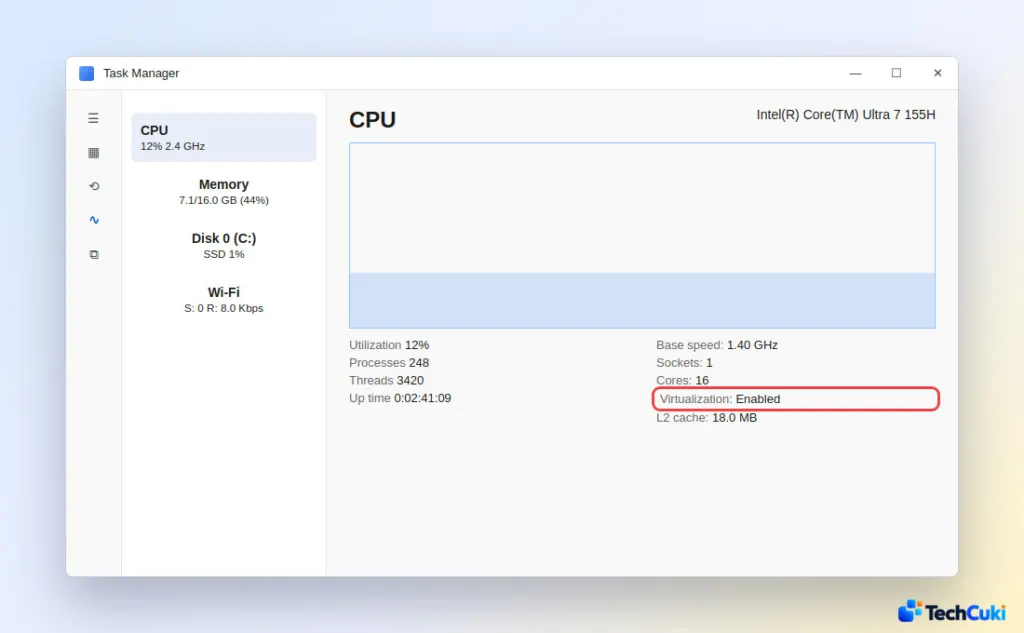
- Read the Virtualization line.
| It says | Do this |
|---|---|
| Enabled | Skip to section 3. Surface devices ship with it already enabled. |
| Disabled | Section 2: change the setting in UEFI. |
2. How to Enable Virtualization in the UEFI BIOS
The hardware setting lives in firmware, not in Windows, so a Disabled reading means a trip through the UEFI menu. If you want other ways in, see how to get to the BIOS in Windows 11. Open these steps on another device first, since you will lose this screen on restart.
- Go to Settings > System > Recovery, then click Restart now next to Advanced startup.
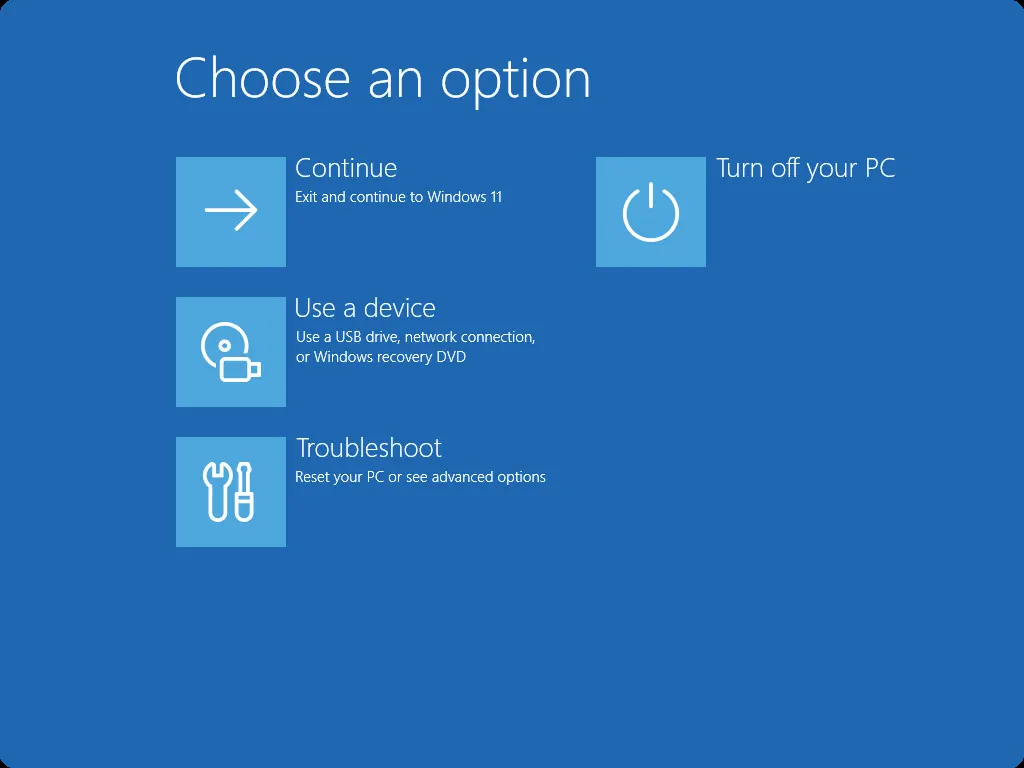
- On the Choose an option screen, select Troubleshoot > Advanced options > UEFI Firmware Settings, then click Restart.
- Find the setting, usually under Advanced or CPU Configuration, and set it to Enabled.
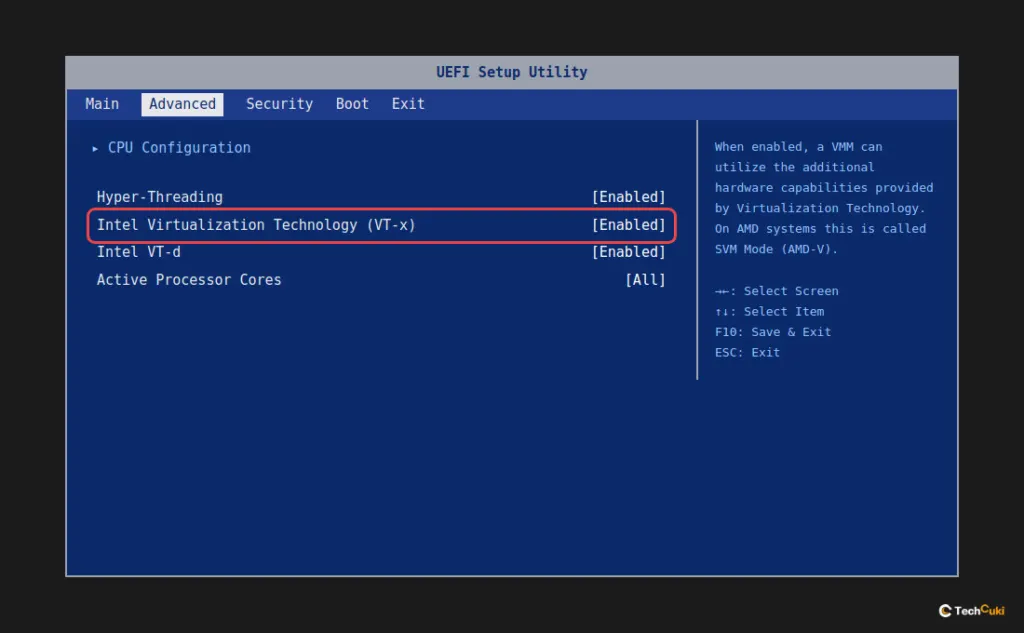
- Save and exit, often with
F10. The PC restarts, and Task Manager should now read Enabled.
The label depends on the CPU and the maker:
- Intel: Intel Virtualization Technology, VT-x or Intel(VMX) Virtualization Technology.
- AMD: SVM Mode or AMD-V.
- Some menus simply call it “hardware VT”.
On an ASUS board, for example, the setting is under Advanced > CPU Configuration, and you may need F7 to switch from EZ Mode to Advanced Mode first. Change only this one option; touching other settings can stop Windows from starting. Undoing it is the same path with the option set back to Disabled.
3. Turn On Virtual Machine Platform or Hyper-V
Windows needs its own layer switched on as well, and this one is often missed on a PC upgraded from Windows 10.
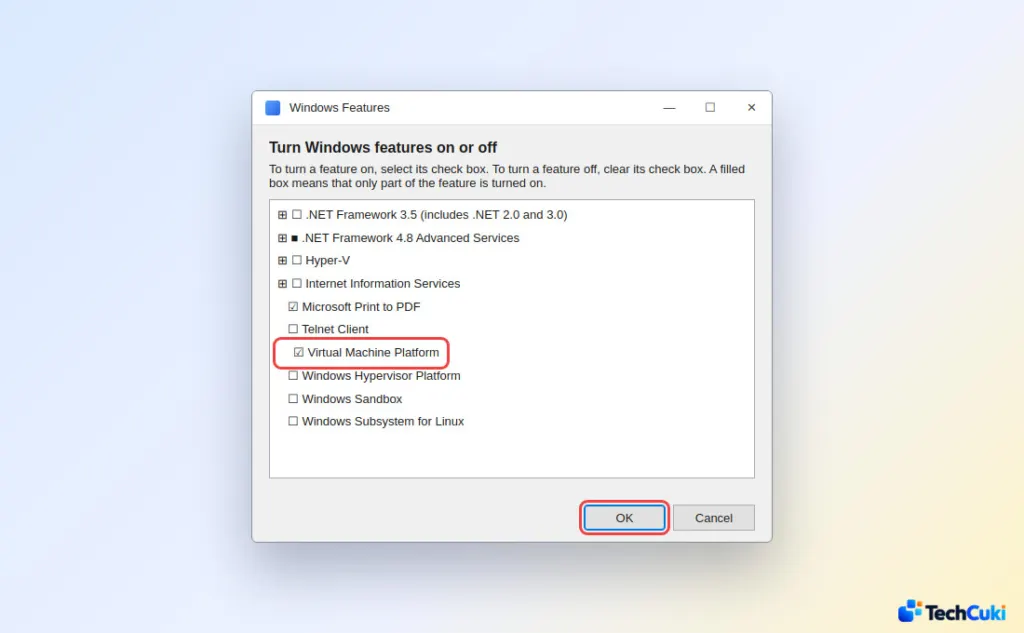
- Click Start, type Windows features, and open Turn Windows features on or off.
- Check Virtual Machine Platform. Add Hyper-V only if you want Microsoft’s VM manager; it is offered on Pro, Enterprise and Education editions only.
- Click OK, and restart if Windows asks.
4. The Virtualization Option Is Not in My BIOS
The CPU may not support it, or the maker may have hidden it. Look up your exact processor on the maker’s spec page for its virtualization feature (VT-x on Intel). If the CPU supports it, check the PC or motherboard maker’s support page for a newer BIOS, because an update can expose the option. Some laptops simply never include the switch. Do not flash an unofficial or modified BIOS to force it, as that can leave the computer unable to boot.
Can You Enable Virtualization Without the BIOS?
Not the hardware setting. Windows can only enable the features that use it, such as Virtual Machine Platform and Hyper-V. If Task Manager already says Enabled, you do not need the BIOS at all.
Is It Safe to Leave Virtualization On?
Yes. It is a standard CPU feature that is already on by default on many PCs, and Windows uses it for some of its own security features. Turn it off and apps that need it, like emulators and virtual machines, will fail to launch.
What you need depends on the apps you plan to run, and many everyday emulators ask for less than you might expect. If you also need a related security change, a companion guide covers how to enable TPM in Windows 11.


