
Typing the 48-digit key and being turned away by the recovery screen is stressful when your files are on the line. When BitLocker recovery key not working is the problem, the key itself is often fine, and the cause is something smaller that can be checked. The sections cover why a key gets rejected, what to check on the recovery screen and how to get out of a recovery loop.
Table of Contents
- BitLocker Recovery Key Not Working: Why It Gets Rejected
- Match the Recovery Key ID to the Right Key
- Enter the Recovery Key Correctly
- Check Other Places Your Key Might Be Saved
- Open the Drive From Command Prompt
- Stop the BitLocker Recovery Loop
- If the BitLocker Recovery Key Not Working Problem Persists: Last Options
BitLocker Recovery Key Not Working: Why It Gets Rejected
Match what you see on screen to the likely cause, then jump to that fix.
| What happens | Likely cause | Go to |
|---|---|---|
| “Incorrect key” or the digits won’t go in | Key ID mismatch, or a key typed wrong | Sections 1 and 2 |
| No account holds a matching Key ID | Key saved elsewhere | Section 3 |
| Key accepted, screen returns on every restart | Recovery loop | Sections 4 and 5 |
| Two or more keys, and the prompt names one drive | Key for the wrong drive | Section 1 |
A loop often follows a BIOS or firmware update, a Secure Boot change, a hardware change or a Windows update. For the trigger behind the screen itself, see our guide on why the BitLocker recovery screen appears.
1. Match the Recovery Key ID to the Right Key
A recovery key only opens the volume it was created for, so the Key ID on the screen has to match the ID of the key you type.
- On the BitLocker recovery screen, note the Recovery key ID. Only the first 8 characters are shown.
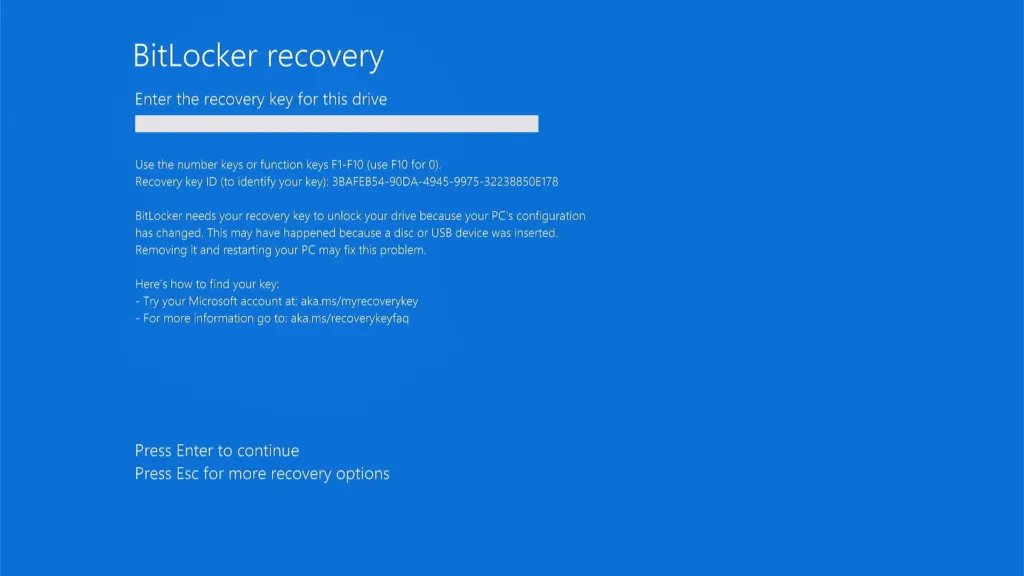
- Sign in to your Microsoft account at account.microsoft.com/devices/recoverykey and find the key whose ID matches. Accounts often hold several keys from old PCs, reinstalls and other drives. A PC with a second internal drive can have one key for Windows and another for the data drive, and the prompt asks for the one that belongs to the drive it names.
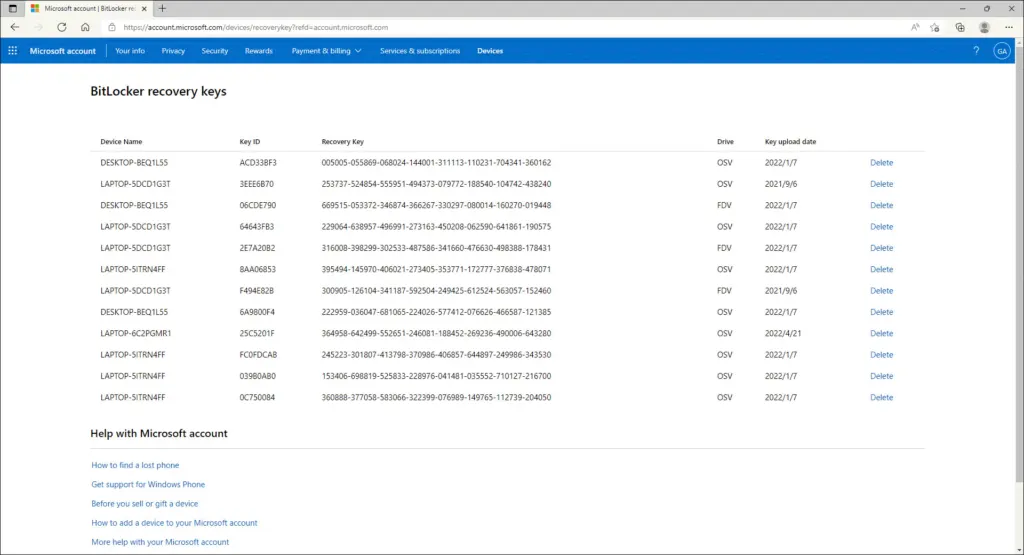
- If no key in that account matches, check any other Microsoft accounts you’ve used. After a motherboard or SSD swap, or when an old drive is read through a USB adapter, the key you need is the one for the old volume, not the new PC.
2. Enter the Recovery Key Correctly
A correct key can still fail when the keyboard doesn’t register the digits.
- Type only the 48 digits, in eight groups of six. The key contains no letters.
- Use the number keys above the letters, or the function keys F1-F10 (F10 enters 0), as the screen suggests. If the number row doesn’t respond, which can happen on some laptops, with Num Lock on or on an external keyboard, use the function keys instead.
- The recovery screen uses a US keyboard layout, so a different layout set on your keyboard can shift keys.
- Confirm that the drive named on the screen is the one your key belongs to, such as C: rather than a separate data drive.
3. Check Other Places Your Key Might Be Saved
If none of your Microsoft accounts shows a matching ID, the key may be stored somewhere else.
- Work or school accounts managed through Microsoft Entra ID or your IT admin
- A USB flash drive or file where you saved the key
- A printed copy
Our guide to finding your BitLocker recovery key lists where keys are stored.
4. Open the Drive From Command Prompt
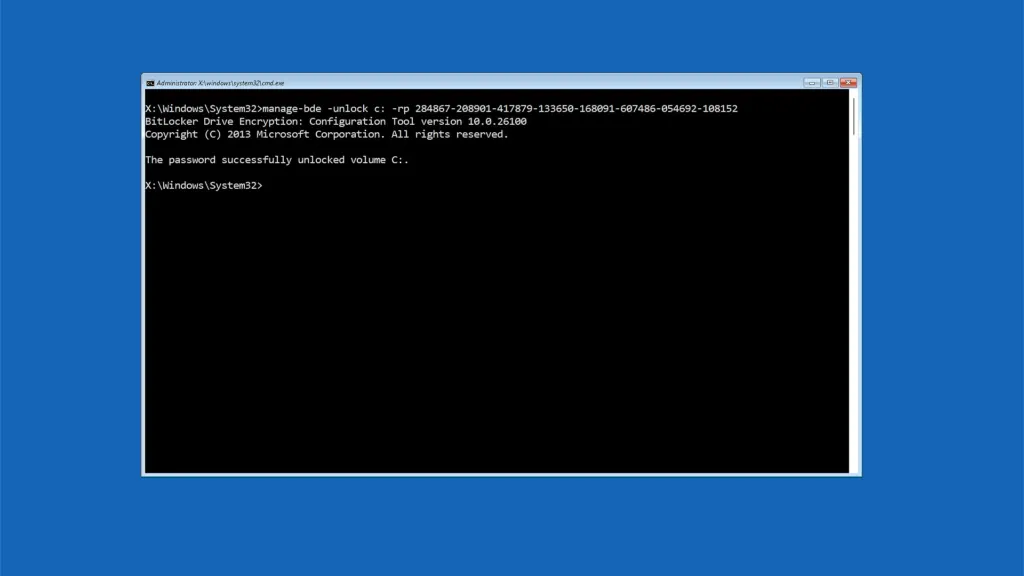
When you hold the matching key but the blue screen keeps rejecting it, Command Prompt in the recovery environment bypasses that screen and opens the volume directly.
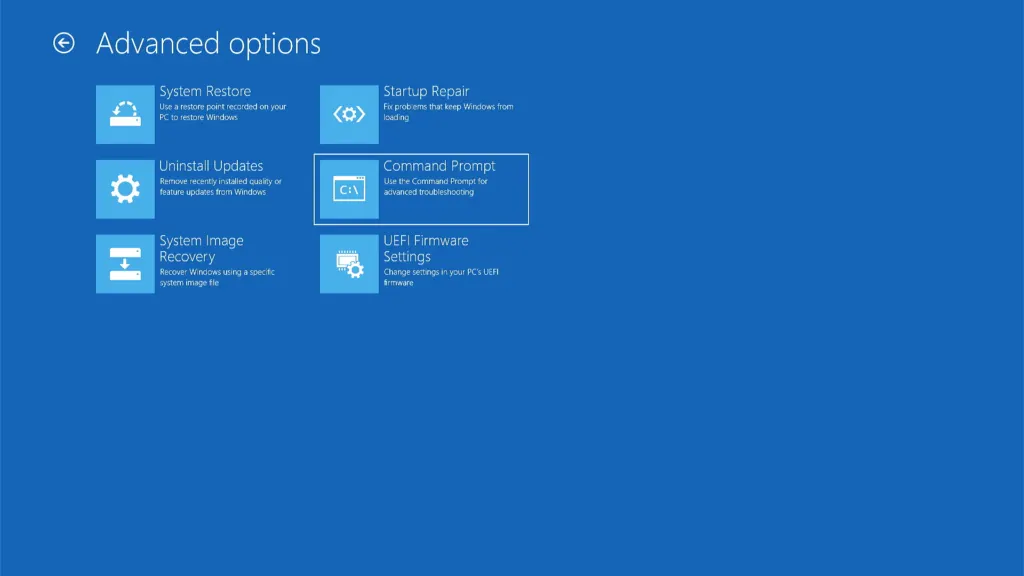
- On the recovery screen, select Skip this drive, then go to Advanced options > Troubleshoot > Advanced options > Command Prompt. If there is no Skip option, shut the PC down with the power button and power it on again three times in a row to land in the repair environment.
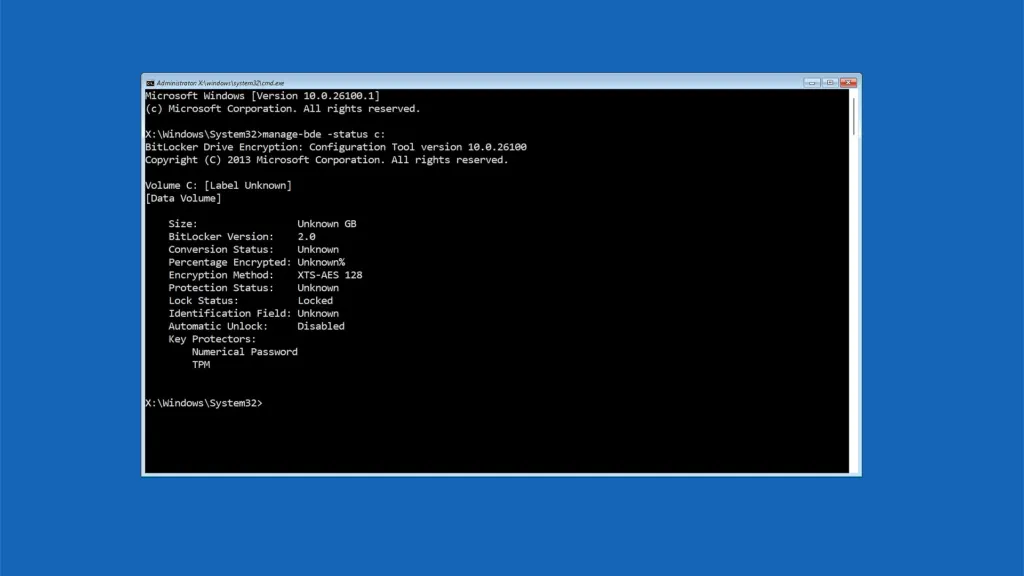
- Type
manage-bde -statusand press Enter. The drive letter can differ from what Windows shows, so find the volume whose Conversion Status is Encrypted and read its Lock Status. The next commands use C: as the example.
- Type
manage-bde -unlock c: -rp <48-digit key>, replacing the placeholder with your key, and press Enter. - If the command works, you’ll see “The password successfully unlocked volume C:”. If it says the password is incorrect, the key doesn’t belong to this volume, so go back to Section 1.
5. Stop the BitLocker Recovery Loop
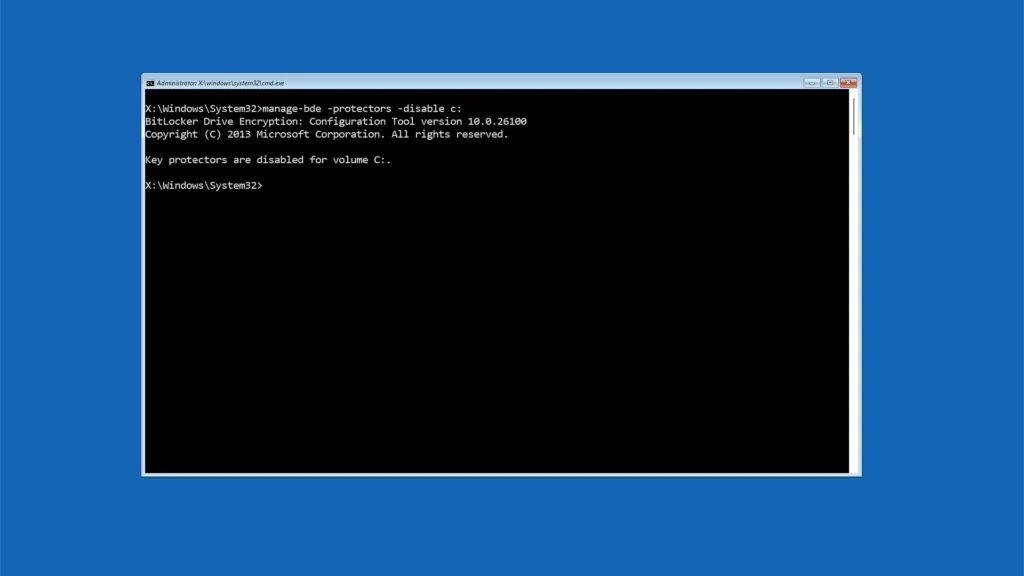
After the unlock, suspending protection lets Windows start without BitLocker re-checking the boot state that caused the loop.
- Type
manage-bde -protectors -disable c:and press Enter. In the recovery environment this holds for one restart only, so don’t skip the last step below.
- Type
exit, then select Continue to Windows. - Press Start, search for Manage BitLocker, and select Resume protection. The drive should show protection on again.
Before the next BIOS or TPM firmware update, open an elevated PowerShell window and run Suspend-BitLocker -MountPoint "C:" -RebootCount 0. Firmware updates often restart more than once, and a count of 0 keeps protection suspended until you run Resume-BitLocker -MountPoint "C:" afterward. Our guide on how to disable BitLocker on Windows 11 shows where the Suspend protection option lives. Also back up the key again once you’re in Windows.
Two version-specific cases are worth knowing. On Windows 11 24H2, rolling back an update to a build earlier than 26100.4770 after installing KB5063878 or later can make BitLocker PIN unlock fail even with the correct PIN. Unlock with the recovery password and install KB5062660 or later. On managed devices with a TPM 1.2 chip and Credential Guard or Device Guard, a recovery prompt at every restart with error 0xC0210000 comes from Secure Launch, which TPM 1.2 doesn’t support, and the IT admin has to change that policy.
If the BitLocker Recovery Key Not Working Problem Persists: Last Options
If no key matches the drive, the encrypted data can’t be decrypted, and the only remaining route is to erase the drive and start fresh.
- Work PC: contact your IT department, which can look up the key in Microsoft Entra ID or Active Directory.
- Your own PC: use reset Windows 11 to factory settings with Remove everything, or install Windows 11 from a USB drive. Both erase the drive, so use them only when the files are backed up elsewhere or expendable.
A rejected key is rarely the end of the road, and a few careful checks often settle it. If nothing works, Microsoft support can help confirm what is possible for your account. Once you are back in Windows, keep a copy of the key somewhere other than the PC.


