
Opening Windows Security and finding a missing page where an important protection setting should be is confusing. The “Core isolation page not available” message points to a system, firmware or software condition rather than an infection. The sections below go from the most likely cause to the least and show how to confirm the feature works afterward.
Table of Contents
- Core Isolation Page Not Available: Why It Happens
- Turn On Virtualization in the BIOS
- Remove Third-Party Antivirus Completely
- Repair or Reset the Windows Security App
- Check for a Policy That Hides Device Security
- Enable Memory Integrity From the Registry
- Repair Windows System Files
- Confirm Core Isolation Is Working
- If the “Core Isolation Page Not Available” Message Won’t Go Away
Core Isolation Page Not Available: Why It Happens
The page shows “Page not available – The page you are trying to access has no supported features and is not available.” Device security may also say “Standard hardware security not supported.”
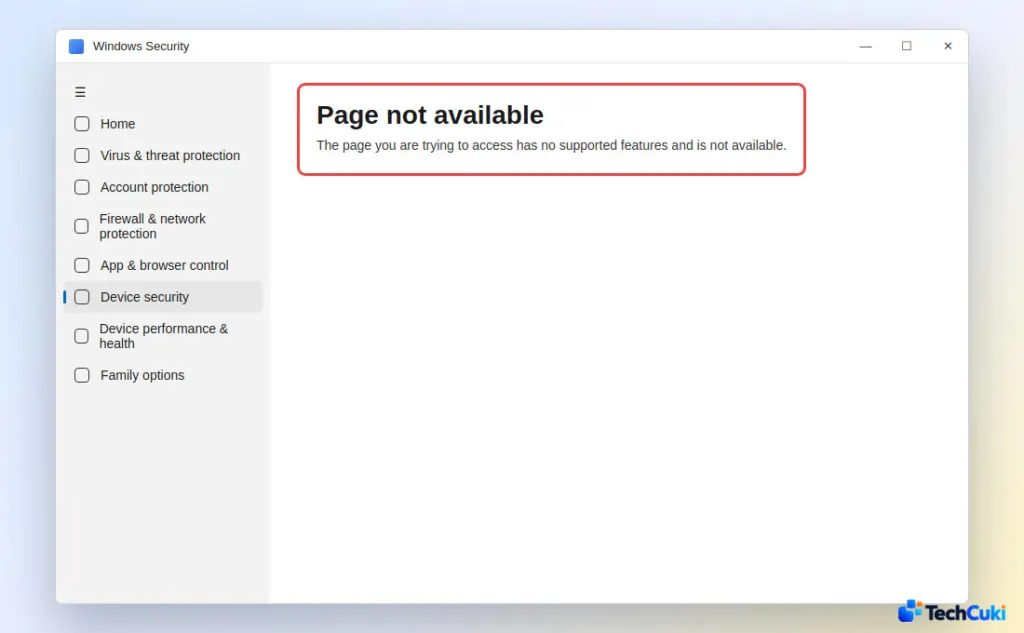
Core isolation needs a 64-bit CPU with virtualization extensions (Intel VT-x, or AMD-V, labeled “SVM Mode” on AMD boards) and SLAT, enabled in firmware. It works on Windows 11 Home and Pro and on Windows 10. Match your situation to the likely cause:
| What happened | Likely cause | Go to |
|---|---|---|
| New PC or BIOS reset | Virtualization disabled | Fix 1 |
| After removing Norton, McAfee or similar | Leftover antivirus components | Fix 2 |
| Other Windows Security pages also broken | Damaged Windows Security app | Fix 3 |
| Work PC or after a tweak tool | Policy hiding Device security | Fix 4 |
| Virtualization on, page still missing | Registry or system files | Fix 5 and 6 |
1. Turn On Virtualization in the BIOS
Check this first. It was the accepted fix in a long Microsoft Q&A thread about this exact message.
- Press
Ctrl+Shift+Escto open Task Manager, then go to Performance > CPU and read the Virtualization line.
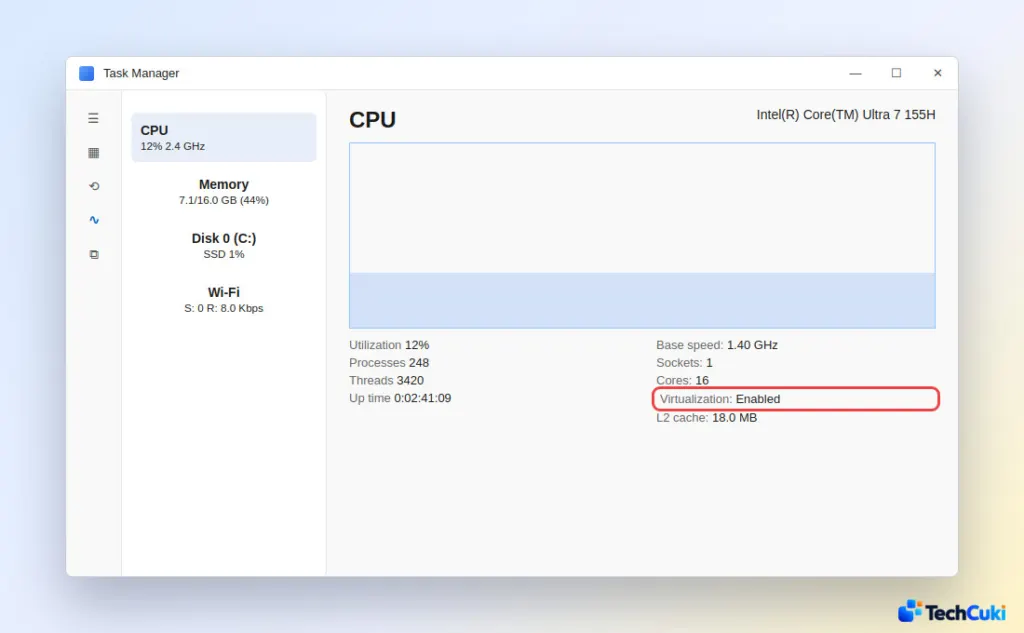
- If it says Disabled, open Settings > System > Recovery, select Restart now next to Advanced startup, then choose Troubleshoot > Advanced options > UEFI Firmware Settings > Restart.
- Find Intel Virtualization Technology (VT-x) or SVM Mode, set it to Enabled, and press
F10to save.
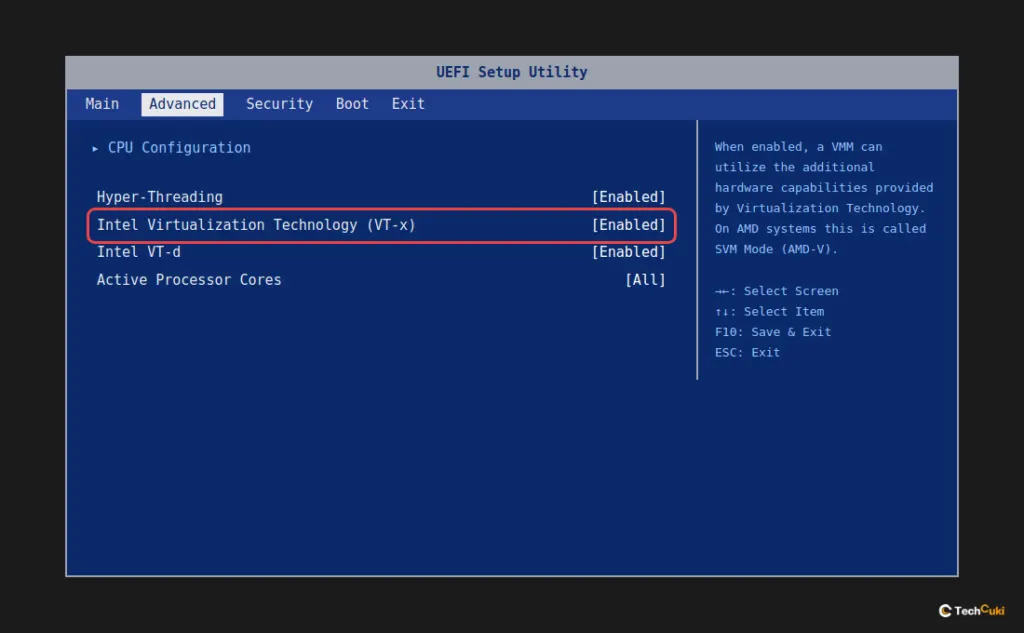
The option sits under different menus by maker: Advanced, CPU Configuration, or the Configuration tab on HP and Lenovo laptops. Our guide to enabling virtualization in Windows 11 has brand details, and getting to the BIOS in Windows 11 covers other entry methods. After the reboot, the Core isolation section should appear.
2. Remove Third-Party Antivirus Completely
If the problem began after you removed a preinstalled antivirus, uninstall it again with the vendor’s own tool, such as the Norton Remove and Reinstall tool or the McAfee Consumer Product Removal tool, instead of only using Settings. Leftover components can keep Windows Security pages unavailable. Restart afterward.
3. Repair or Reset the Windows Security App
Type Windows Security in Start, right-click the result and choose App settings. Try Repair first, and if the page is still missing, use Reset.
You can do the same from an administrator PowerShell window, then restart:
Get-AppxPackage Microsoft.SecHealthUI -AllUsers | Reset-AppxPackage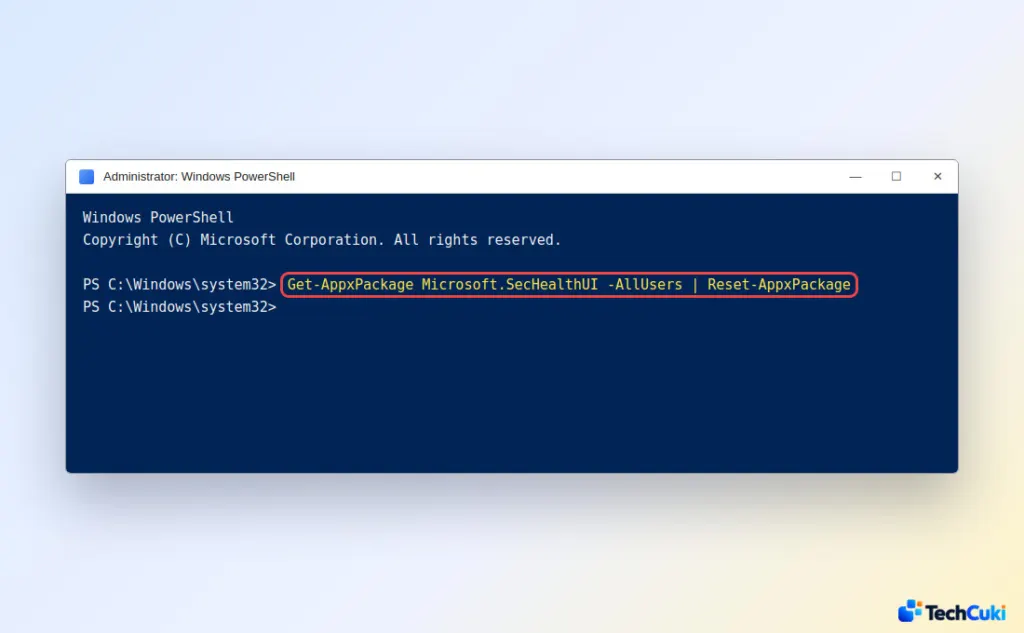
4. Check for a Policy That Hides Device Security
On Windows Pro, open Group Policy and go to Computer Configuration > Administrative Templates > Windows Components > Windows Security > Device security. The setting Hide the Device security area should be Not configured.
The registry equivalent is the value UILockdown under HKLM\SOFTWARE\Policies\Microsoft\Windows Defender Security Center\Device security. A value of 1 hides the area, so delete it or set it to 0. On a work or school PC managed by IT, ask IT instead of changing it yourself.
5. Enable Memory Integrity From the Registry
Use this when virtualization is on but the page stays missing. Back up the registry first, because an incompatible driver can make the PC fail to boot or cause Windows to turn the setting off again.
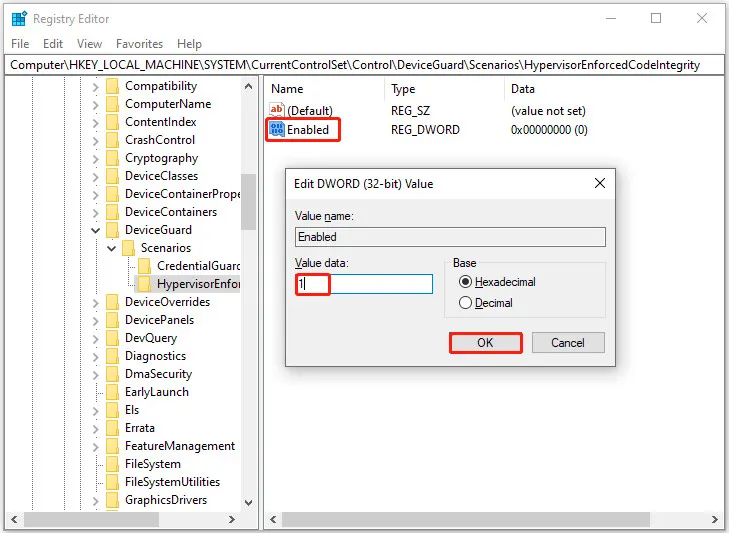
- Open Registry Editor, go to
HKLM\SYSTEM\CurrentControlSet\Control\DeviceGuardand make sure the DWORDEnableVirtualizationBasedSecurityexists and is set to1. - Go one level deeper to
Scenarios\HypervisorEnforcedCodeIntegrity, creating the key if it is missing. - Create or edit the DWORD value
Enabledand set it to1.
- Restart the PC.
To undo it, set the value back to 0, from Safe Mode if Windows will not start. For blocked toggles and incompatible drivers, see our guide to enabling memory integrity in Windows 11.
6. Repair Windows System Files
Install pending Windows updates, then run these in an administrator Command Prompt, one after the other:
sfc /scannow
DISM /Online /Cleanup-Image /RestoreHealth
Confirm Core Isolation Is Working
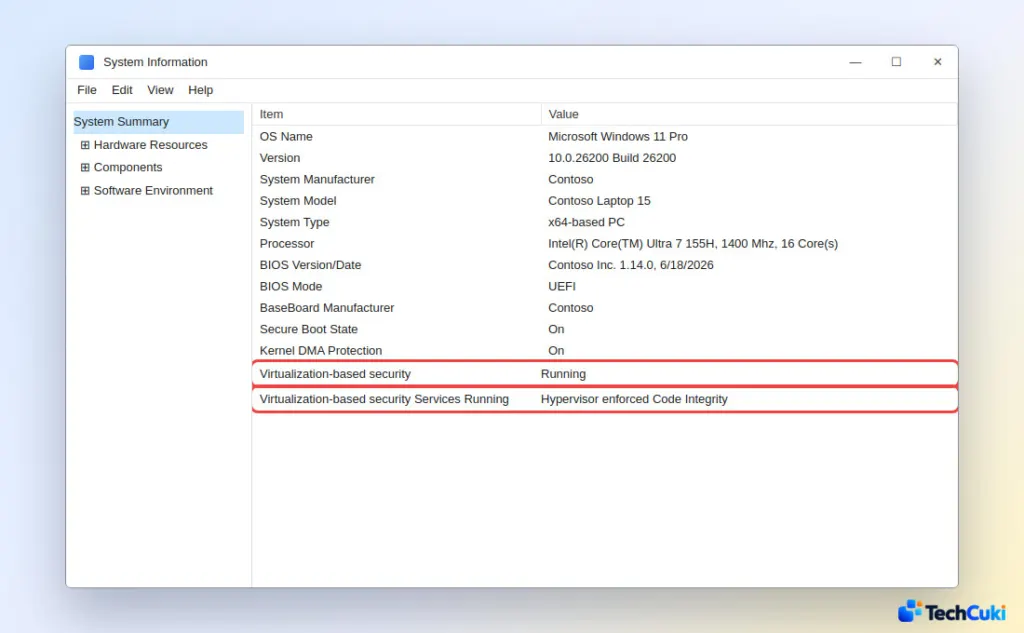
Press the Windows key, type msinfo32, and open System Summary. You want Virtualization-based security to say Running, and Virtualization-based security Services Running to list Hypervisor enforced Code Integrity.
If the “Core Isolation Page Not Available” Message Won’t Go Away
If virtualization is on, no third-party antivirus remains, the app is reset and System Information still shows virtualization-based security as not enabled, try an in-place repair upgrade: run setup.exe from a Windows 11 ISO and keep your files and apps. Your last option is resetting Windows 11 to factory settings. PCs that bypassed the Windows 11 requirements, with very old CPUs lacking SLAT or virtualization, may never show the page, and that is a hardware limit.
Once the page is back, it is worth checking occasionally that the protection stays on, because system changes can quietly undo it. If the page still will not show after careful troubleshooting, Microsoft support or your PC maker can help with the rest.


