
A warning in Windows Security about a switched-off protection is easy to ignore, but it concerns one of the deeper safeguards in the system. The setting can be off for several reasons, from a feature that was never turned on to something on the PC that stops it from starting. The sections below show how to enable memory integrity, what to check when it will not turn on, and how to confirm it is running.
Table of Contents
1. How to Enable Memory Integrity in Windows 11
The switch lives under Core isolation in Windows Security. Turn it on, approve the prompt, and restart.
- Click Start, type Core isolation, and open it. You can also open Windows Security and select Device security.
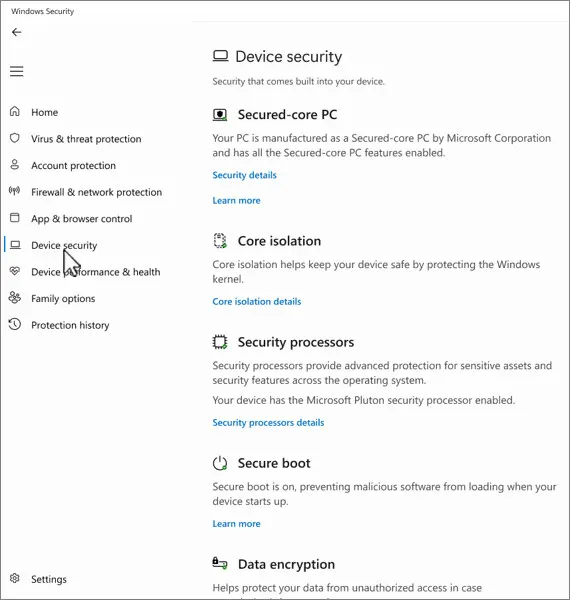
- Select Core isolation details and find the Memory integrity switch, which is set to Off if the feature is inactive.
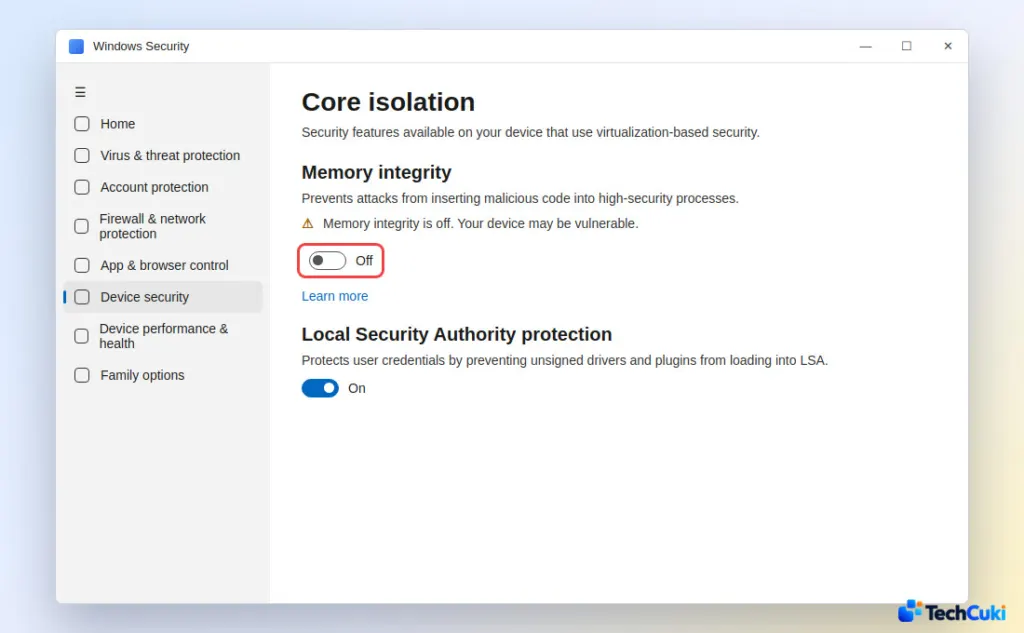
- Set Memory integrity to On, approve the User Account Control prompt, and restart your PC.
Every change needs a restart, so save your work first. If it won’t turn on or the whole Core isolation page is missing, use the table below.
2. Why You Can’t Enable Memory Integrity
What you see on screen points to the cause, so match it before changing anything.
| What you see | Cause | Fix |
|---|---|---|
| No Core isolation page; Device security says standard hardware security is not supported | Hardware virtualization is off in firmware | Turn on virtualization in BIOS |
| A message with Review incompatible drivers | A driver can’t run under memory integrity | Update or remove that driver |
| Switch fails with no driver listed | Pending updates or a Windows Security glitch | Install updates and restart |
Virtualization is turned off
Memory integrity runs inside a virtual environment, so hardware virtualization (called SVM on AMD boards, and often “Virtualization Technology” on Intel) has to be on in UEFI/BIOS. Users in a Microsoft support thread found the Core isolation page appeared once they enabled it. Do that first with our guide to turning on virtualization in Windows 11, then repeat the steps above. If you’ve never opened the firmware menu, getting into BIOS in Windows 11 shows how.
A driver is incompatible
Windows lists the exact driver that blocks the switch, and an updated version from the device maker often clears it.
- Select Review incompatible drivers from the message.
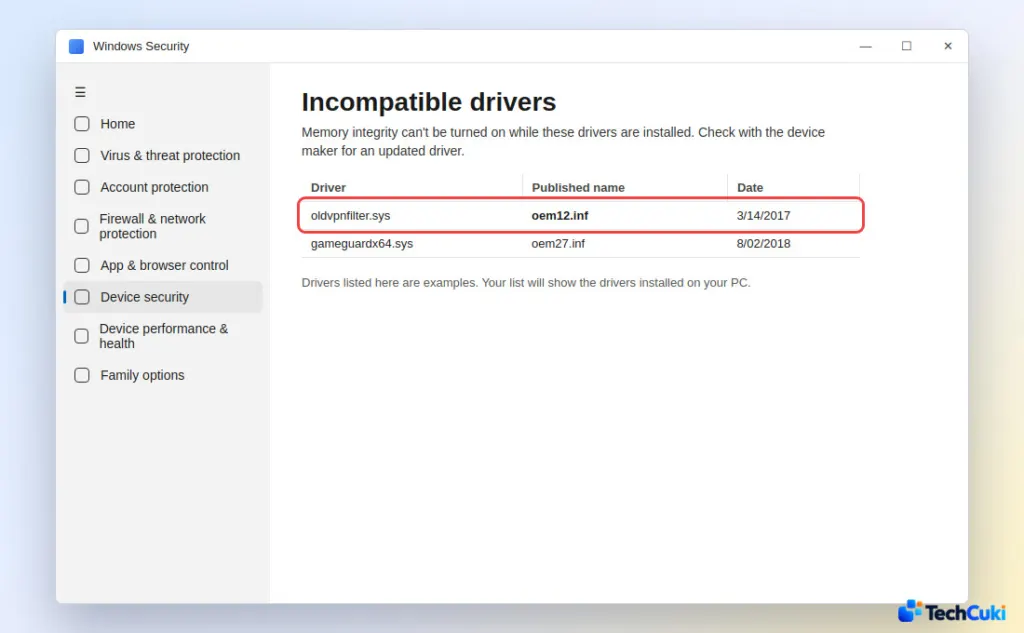
- Note the driver file and its published name, such as
oem12.inf. Look for a newer driver on the device maker’s website. Our steps to update drivers in Windows 11 help if you’re unsure how. - If you don’t use the device or app that installed it, removing the driver is the other option.
Treat removal as advanced. Deleting a driver a device relies on stops that device working, so create a restore point first. Anti-cheat and storage drivers show up often in community reports of this blocker.
- Open Terminal (Admin) and run
pnputil /enum-driversto find the published name.dism /online /get-drivers /format:tablelists them in a table. - Run
pnputil /delete-driver oem12.inf /uninstall /force, replacingoem12.infwith your driver’s published name.
Updates are pending
Install anything waiting before you retry, because a later Windows Security update has fixed this switch for some users.
- Open Settings > Windows Update, select Check for updates, install what’s offered, and restart.
3. Check That Memory Integrity Is Running
The switch can say On while the protection isn’t active yet, so System Information is the real test.
- Press
Win+R, typemsinfo32, and press Enter. - Scroll to the bottom of the System Summary section.
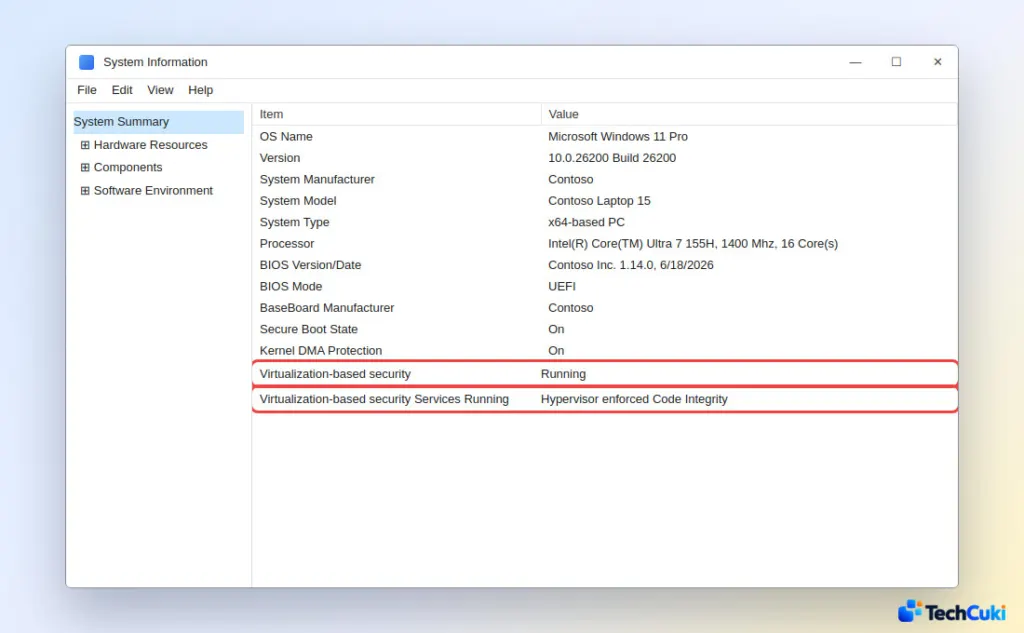
Look for Virtualization-based security set to Running, and Virtualization-based security Services Running listing Hypervisor enforced Code Integrity.
4. Should You Keep Memory Integrity On?
For most people, yes. It checks kernel-mode code inside an isolated environment, so malicious code has a harder time slipping in through drivers. The cost is compatibility, because older drivers and some anti-cheat or legacy hardware software may not work with it on.
Performance depends on the CPU. Intel Kaby Lake and newer, and AMD Zen 2 and newer, have hardware support. Older processors use an emulation called Restricted User Mode, which has a bigger performance impact.
If a device or app starts failing afterward, update that driver in Device Manager. If Windows won’t start, boot into the Windows Recovery Environment, and set the memory integrity registry value to off there:
reg add "HKLM\SYSTEM\CurrentControlSet\Control\DeviceGuard\Scenarios\HypervisorEnforcedCodeIntegrity" /v "Enabled" /t REG_DWORD /d 0 /f
Restart afterward. If a policy such as Group Policy forced it on, switch that policy off first, and if it was turned on with a UEFI lock, you also have to disable Secure Boot before the registry change sticks.
If none of this clears the blocker, check the PC maker’s support page for a BIOS or driver update for your exact model, since some blockers can only be fixed by the manufacturer.
This protection is worth having when the PC allows it, and the effort is small compared with the security it adds. Changes like this can be undone, and creating a restore point first is a sensible precaution. If the PC will not cooperate, the maker’s support can advise on compatible drivers.


