A grey box that says the signature is invalid, with nothing but an OK button, is a scary thing to see when you only wanted to turn your laptop on. It usually comes down to a mismatch between the boot files Windows is trying to use and what the firmware is willing to trust. The steps below cover what is behind an MSI Secure Boot violation and how to get the laptop starting Windows again.
Table of Contents
Before you start
- Changing Secure Boot can trigger a BitLocker recovery prompt, so get your recovery key from another device first (see how to find your BitLocker recovery key). Match the key ID shown on the screen.
- On a work or school laptop, stop here and contact your IT department instead.
What the MSI Secure Boot Violation Error Means
The error means the firmware rejected a boot file because its signature isn’t trusted, so the laptop won’t load Windows.
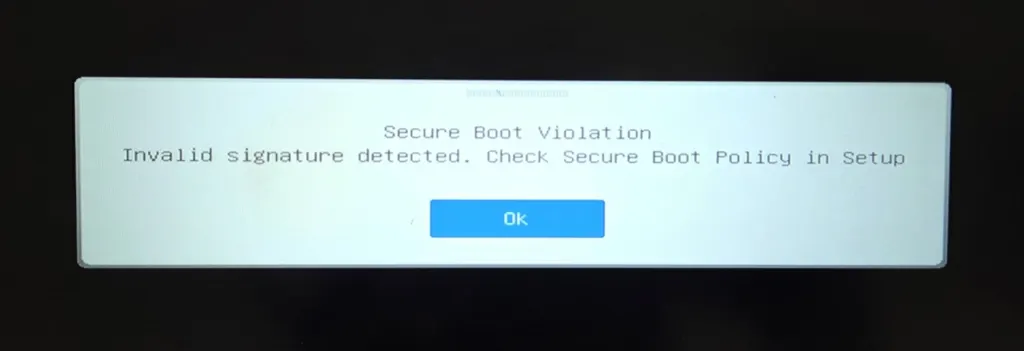
Secure Boot only runs boot files signed by certificates stored in the firmware. Microsoft’s original 2011 Secure Boot certificates began expiring in 2026, and Windows updates are moving to boot files signed with Microsoft’s 2023 certificate. If your laptop’s firmware doesn’t have the 2023 certificate yet, it rejects the newer boot files and shows this message. People have reported it on many MSI models, including the Thin GF63, Katana, Cyborg, Modern 14 and Stealth 15M, usually right after a Windows update.
Other triggers exist too: booting an unsigned USB drive or a Linux installer, or Secure Boot keys that were changed or wiped during a BIOS update. MSI published a troubleshooting FAQ and a recovery tool for all of its notebooks, updated in October 2026, and the fix below uses that tool.
Turn Secure Boot Off Temporarily
If you have another PC, you can build the recovery USB there and skip this section. Otherwise, switching Secure Boot off is how you get the laptop into the BIOS and back to a working state.
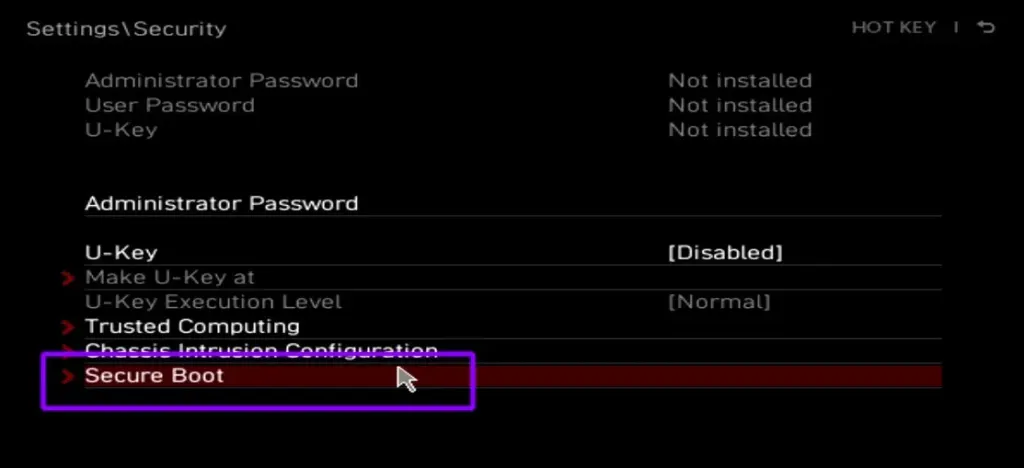
- Restart the laptop and press
Deleterepeatedly at the MSI logo to enter the BIOS. On some models,F7switches to Advanced Mode. - Go to Security and open Secure Boot.
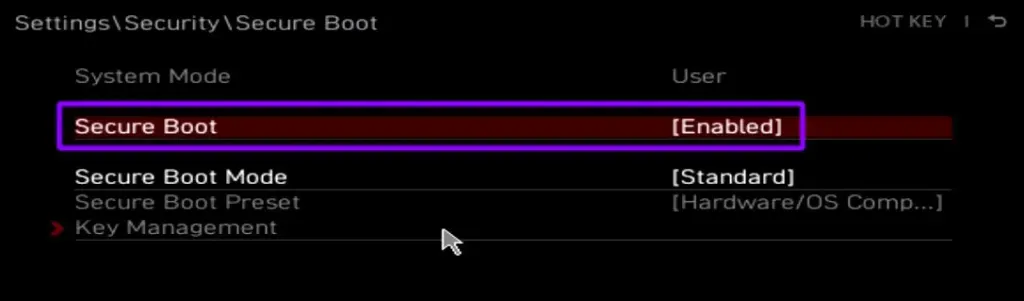
- Set Secure Boot to Disabled.
- Press
F10to save and restart.
The screens above come from an MSI desktop board with the Click BIOS, where the path is Settings > Security > Secure Boot. Laptop menus look simpler and differ by model and BIOS version. If the option is greyed out, read our guide on Secure Boot greyed out in BIOS. On some MSI laptops, a boot-entry change has to be saved first before the Secure Boot option becomes selectable.
Make the MSI Recovery USB
You need an empty USB flash drive formatted as FAT32, which is the format MSI recommends (NTFS is also listed).
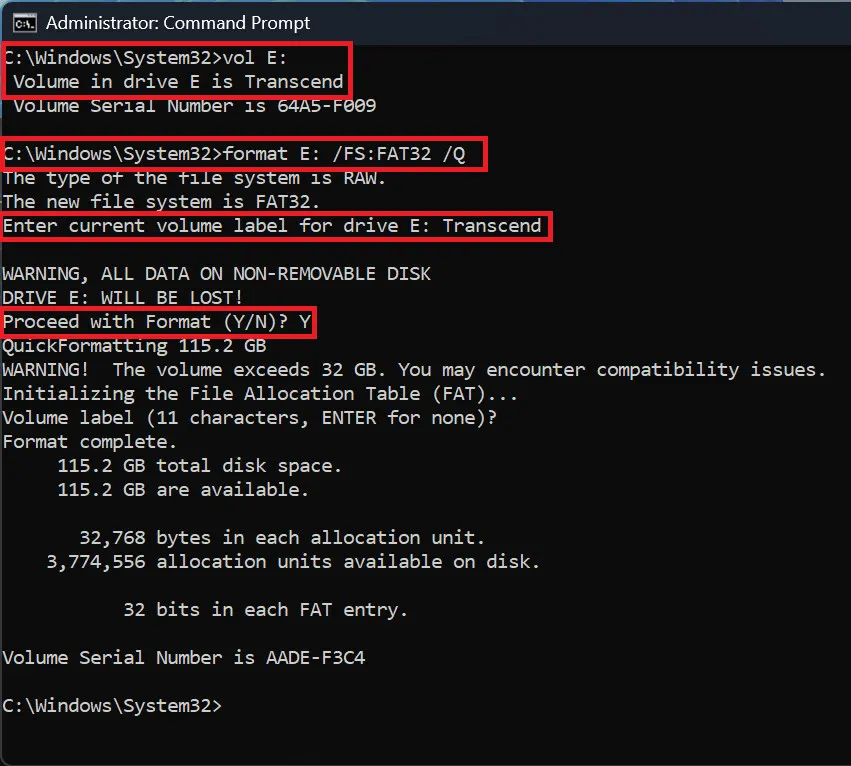
- Plug in the USB drive. If it is larger than 32 GB, the Windows format dialog won’t offer FAT32, so open Command Prompt as administrator and run
format E: /FS:FAT32 /Q. ReplaceE:with your USB drive letter and double-check it, because this erases the drive.
- Download the recovery tool from MSI’s FAQ page at msi.com/faq/faq-11370 and extract the ZIP.
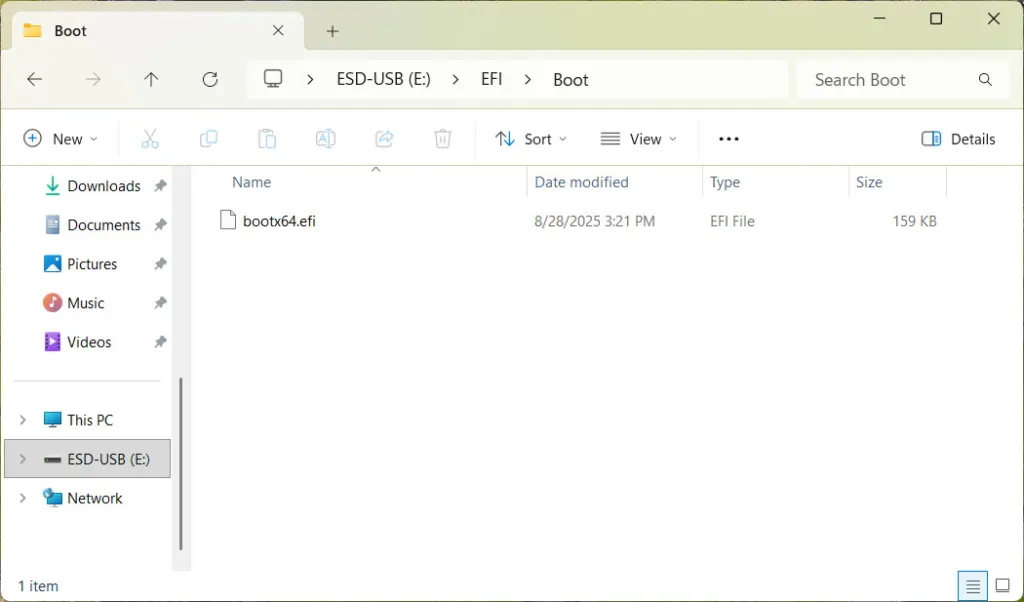
- Copy the whole EFI folder to the root of the USB drive, not inside another folder. You should see EFI > Boot > bootx64.efi on the drive.
Boot the USB to Fix the Secure Boot Violation
The tool runs on its own once the laptop boots from the USB drive.
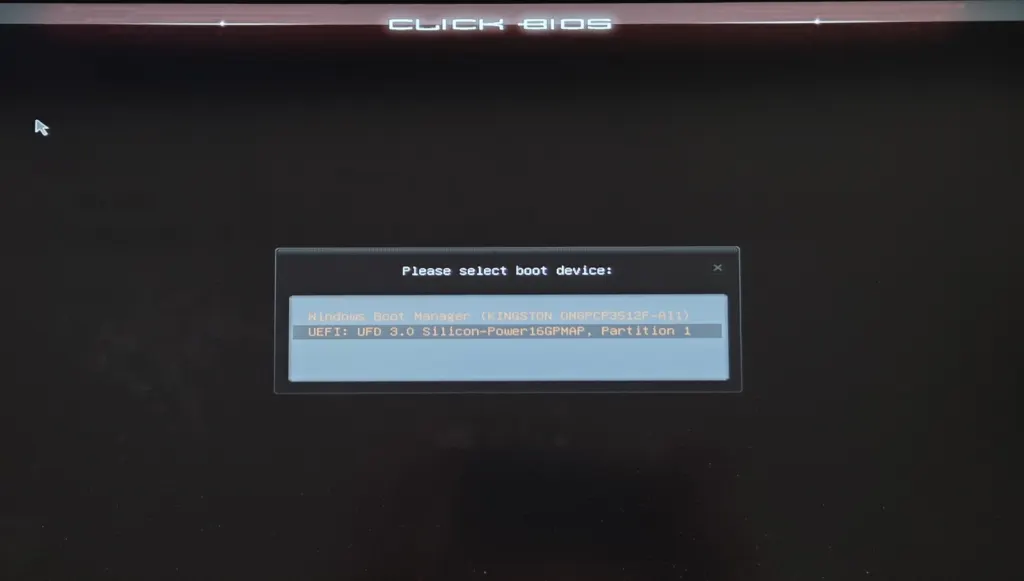
- Plug the USB drive into the MSI laptop and restart it.
- Press
F11at the MSI logo to open the boot device menu. - Choose the USB entry that starts with UEFI:.
- Let the tool run. It checks the Secure Boot certificate configuration and restarts the laptop when it finishes.
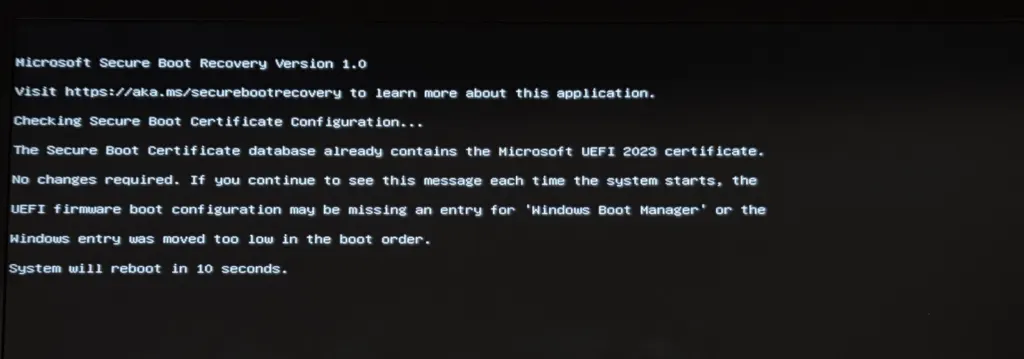
If the output says the database already contains the Microsoft UEFI 2023 certificate, the certificate isn’t your problem. A missing or low Windows Boot Manager entry in the boot order is the more likely cause, and the next section covers it.
Turn Secure Boot Back On
Once the tool has finished, switch the protection back on so Windows 11 stays supported.
- Restart and press
Deleteto enter the BIOS again. - Go to Security > Secure Boot and set it to Enabled.
- Make sure Windows Boot Manager is first in the boot order.
- Press
F10to save and exit.
Windows should start now. Enter the BitLocker key if it asks. For more on the setting itself, see how to enable Secure Boot in Windows 11.
If the USB Doesn’t Show Up or the Error Stays
Most USB problems come down to the drive format or where the files sit.
- Check that the drive is FAT32, not exFAT, and that the files are at the root rather than inside an extra folder.
- Try a different USB port on the laptop itself, not a hub, or use a smaller drive.
- If the firmware rejects the tool, make sure Secure Boot is still off while you run it.
If the error keeps coming back, check MSI support for a BIOS update for your exact model, then contact MSI support. Don’t switch to Legacy or CSM mode as a workaround, since Windows 11 expects UEFI with Secure Boot. Our general guide to the Windows 11 Secure Boot violation covers the error beyond MSI, and the ASUS version is in our ASUS Secure Boot violation guide. If you need a refresher on reaching the firmware screen, see how to get into the BIOS on Windows 11.
A boot error like this looks worse than it is, and the laptop and your files are almost always fine. The change is reversible, so you can always go back into the BIOS and adjust it again if something looks off.