
A blue warning box at startup that blocks your laptop or desktop from loading Windows can be alarming. An ASUS Secure Boot violation usually comes down to a recent change on the PC rather than a fault in the hardware. The sections below cover the likely causes in order, with steps for ASUS laptops and desktop boards.
Table of Contents
Why You Get an ASUS Secure Boot Violation
The message reads “Secure Boot Violation – Invalid signature detected. Check Secure Boot Policy in Setup,” with an OK button.
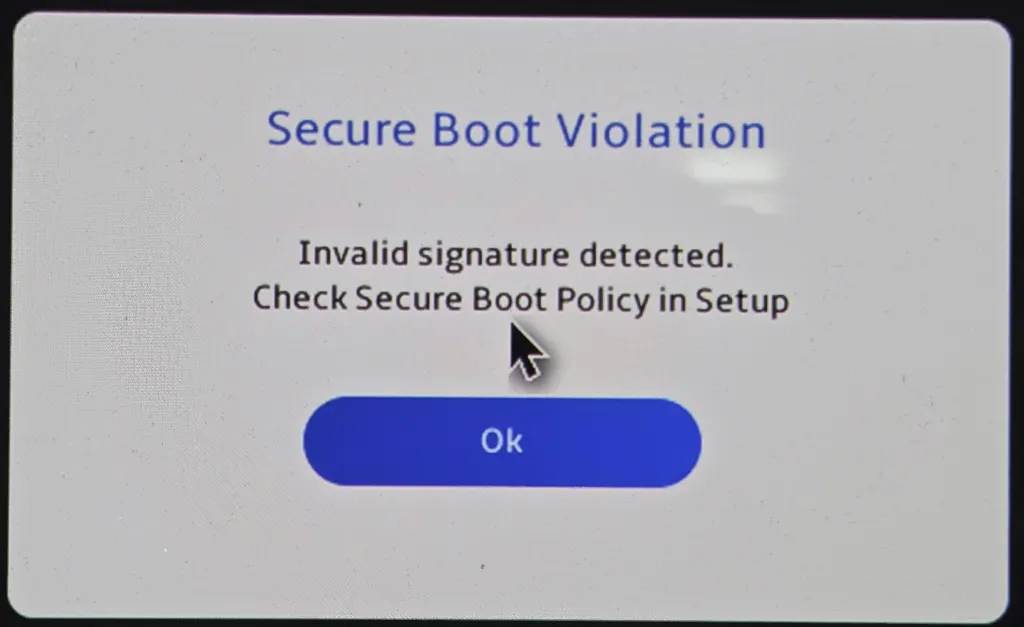
ASUS notebooks ship with Microsoft Secure Boot on, so any loader that fails the signature check triggers the box. The sections below go from the quickest fix to the most involved. For Startup Repair and EFI rebuild steps that apply to every brand, see our general guide to the Windows 11 Secure Boot violation.
Get Into the ASUS BIOS
On an ASUS laptop, power the PC off, hold F2, press the power button, and release F2 when the BIOS appears. The boot menu is Esc held while you press power. On ASUS desktop boards, tap Del (or F2) right after power-on. If Windows still starts, our guide to getting to the BIOS in Windows 11 has the software route.
Changing Secure Boot settings can trigger the BitLocker recovery screen, so have the key ready. Our guide to finding your BitLocker recovery key shows where it lives.
1. Unplug USB Drives First
Remove every USB stick and external disk, then restart. A bootable stick with an unsigned loader is a common trigger, and the PC may start normally without it.
2. Check the OS Type Setting
Desktop boards and some ROG and TUF laptops expose this in Advanced Mode (F7) under Boot > Secure Boot > OS Type.
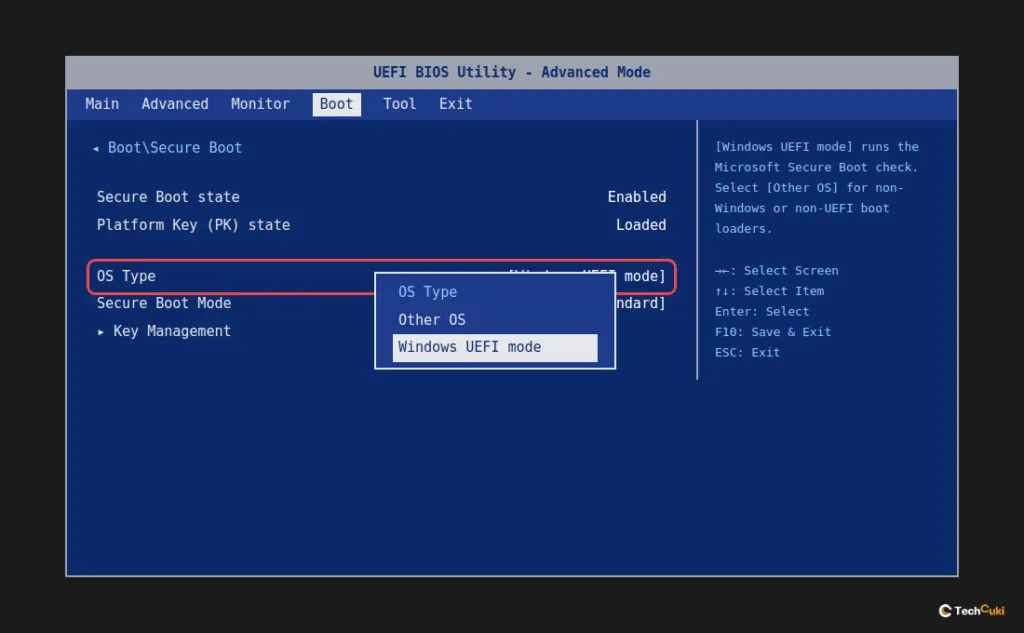
Pick Windows UEFI mode if Windows is installed, because that runs the Microsoft signature check against the right keys. Other OS is meant for non-Windows or non-UEFI loaders and effectively stops the Microsoft check, so use it only for Linux.
3. Run ASUS’s Secure Boot Recovery USB
This is the official ASUS laptop procedure, and it repairs the Secure Boot certificate configuration. You need a FAT32 USB drive and a working copy of Windows.
- Open the BIOS, go to Security > Secure Boot Control, set it to Disabled, and press
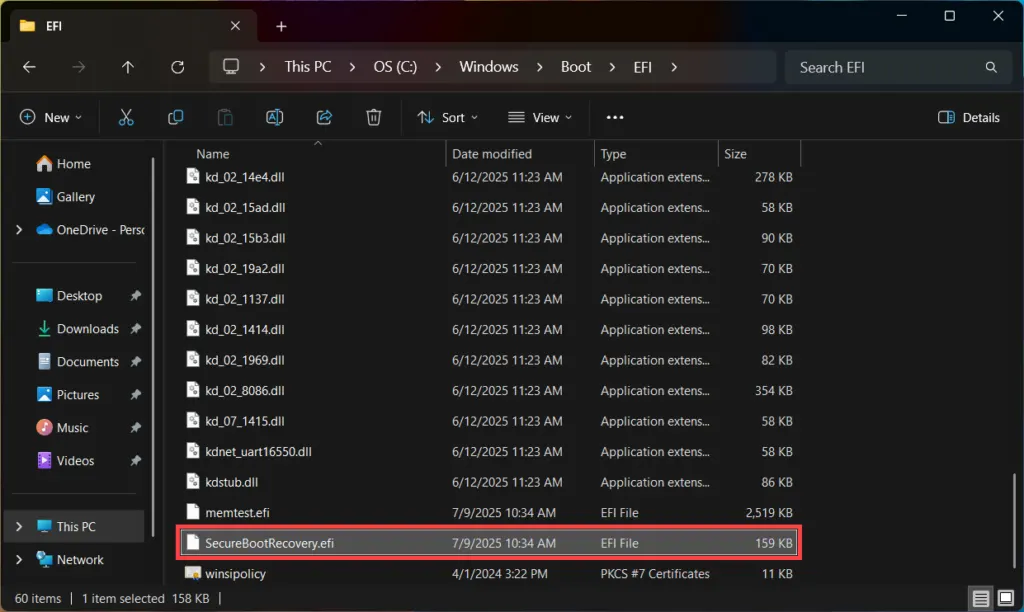
F10to save. - Boot into Windows and open
C:\Windows\Boot\EFI. Look forSecureBootRecovery.efi. If it is missing, skip this fix.
- On the FAT32 USB drive, create a folder named
EFI, and inside it a folder namedBOOT. - Copy
SecureBootRecovery.efiinto theBOOTfolder and rename itbootx64.efi. - Restart, open the boot menu with
Esc, and boot from the USB drive.
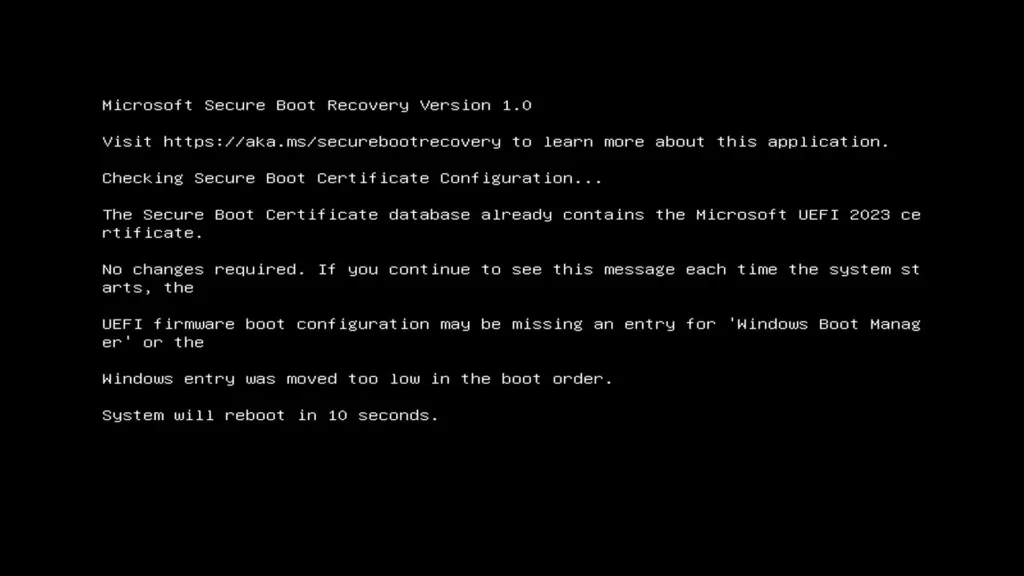
A text screen titled “Microsoft Secure Boot Recovery Version 1.0” checks the certificate configuration, then says the system will reboot in 10 seconds. The PC restarts itself.
- Back in Windows, open the BIOS again and set Secure Boot Control back to enabled. Our guide to enabling Secure Boot in Windows 11 covers that step.
4. Restore the Factory Secure Boot Keys
If the key databases are corrupted, restoring the defaults replaces them with ASUS’s factory set.
- Enter the BIOS in Advanced Mode and go to Security on laptops, or Boot > Secure Boot > Key Management on desktops.
- Choose Restore Factory Keys or Install default Secure Boot keys. On some Aptio laptops, instead pick Update > Factory defaults for each of Platform Key, Key Exchange Keys and Authorized Signatures.
- Select Yes at the confirmation and press
F10to save and exit.
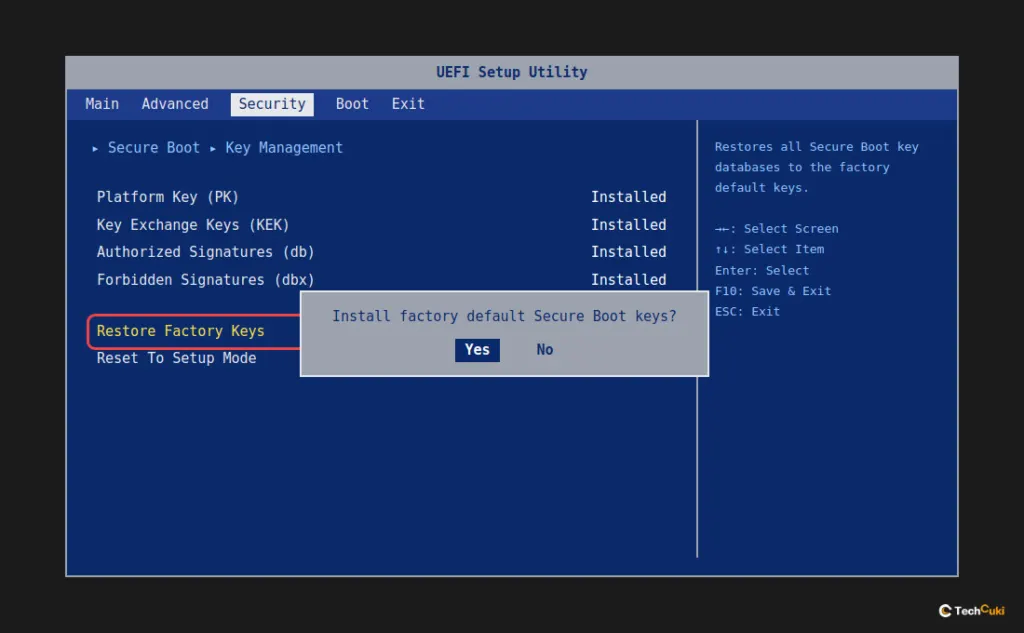
Desktop boards also offer Clear Secure Boot keys. Avoid it, since it puts the board in Setup Mode and effectively turns Secure Boot off.
5. Make Sure Windows Boots in UEFI Mode
Secure Boot needs a GPT disk and UEFI booting with CSM disabled. A legacy-mode install or an MBR disk makes the check fail or stay greyed out. Our guide on Secure Boot that can only be enabled in User Mode explains how to confirm both.
6. Update the ASUS BIOS
Newer firmware fixes key and signature handling bugs. On laptops, update through the MyASUS app, or download the file from the ASUS support site and run it from Advanced > ASUS EZ Flash Utility. Desktop boards use EZ Flash 3 or BIOS FlashBack. Suspend BitLocker before flashing so the update does not trigger the recovery screen.
If the ASUS Secure Boot Violation Won’t Go Away
Turning Secure Boot off lets you get into Windows, and Windows 11 still runs, but some anti-cheat games and security features need it, so turn it back on once the cause is fixed. If the box returns after the key restore, the recovery USB and a BIOS update, the motherboard’s NVRAM or firmware may be faulty, and ASUS Product Support or a service center is the realistic next step.
Most of these checks are quick and leave your files untouched. Note each change as you make it so you can reverse it, and contact ASUS support if the warning still appears after you have worked through the options.


